Last updated October 13, 2024. By Andrew M. Tan.
Are you trying to paint models for a diorama, a tabletop wargame? Military tank miniatures from wargames like Bolt Action, Flames of War, or even Warhammer 40K can be fun but challenging to paint well. For the scale modelers who aren’t sure where to start with the process, tanks are one of the best places to learn the basics of painting and weathering models.
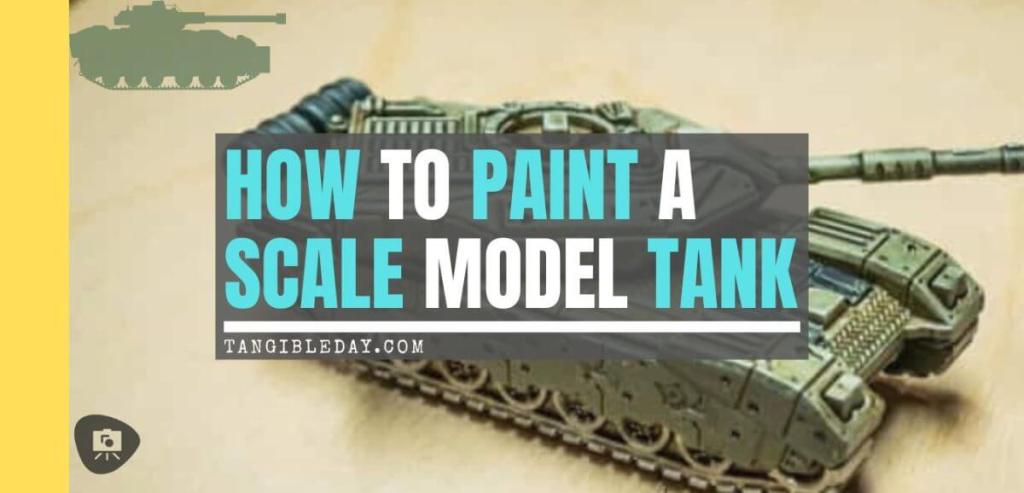
In this article, I’ll show you a quick and easy way to get your model tanks painted using just a few simple supplies.
Supples You’ll Need:
- Your model
- Acrylic hobby paints
- Oil paints or weathering medium
- Primer
- Brush
- Airbrush (optional)
For more essential supplies for painting miniatures and models, check out this guide.
Model Tank Painting Techniques
Almost all scale model painting approaches use the same process. The most common way to achieve the best results is by using an airbrush. Airbrushing provides modelers with a consistent paint job, excellent coverage, and fewer visible brushstrokes.

If you’re interested, check out my recommended gravity-fed airbrushes for painting scale models and miniatures (or this complete airbrushing guide).

If you don’t have access to an airbrush or if you’re new to painting models, don’t worry. You can still get great results by hand painting your model tank. For example, you can paint almost 90% of any miniature (except for the really large models) with a single pointed round brush and a reliable dry brush.
What about the best kind of paint for scale miniatures?
Nowadays, the most recommended kind of paint are acrylic hobby paints. Enamel paints in the “old days” were popular but have since been replaced by acrylic paints.

The main advantages of acrylic model paints are that they:
- Are water-based, so they’re easy to clean up and thin with water
- Dry quickly
- Aren’t poisonous
- Work great in airbrushes
- Tractable for many usefu blending techniques, e.g., dry brushing
- And more!
For any scale model, you’ll want to use an acrylic paint designed for plastic model kits. Yes, you’ll want to prime your surface first, but plastic doesn’t absorb water–some materials may influence how paint layers dry and film over, which could be an issue with paint adhesion.
You might be wondering, “Can I use normal house paint, or craft paint?”

No, don’t do that! Paints designed for model kits have the pigments (color) and binders (adhesion) that work best on plastics at at finer scale which preserves texture and detail.
You could technically use other kinds of paint but you would be compromising the results (trust me, I’ve tried; though one of these days I’ll show you, subscribe💡👆👆👆).
Oil Filters or Acrylic Washes?
Somewhere along the process (see below), you’ll likely want to try using oil paints or washes to enhance the contrast, or modulate the color tones on your painted model.
I personally prefer oil washes because I like the subtlety and control that they provide. However, if you’re new to model painting, I recommend staying away from oil filters altogether. They can be challenging to work with and easy to mess up.


(For reference, however, I use oils to show you the easy effects you can achieve with them).
Acrylic washes are much easier to work with for new painters and provide modelers with a similar effect. You can find washes pre-made or you can mix your own by thinning down acrylic model paints.
8 Steps for How to Paint a Model Tank
- Start with a Primer Coat
- Base Coat with Your Main Color
- Add Accent Colors and Details
- Paint a Camouflage Pattern (Optional)
- Apply a Dark Brown Wash
- Restore and Enhance Color with a Dry Brush (Optional)
- Clear Coat the Painted Model
- Take Photographs

1. Start with a Primer Coat
The first step for painting model tanks is to apply a primer. A primer provides a consistent surface for the paint to adhere to and also helps prevent modelers from having to use too much paint (and wasting paint).


For this tank (a toy representative), I use an airbrush to spray my surface primer. You can use a brush-on primer (here’s how), but it will take longer and requires a bit more patience to achieve smooth, thin coats.

Make sure you cover the entire model’s surface, including the underside of the vehicle.


While optional, a zenithal highlight with a brighter primer (over a dark color) can help you paint with a higher contrast.


Zenithal highlighting or priming is a technique that helps you simulate the lighting effect of an imaginary light source shining directly from above your model.


The idea is to light the whole surface of the model “fake” lighting to show you where shades and lights should go on your project.

In either case, this base layer (1-2 coats of primer) will provide a good foundation for the other paint layers you apply.
2. Base Coat with Your Main Color
The next step is to paint your main color. This is the color that covers most of your tank. In this case, I use a dark green military color. Obviously, the color choice is up to you.

Now, there are several ways you can apply color. Here, as you noticed above, I used a zenithal highlight undercoat.


So, to keep my contrast high (a key part of achieving that “3D pop effect” in miniature painting), I wanted to use a translucent glaze. A glaze is a thinned-down paint that allows some of the underlying color to show through.


First, I mix up my glaze by adding a little bit of water to my paint. Then, I apply it evenly over the model. I use a soft (cheap) kolinsky sable brush to help with this.

You can see the effect of this glaze in the photo below. The model is still wet, but you can already see the underlying zenithal highlight coming through.

The recesses darken a bit more than the raised textures on the model. Edges stay brighter, and naturally create “shape and form” around major elements of the vehicle.
Quick overview of a non-translucent base coat:
If you didn’t use the zenithal highlight undercoat, then your job may actually be easier. You’ll use the standard basecoat layer, followed by your accents and detail steps.
To base coat your colors without zenithal priming or highlighting, apply 1-2 thin coats of paint (not a glaze), allowing each coat to dry before applying the next.
This paint should be more opaque and the consistency of melted ice cream. Two coats of paint should essentially cover the underlying primer.

If you’re using an airbrush, hold the model at different angles so that you don’t miss any nooks and crannies.

While I don’t think you need to use masking tape at this point, a way to cover parts of your model that you don’t want to spray with your airbrush could come in helpful later.
Overall, the idea is to ensure that you’ve covered the entire surface with a layer of your base coat color evenly, without streaks.
3. Add Accent Colors and Details
Every vehicle, scale model will have different elements and parts to it. This means your model will likely require different colors to achieve the end result you’re looking for.


Some modelers like to add all the colors at once (base coat, glazes, and highlights), while others prefer to work on one area at a time. It’s really up to you and what works best for your process.
The placement of these colors is key to bringing your vehicle to life. Adding too many or painting in the wrong places can make your model look overdone or “busy.”


For this project, I paint the tank wheels and tracks with a metallic steel paint. I’m keeping it simple! There are more options you can work with on things like this, such as using a mixture of metallic paint and inks, to give your treads less of sheen; a method that gives your model more of that gritty vibe (check out the Grimdark motif).
Remember to paint other parts of your scale model tank (or whatever your piece) with the same technique. The key to use a small amount of paint wherever necessary, but not to overdo it.

If your model has a base or a stand, then you may want to consider adding flock, like grass or sand, to give your piece a sense of place.
Adding a subtle dust effect on the tank tracks and bottom armor plates can go a long way toward adding realism. You can use dry pigment or simply oil or enamel streaking media (more about this below).
I’ll note that a diorama, for example, doesn’t need to be elaborate set piece.

I’ve seen some amazing work with a simple mixture of sand, glue, and a few small details, like broken tree branches; or rusted over bits of broken building and construction material strewn about in an urban scene.
When you’re done, I suggest you consider painting exposed edges of your base or stand with a matt black paint. While I don’t show it here (I have other examples of this technique in my painting galleries). What this does is it “pushes” these areas into the background so your viewer is less distracted when they see your completed work.
Read on below to see how to complete this scale model paint job!
4. Paint a Camouflage Pattern (Optional)
This is an optional step. With some military scale miniatures, you’ll find some have camouflage, while others don’t. Even the patterns themselves differ.

In this case, I refer you to one of the simplest ways to paint stripped camo. You can create the same effect with commercial airbrush mini-stencils or stencils you make yourself.

You could also use wet slide decals to add patterns, logos, and other details to your model.
To keep things simple for this tutorial, I won’t go into too much detail about painting things to add weathering or battle damage to your model. There are so many ways to approach this.

Effects like scratches, bullet holes, and chipped paint exposing bare metal can be painted by hand. In fact, I find that you’ll want to do this with a free handing style, e.g., no decals, stencils, etc., for best results that look convincing.

There’s something about the hand painted character that a freehand style adds to scale models that I’m attracted to. Perhaps it’s the imperfections and randomness that make it more believable.
5. Apply a Dark Brown Wash
This is my favorite step! For scale models, I love using washes. Washes are nothing more than thinned paint, usually a dark color like black or brown.


You can use an acrylic wash or shade (which I mentioned above) or an oil wash you make from oil-based paint.
For this project, I show you how to apply a wash from oil paint because I think it works better. The consistency is just right for getting into all the nooks and crannies, and it doesn’t require any extensive clean up you may have to do with an acrylic wash.

You can read more about using oil paints with miniatures and models in this article.
To start with an oil wash, take your oil paint and thin it with an appropriate solvent. I strongly suggest an odorless mineral spirit, which is what I use.
For a wash, starting with a 1:2 paint to thinner ratio is good. The idea is to thin the paint pigment so it bleeds into the recess of a model without sticking to raised surfaces.

You may have to experiment with your particular paint brand and style of painting. The great thing about oil washes is that they dry very slowly.
You can simply take a clean cosmetic sponge, paper tissue, or cotton tipped applicator to remove excess oil paint wash color from your model’s surface.
In fact, when you’re done applying the oil wash to the model, this is exactly what you do!
Apply the wash over the entire model. Allow the pigment to fill panel lines, running along the edge of other elements on your model.


Once you’re satisfied, allow the solvent in the oil wash to evaporate a bit. This means allowing your model to sit in a safe place to dry for 15-45 minutes.
When the solvent evaporates, the “wet” look of the wash will have diminished. At this point, you can take a clean cotton swab, paper towel, or cosmetic sponge and gently dab or rub the surface of your model.


Do this carefully, as you don’t want to lift underlying paint or remove oil pigments that settled in crevices or recesses. Go slowly. This will remove any excess oil paint wash pigment from areas you don’t want it.

Some painters suggest varnishing or clear coating before applying an oil wash to protect underlying paint layers. I find this is useful if you want a “clean” paint job.
But for a more realistic appearance, that gritty military scale model look, I find that a gloss coat varnish makes this harder and ends up being more work.

Just be gentle with your oil wash steps, allowing the mineral spirit to dry before the clean up step, e.g., cosmetic sponge dabbing cleanup process.
When you’re done, I suggest allowing your oil washed model to dry overnight. This allows the oil paint/wash to set and makes the following steps easier to handle. It also protects you from some accidentally rubbing off paint when you don’t want to.
If you used an acrylic wash, you can move immediately once the color dries.
6. Restore and Enhance Color with a Dry Brush (Optional)
Once you’re done with wash step, you could push your contrast higher with a simple dry brush.
I don’t think this is necessary if you used an oil wash, since you were able to clean up any excess oil color from raised surfaces.

But some may find it helpful if they are looking to bring back some of that color vibrancy that you certainly lose when applying an acrylic wash.
To bring back your base colors after an acrylic wash or shade, the dry brush technique is very effective.
Start with a dry, clean brush. I use a soft sable model paint brush for this step. Dip your brush into the model paint you want to use for dry brushing.


Then wipe off almost all the paint from your brush on a paper towel until the pigment is barely visible on your brush. You want a very light layer of paint pigment on your brush for this step.
Test the pigment load on your brush by dry brushing it across a piece of paper. The goal is to have just enough pigment to cover the raised surfaces of your model without depositing too much color.
If you see hardly any color being left behind on the paper, then you have too little pigment on your brush. If the color is too thick, then you need to remove more paint from your brush.

Once you have the perfect amount of pigment on your brush, start dry brushing in a small area of your model. Again, go slowly and carefully. The goal is to cover the raised details of your model without leaving a heavy layer of color anywhere.

You can build up the effect by doing multiple light layers of dry brushing if needed. The lightly applied layers should blend together slowly. It’s easy to go overboard with this technique, so it’s best to start light and build up the effect as needed.
7. Clear Coat the Painted Model
Once you’re happy with the paint job on your model, you should apply a clear coat varnish to protect your work.
A clear coat varnish will protect your paint job from scratches, finger prints, and other damage. It also makes the model easier to clean if it gets dusty.

I highly recommend a matte varnish for several reasons, and use Testors Dullcote for almost all my paint projects.

The main reason is that it provides a nice even finish that doesn’t reflect light the way a glossy varnish does. A matte finish also makes it easier to see the model’s details, since there is no glare from a gloss finish.
8. Take Photographs
Obviously, I’ve shown you some photos of this work (and other stuff). When you’re done with your project, share it!
Of course, photography isn’t just for other people to see what you’ve done. It can help you become a better painter, too.

Photography can help you see your model from different angles and in different lighting conditions. This can help you identify areas that need more work or details that you missed.

For example, when I took photos of my model, I noticed that the tracks needed some highlights. So I went back and added some silver paint to make them stand out more.
And that’s it! You now know the basics of how to paint model tanks. Just remember to take your time, be patient, and have fun!
What Makes a Scale Model More Realistic?
Real life has a habit of breaking things down. It’s called “entropy”. Entropy is a natural law of the physical universe, where “ordered things” will tend toward their random, chaotic state.
Without external input to hold and put things together in a certain form or pattern, everything will fall apart.
The same is true for all the real life objects we model at the miniature scale. For a scale model to appear more realistic, we have to imagine what that physical object must endure through the trials and tribulations of its existence.

For military scale models, it’s pretty obvious. War, combat, will naturally deteriorate and degrade the armored surfaces, the moving mechanical parts.

Oxygen, humidity, and the extremes of weather will lead to metal corrosion, e.g., rust, chipped paint, and even dirt and grime build up in the panels and exhaust vents. Overheated gun barrels will shine or carbonize, depending on the chemical make up of the metal alloy.

When it comes to making a scale model appear like its real life prototype, you’ll need to gather your entire imagination.
Then, at the painting stage you’ll want to take the collection of art media you own and see if you can reproduce that vision of your scale model. Sometimes, it’s easy. You can envision a tank that came out of battle in a muddy forest environment.

Other times, it’s impossible to really know what your particular model is supposed to look like. An airplane, for example, may not be as simple to weather. These kinds of vehicles are often cared for, since even the slightest damage to their surface could affect how they fly and fight.

Tips for Painting Realistic Scale Models
Use reference images
This is the most important step you can take to painting a model that looks realistic. You need to find good quality photos of real objects for reference.
For example, you want to paint battle damage on a tank or building. How do you do that? You need to find good photos that show you what battle damage looks like. It doesn’t even have to be a real bullet hole or paint chipped military vehicle.
Find photos of worn out machinery, a used construction vehicle, or even a rusted out car. These photos will give you ideas for how to weather your model.
Use realistic colors with accents
This can be tricky, because you want your model to look realistic, but also pop out against its surroundings.
Again, take liberties with reference photos. A real military vehicle or other combat scale miniature will have colors that intentionally make it less visible… so they don’t get shot at easily.
Well, this works against you, the hobbyist who wants to make it the center of attention. So, maybe you use the realistic colors, but then you add bright colorful accents here and there. Not too much.
But, enough to point the viewers attention in the right direction. Add a small flag decal, or a bright spot of blood splatter… use your imagination to make something in the model stand out.
Realism in scale model work is a paradox. You want to be natural, subtle, but show off at the same time.
Apply weathering techniques
As above, this is where good reference photos come in handy. You need to find examples of what you want to achieve, and then study how it was done.

This could be as simple as a model that’s been weathered with just a few drops of dark paint streaked across the surface. Maybe some light rust was added here and there, or a wash to make the model look grimy.
You can get as complicated as you want, and there are many excellent weathering products available on the market. But, it all starts with good reference photos and some imagination.
Maintain high contrast
This is important, because if your model doesn’t have good contrast then it will be difficult to see the details. You want the viewer to be able to see all the work you’ve put into making your model look realistic.
That means choosing colors that have a high contrast with each other. For example, a dark color on a light background, or a light color on a dark background.
You can also use different shades of the same color to create contrast. This is called tonal contrast, and it can be very effective in making your model look more realistic.
Remember, realism in scale model work is also all about the details. By maintaining high contrast, you’re ensuring that those details are visible and appreciated.
Use light and shadow to your advantage
Light and shadow is one of the most important aspects of realism in scale model work. By using light and shadow, you can create a sense of depth and dimension in your model.

This is especially important when painting buildings or other structures. By using light and shadow, you can make a building look like it’s three dimensional, instead of just a flat surface.

You can also use light and shadow to highlight details on your model. This is especially effective when painting military vehicles, as you can use light and shadow to create the illusion of camouflage.
Finally, don’t forget that light and shadow can also be used to create a mood. A model that’s lit from below will look different than one that’s lit from above.
You can use light and shadow to create a sense of drama or suspense, or to make your model look peaceful and serene. It all depends on how you use it.
Clear coat with a matte varnish
Once you’re happy with the way your model looks, it’s time to give it a clear coat. This will protect your paint job and keep it looking good for years to come.
There are many different types of clear coat, but I recommend using a matte varnish. (I’m emphasizing this again here for a reason!)
A matte finish is generally more realistic, as most real-world objects don’t have a high gloss finish. By using a matte varnish, you’re ensuring that your model looks as realistic as possible.
There’s one more benefit to using a matte varnish: it’s easier to apply. A gloss finish requires a perfectly smooth surface, but a matte finish can be more forgiving.
That means you don’t have to be as careful when applying the varnish, and you’re less likely to make mistakes. Just make sure you’re spraying your matte varnish in the proper ambient conditions!
Recreate the surrounding environment in photography
If you have the opportunity to do so, and you likely do, take some photos of the model in its environment. This could be as simple as setting up your model tank on a table, and taking a few pictures from different angles.

You can also get more creative, and set up an entire scene around your model. This could include other models, figures, trees, buildings, etc.

The important thing is to try and recreate the environment in which the model would actually be used. This will help you take more realistic photos, and it’s also a lot of fun.

One final tip: if you’re going to take photos of your model in an outdoor setting, make sure the sun is not directly shining on the model. The harsh light will wash out the colors and make it difficult to get a good photo.

Conclusion
Well, there you have it! How to paint a scale model tank. Just remember to have fun, and experiment with different techniques. There’s no right or wrong way to do it, so go ahead and try something new.
I love putting these write ups together. If you enjoyed this article, please let me know in the comments below. I’ll be sure to write more like it in the future.
Happy painting and modeling!
Enjoying Your Visit? Join Tangible Day
Free newsletter with monthly updates (no spam)


Tangible Day on YouTube (Miniatures and More!)

By Andrew M. Tan, PhD
Andrew is a commissioned miniature painter with more than 15 years of experience painting tabletop miniatures, photographing models, and testing hobby tools in real-world use. Read his full bio.
Pingback: How to Paint Model Tanks (8 Basic Steps) - Toy Newz