Are you wondering about the possibility of 3D printing your own miniatures? There are free 3D files for almost anything now. Even your favorite wargame miniatures are coming to an open source database near you. Out of simple curiosity, I did an online search for free 3D printable files for Warhammer 40k and Forgeworld models. I discovered a plethora of Warhammer-inspired work from the 3D modeling community. All of them are downloadable, and can be 3D printed without much post-processing work. Easy!
If you play Warhammer 40k or 30k, or simply love the exotic looks of Forgeworld models, you’ll recognize that the popularity of wargaming miniatures is their COOL factor. Assembling models, creating a unique feel through kit-bashing and scratch-building, and ultimately painting these miniatures is an awesome hobby.
In this article, I show you how I went from a free downloadable 3D file of a Forgeworld inspired model (Spartan Assault Tank) to a finished piece.

RELATED:IS 3D PRINTING GAME MODELS PIRACY OR NOT?
Step 1 – Download 3D File
To 3D print anything, you need a 3D printable file of the model. These 3D printable files are listed as either “*.OBJ” or “*.STL” formats.
The model I printed was from a 3D printable file that I found on Thingiverse.com. Thingiverse is an open-source database that people can upload 3D printable files to, or download from. You can find other cool Warhammer inspired tanks and vehicles here, too!
There are TON of Warhammer models on Thingiverse. You just have to look. And, if you were wondering, the only way that these 3D printable files of look-a-like models are there is that someone uploaded them.
These individuals either got the 3D renders from someone else, or modeled the pieces using software themselves. In either case, some of the work that you can see there is incredibly well-done.
To read more about the legality or ethics of 3D printing game models, check out this article.
Step 2 – Print 3D Model
The model I printed was a re-rendered 3D model of the Forgeworld Spartan Assault tank. If you look closely, the model is missing a ton of details, but I try to add later with kit-based pieces from real sprues.
I used the free, open-sourced software “CURA” to slice the model into layers for the 3D printer.
There are a lot of resources online about how to operate 3D printing software and hardware. So, for the sake of brevity, I won’t go into that here. But, you can check out this site for more info on the process.
The 3D printer I used is an Ultimaker 2+, which I purchased several years ago. Nowadays, there are a lot more economical 3D printers.

For the well-versed 3D printing enthusiasts, you’ll probably want to know what software slicer settings I used.
In a nutshell, I used standard PLA plastic filament with a 0.4mm standard nozzle. I set the layer height at 0.1mm with a 20% infill to provide a better quality (versus speed) to the 3D print.
To ensure all the parts would come out reliably and consistent, I printed the tank in sub-assemblies, one part at a time. If you have a printer with a smaller print bed, you’ll have to cut-up your tank model with other software to make it all fit.

Meshmixer (by Autodesk) is a well-respected pieces of software (free) that you can use to modify 3D printable files for such purposes as shrinking or cutting-up models.
Step 3 – Assemble the 3D Printed Model
After many hours (more than 20), when the parts all printed, I have to figure out how to assemble the model. This is where the engineer in us comes out to play!
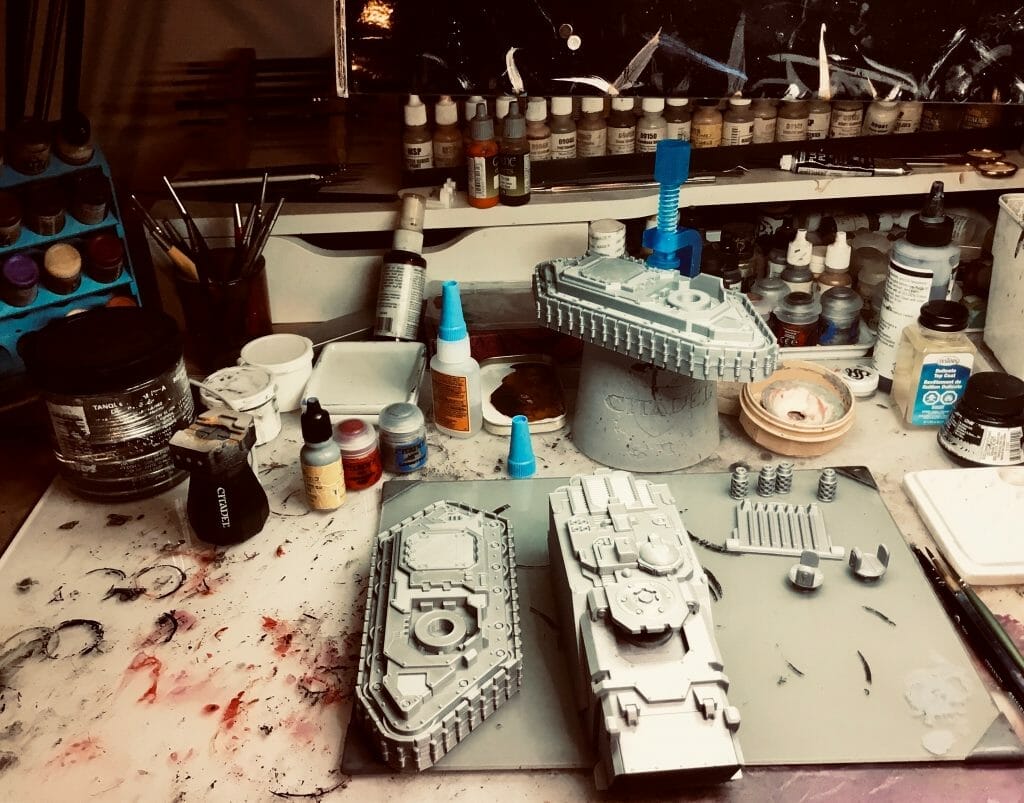
Most 3D printable files that you get online for free don’t come with assembly instructions. You have to figure it out.
For a vehicle tank that I printed, it was fairly straightforward.
There’s a box chassis flanked by treads. The exhaust pipes go in the back.
Although one issue that I encountered is that the 3D file I had only provided one side of the treads. I had to “duplicate and mirror” the other treads in CURA to make the entire tank.
Easy enough!
Once finished, I used my favorite recommended glue for PLA 3D prints: super glue. Here’s why!

Step 3 – Kit Bash the Details
The 3D printable file of the Spartan Assault tank didn’t come with any weapons. I would have to add them. I could have done this one of two ways:
- Print new weapons (harder)
- Find extra plastic weapons kits I had lying around (easier)
What is kit-bashing?
Kitbashing or model bashing is a practice whereby a new scale model is created by taking pieces out of commercial kits.
Source
I found some old sprues from plastic landraider kits and cut out the bits that I thought would be useful.
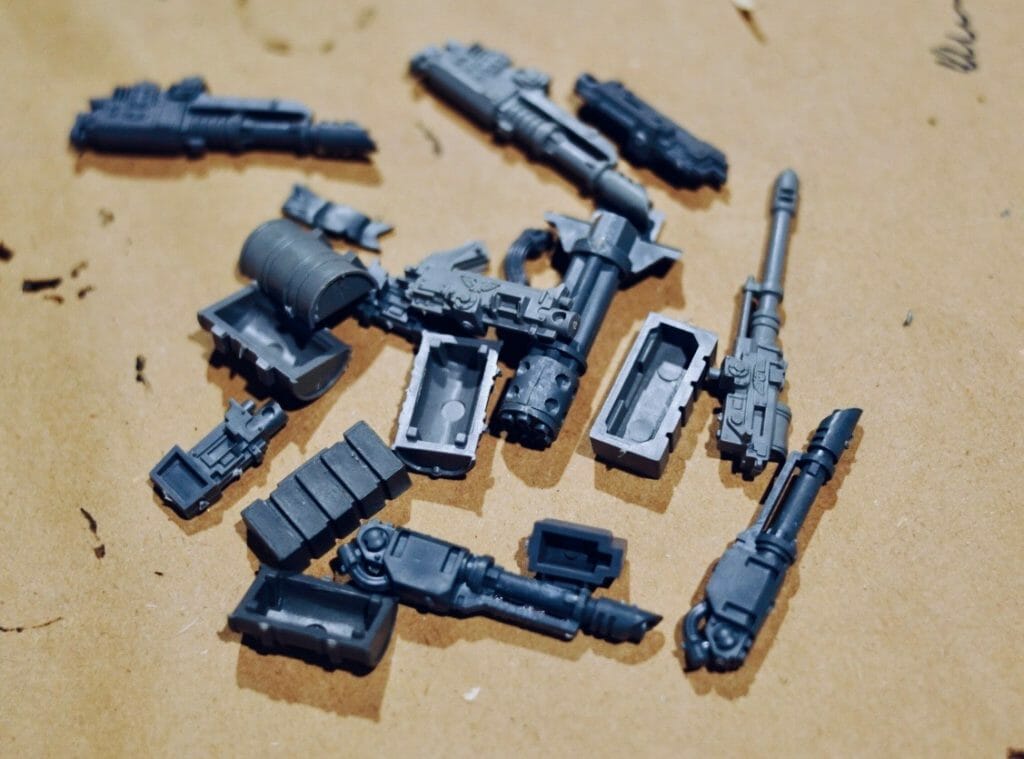
I know that I needed 8 lascannon bits to reconstruct the turrets mounts on the flanks of the tank. I was lucky and was able to find them in my mounting pile of plastic kit sprues from years of collecting Warhammer 40k stuff.
Again, a bit of crazy glue (also known as cyanoacrylate), I put the whole model together. I cheated a little and used the photo reference of the Forgeworld model to figure out where things well.

If you look closely at my photos, I did make small modifications here and there.
Step 4 – Gap Filling the Model
With any kit, commercial or 3D printed, there will be gaps between sub-assemblies. Parts don’t always sit flush with each other.
I didn’t take many photos of the process, but gap-filling 3D printed parts is quite simple.
RELATED: GAP FILLING: BEST PRACTICE AND PRODUCTS FOR MINIATURES AND MODELS
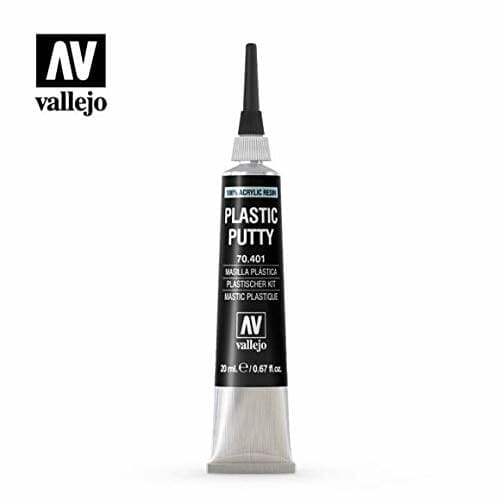
For this 3D printed tank, I used my standard Vallejo Plastic Putty. It’s inexpensive, versatile, and easy-to-use. I know other hobbyists might lean toward Liquid Green Stuff, but I find it’s harder to use on 3D prints because of the thicker viscosity.

The best way to use a gap-filler is to apply as much of the products as you need to cover the gap. Then, using your finger (dampened with water) or a rubber spreader, push the gap-filling product into the separated parts.
Let the gap-filler dry.
Then, do it again if you still see the depression between the two parts. I keep applying gap-filling product until there is a raise bit of the gap-filler above the two parts.
Then, sand down the excess, hardened gap-filler with sand paper, or whatever your preferred method is for smoothing a surface.
Of course, with 3D printed parts you’ll find that in many spots on the surface you’ll see the print lines. This is especially true for fuse-filament deposition (FDM) printing methods, like what I used for this tank.
A 3D print is basically 2D printing performed over and over again through the machine.
The print layers are the visible 2D printed layers that make up the 3D object.
For our needs, the best modeling outcome quality would be to remove those small print layers.

Gap-fillers will not remove 3D print layers. And, to try would become very expensive and potentially obscure a lot of the detail.
Gap-fillers…fill. Bad for details.
Also note that gap-fillers also have particulate matter (the gap-filling stuff) that won’t “fit” into the sub-micron sized build layers. So, these products may be ineffective for smoothing out 3D prints.
I’ve tried using Milliput on small 3D prints, but found that indeed it’s very hard to use as a smoothing agent.
In the next step, I show you the best way to remove or at least reduce the presence of 3D print layers.
Step 5 – “Smooth” 3D Print Build Layers with a Surface Primer
Let’s get this out of the way. A 3D printed model using FDM style printing technology will usually have flaws. These flaws include 3D print build layers appearing across large swaths of the model.
The challenge is to reduce the visible presence of these build layers to improve the overall look of the final painted piece.
MORE: BEST PRIMERS FOR MINIATURES AND MODELS (3D PRINTING, TOO!)
To “smooth” a 3D printed model, the obvious way is to print it with a very high resolution in the first place.
I’ve 3D printed models that were printed at much higher resolution, but they used different technology and or were much smaller models.
I printed the Spartan Assault FW tank shown in this article at 0.1mm layer height, which is already quite good already.
But, if you’re able to calibrate your printer, you can probably get this down to 0.05mm, which would create a much smoother overall surface. However, with such a high resolution a printed object would take exponentially longer to print.

Instead, for this model, I used an acrylic-polyurethane primer that self-levels when it dries to smooth out the build layers. I found that this is the easiest, if not best, method to smoothing out 3D printed build layers.
My favorite surface primer for this purpose is Vallejo Surface Primer, which is best-used in an airbrush. You can certainly brush on a primer on 3D prints and achieve a similar effect, but it will take a lot longer to get those even, smoothed-out layers.
Here’s the breakdown of how I used primer to smooth out the 3D printed tank:
- Airbrush (or spray) a thin layer of black primer over the entire model. I focus on the most offending areas where 3D print lines were most visible, e.g., the doors, the tracks, and other flat vertical surfaces.
- Used a hair dryer to speed up drying of each primer layer. See what I use and why a hair dryer is indispensable for the miniature hobbyist. You’ll want a hair dryer if you want to paint faster!
- To see how well I’m smoothing out the surface with the black colored Vallejo Surface Primer, I’ll alternate a brighter primer (e.g., gray or white). After spraying from different angles, the build layers that haven’t smoothed out will become more visible. This is because the build layers make shadows that are highlighted from the brighter primer overspray.
- If you want a smoother surface, repeat the process from #1.
I ensure each layer of primer is completely dry before adding another layer. I use the hair dryer to speed up the process.

After 8-10 layers of primer, I’m usually satisfied with the smoothness of the 3D print. On this model, I did focus on particularly offending surfaces such as the sides of the treads and the top-hatches.
These areas are mostly visible from a tabletop playing distance (up to 3 feet away). And, I want to conceal these areas as much as possible. Also, specific areas of the tank will be receiving wet-slide decals.
Because I want these to adhere properly and look good, these soon-to-be decaled areas need to be smooth!

This means doors and open flat surfaces should be finished carefully prior to painting. This means more, you guessed it, primer.
So in actuality, even though most of the model is covered in 8-10 layers of primer, specific places might have up to 30 layers of primer. Spot-priming, as it were.
Step 6 – Base Coat the Model
For larger model, I use a general workflow for painting. Check out my large model painting workflow here.
Painting organic looking model uses a different approach. And, speeding painting uses yet another method and way of thinking.

I’m painting this tank for my Space Marine Imperial Fist army. That means, yellow as the main color.
Just so you know, I HATE painting yellow. Yellow paint has the worst coverage of any of the model paints.
The best way to paint yellow (if you can’t avoid this color) is to spray it on in many, many layers.
Or, use Citadel Contrast Paints. Reviewed here.

A quick tip for painting yellow: Before you paint or spray on a yellow color, try and cover your model in something brighter. It’ll not only speed up your work, but can also provide a more vibrant outcome.
In this case, I started with a shade of yellow, which is a (very) dark orange. In my case, this meant spraying an almost brown color. I liked using this tone because when I spray yellow over this, I can adjust my spray patter to naturally leave some of the dark color showing.
Pro tip: Make sure your paint is mixed thoroughly. Try using a model paint mixer or shaker, such as these.

This is the shadow you would normally paint. For this model, I’m merely adding shadow tone everywhere first.
As you will see below, I do several things to maintain contrast.
Contrast is king.

Step 6 – Layer Up the Main Color
This is the step that starts to reveal why you worked so hard to smooth out your 3D print.
As you brighten the color of your paint job, those small build layers create “micro-shadows”. The smoother your surface, the less visible those print shadows will be.
For this Imperial Fist chapter, I love using Vallejo Model Air yellow paint. When used in an airbrush, it provides fairly good coverage. It does take several layers to get good saturation.
And, because it’s thinned already, this Model Air paint is airbrush ready. No need to thin or work out formulas, etc.
Just paint!

As mentioned above, I try and leave some areas with less layers of yellow. This allows some of that dark orange-brown to show through. The effect is useful for adding interest and maintaining contrast (and thus shape) for the model.
You can see the “shaded” effect in the photos.

Step 7 – Paint Metallics
I don’t like painting metallics. They are almost as bothersome to apply as yellow.
Those metallic flakes get into your palette, in your brush water, and taint everything with sparkles.
So, my recommendation is paint metallics as far to the end of the paint job as possible.
If it was up to me and I had infinite time, I would paint everything with non-metallic metal (NMM). But, alas, I reserve NMM painting to small models or parts, not these large vehicles.
NMM on large models generally looks cartoony or comic-book like (unless you’re really, really good. And, I am not).

Using real metallics is always faster, more convenient and realistic, and oftentimes just as good-looking at NMM.
MORE: CHECK OUT HERE FOR MORE NON-METALLIC METAL (NMM) INFORMATION
For this project, I painted the metallic parts using only two metallic-based paints for the entire model.
Even though these paints are designed for use in airbrushes, they works AMAZING with a brush. They are in my opinion the best metallics you can use when you’re not sure what metallics to use.
These paints satisfy the cool and warm metallic look that I tend to want to include in most models. When in doubt, use steel and copper, for your metal painting. They work for almost color scheme.

Using a fairly large flat-headed brush, I paint the treads with the Steel metallic paint. The reason I don’t airbrush is because I want to avoid “over-spray” onto areas that are painted well in yellow.
Certainly, I could have used masking tape to airbrush, but I wanted to change the pace. Airbrushing requires very careful clean-up, and a brush is simply easier to maintain.

The exhaust pipes were painted with the copper metallic paint, applied with a brush.
To paint the weaponry on the model, I started with a flat black. This gives me a nice base to work from. I usually like to go from dark to light when I paint. It’s faster to paint this way.

Step 8 – Apply Acrylic Washes to Reduce Metallic Shine
I prefer my vehicle models to have a more realistic feel. That means reducing anything that adds a cartoon-y look.
Because the whole model was just a bit too “shiny”, I decided to apply a few washes.
Darkening washes are perfect for this.
My preferred washes for vehicles are the Vallejo brand washes. The wash kits are especially useful for many other projects. They come in a variety of muted colors, which add interest and contrast to brightly painted surfaces.

For speed, I airbrushed these washes onto the tracks and some of the yellow painted surfaces. You can see how this looks in the following images.
Because the Vallejo washes are pretty thin already (low viscosity), you don’t need to add water or other mediums before you airbrush them.
You can apply washes with a regular brush, just make sure you control where the wash goes. This is particularly true when you’re painting 3D printed models.
Painting 3D printed models require special technical handling, since those build layers mentioned earlier can interfere with how paint behaves.
Be careful when you apply thinned paint on a 3D printed model. Colors will tend to feather into unwanted areas.

Airbrushing does get around some of the problems with applying thinned paint to a 3D printed model.
I generally use two airbrushes. One has a bigger nozzle (0.4mm) for painting larger surface areas. The other has a smaller nozzle (0.2mm) that I operate at lower air pressure for more detailed spraying.
I switch between the two airbrushes depending on the need.
Side note: For other projects, I have a third airbrush that I like to play with. But, for now, I prefer using the Badger line of products. The replacement parts are easier and less costly here in the U.S.
Step 9 – Add Realism with Oil Washes
I write about how I use oil washes for other models here. Oil washes are great for organic-looking miniatures and for speed painting.
In general, I love oil washes for quickly adding contrast and weathering.
I’ve tried a lot of oil paints to make washes.
MORE: HOW TO USE OIL PAINTS FOR MINIATURES AND MODELS

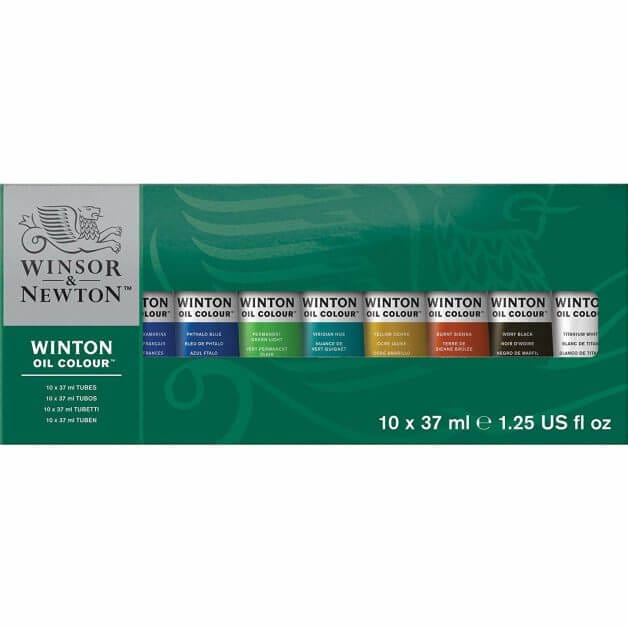
The best oil paints for making washes for miniatures and scale models are from Winsor and Newton.

| Winsor & Newton oil paint |
|---|
 |
| Check on Amazon |
| Check on BLICK Art |
Winsor & Newton oil paints provide the best medium for making washes because of the high density of fine pigment in the paint. When you thin the paints using clear mineral spirits, the pigments maintain a consistency that is hard to find in other brands.
I mix in about 3:1 parts mineral spirits to oil paint as a starting point to make a wash. The goal is to make a wash that is thin enough to run across a surface into crevices, but not too thin as to lose the color.

I like using a glaze ceramic palette for mixing my oil paint washes. Every miniature painter should consider a dry palette.
I like this mini-sized mixing palette.

To make the oil wash for my 3D printed tank, I mix both black and blue oil paint in a small glazed palette. I add mineral spirits and stir until everything is evenly mixed.
Then, using a cheap synthetic paint brush, I apply this mixture over the entire model.

Using my hair dryer, I speed up the curing/drying process. To remove the excess paint that has covered most of the flatter surfaces, I dampen a paper towel in clean mineral spirits.
Gently, I wipe off the excess oil pigment that has deposited over the raised surface areas of the model.
To smooth out any inconsistent application, I also use a soft makeup brush (like these super cheap off-brand ones) and continue wiping the model until I’m satisfied with the final “look”.

Before you move on to the next step (adding decals), I protect my oil paint-wash job with a single coat of varnish. For this, I’ll use Testors Dullcote enamel spray.
MORE: HOW TO AVOID MISTAKES AND FROSTING WITH MATTE VARNISHES: A COMPLETE GUIDE

Step 10 – Add Wet-Transfer Decals
Now, this step should be generally performed the oil wash. Doing so would provide a bit more control on how these decals could be weathered.
But, it doesn’t matter since you’ll want to weather decals separately anyway.
Before I apply any decals to the model, I ensure that the surface is dry. Then I apply a layer of a decal solution. The decal solution provides a consistent layer to put the decal over.
I let the decal solution dry.
For this project, I used some extra decals from a Landraider kit I had.
Once I cut out the decals with a hobby knife, I soaked them for 60 seconds in clean water. This lets them “slide” off the paper backing.
I used a small brush and tweezers to apply them to the surface of my 3D printed model.

Keeping the surface wet with water allows me to use the damp brush (usually a stiff #0 round pointed synthetic brush) to maneuver the decal into place.
Once I’m okay with the placement, I’ll use the corner of a tissue paper to dab out the excess water.
After that is dry, I’ll apply a liberal layer of the decal solution again.
The decal solution softens the decal so it not only adheres to the model better, but also contorts the decals to the exact shape of the surface of the model.
Once I finish applying the decals and all the solutions/water has dried, I apply a thin layer of oil wash over each decal. This blends each decal back into the model.
In some cases, I’ll take the corner of a wooden toothpick and chip away part of the decal. This adds the battle damage and weathering to the look of the images.
To further hide the decals (so they look like they are a part of the model, and not just a “sticker”), I apply brush-on Testors Dullcote enamel varnish.
The Testors Dullcote Matte brush-on varnish is the perfect final step for “hiding” the raised edges of a wet slide decal.
Step 11 – Paint Details
Painting details on a model this size could happen at nearly any point following the first layer of primary paint layer is finished (see Step 6).
Here, painting details means any of the purity seals, the weapons, and adding pinstripes (or whatever you call the black strip down the middle of the tank).
Add weathering to these details as you prefer.

I tend to just use the Vallejo or oil paint washes to do this.
When you get to this point, most of the major work is done, so I tend to play this part by ear.
I paint whatever looks “good” to me.

Now, at this point, you could consider this complete. The model already looks Battle Ready.
What is Battle Ready?
Source
If a model is Battle Ready, it means it’s ready to game with. Battle Ready models have their main areas coloured and an simple finish on their bases.
Step 12 – Add Special Effects
To push your model into a more realistic, display level paint job, consider adding special technical effects.
These might include mud, dirt, rust, and other things that show that the model has been in an epic fight.
RELATED: CHECK OUT THESE ALTERNATIVES TO CITADEL TEXTURE PAINTS
A side-advantage of adding special effects, like Citadel Texture paint, or Vallejo Earth texture, is the that they help further hide 3D print lines.
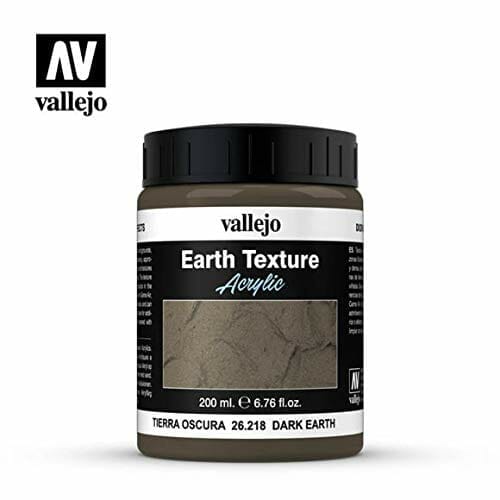

Hiding 3D printing artifacts will go a long way to improving the overall look of your model.


Ultimately, the final outcome of the paint job will depend on your preferred look. The more work you put into painting up your 3D printed model, the better it will likely turn out.
Once you’re finished with everything, my recommendation is to spray varnish at least 3-4 layers of Testors Dullcote. The matte finish will help with the next step: photographing your model.
Step 13 – Photography (Optional)
For photography, I use a light box and a black backdrop.
Of course, you don’t need fancy equipment to take great photos of your miniatures. But, it does help just like using good tools for painting.

I write a lot about photography in other articles. But, if you want to see how I generally set up my miniature photography, you can check this post.
MORE: WANT BETTER MINIATURE PHOTOS? CONSIDER A PHOTO LIGHT BOX
Photographing your model is definitely optional. But, I like documenting my effort and, of course, sharing it on this site.
Check out my free photo backdrops.
Here are three photography tips to keep in-mind when taking photos of your miniatures:
- Low ISO settings – Keep your ISO setting as low as possible. The closer your ISO to “100”, the less noise and grain you’ll have in your final image.
- Higher aperture settings – Try and keep your aperture (i.e., f-stop value) greater than “4”. This setting controls the depth-of-field of the image. In other words, more of the miniature will be in-focus with a greater f-stop number. The drawback, is less light will pass to through your lens to the camera’s sensor. To compensate, you’ll need to slow your shutter speed.
- Use a tripod – As mentioned in #2, you’ll need to slow your shutter speed to allow sufficient light through your lens. But, slowing your shutter speed will also introduce the risk of camera-shake. This will obviously blur your image. To control for this, try and use a tripod when taking photos of your miniatures. Low-cost tripods for smart phones and dedicated cameras are everywhere. Here’s what I use for everything nowadays.

Final Word
3D printing is a fun hobby. Combine it with tabletop gaming and modeling, and 3D printing becomes an indispensable tool. It adds a creative outlet for customizing, converting, and scratch building that was previously labor intensive.
Here, all you need to find a 3D printable file (or make one yourself), print it, and paint the model. Painting 3D printed models has a unique set of challenges, but hopefully this article has clarified how simple it can be.
The final look of a 3D printed model, especially one of this size (a tank!), can be as good as an actual kit.
Have fun! Keep painting!
Thanks for reading!
Tangible Day on YouTube (Miniatures and More!)


Seriously impressive work–George Lucas would fall in love with you!
Hah thanks 😉