
Last updated October 19, 2023. By Andrew M. Tan.
Do you play board games with miniatures? Tabletop games with miniatures are especially fun because they add an extra level of tactile immersion. Even better, of course, are board games with painted miniatures. Of all the games that you can enhance with painted miniatures, Cthulhu Wars (Peterson Games) is a particular stand-out!
In this article, I show you how to paint “Nyarlathotep”, the crawling chaos character in the Cthulhu Wars Board Game.
- Cthulhu Wars first appeared as a Kickstarter crowd-funded project
- Cthulhu Wars has received great reviews throughout the board game community for its gameplay, high-production quality of miniatures, and embrace of the beloved Lovecraftian Universe
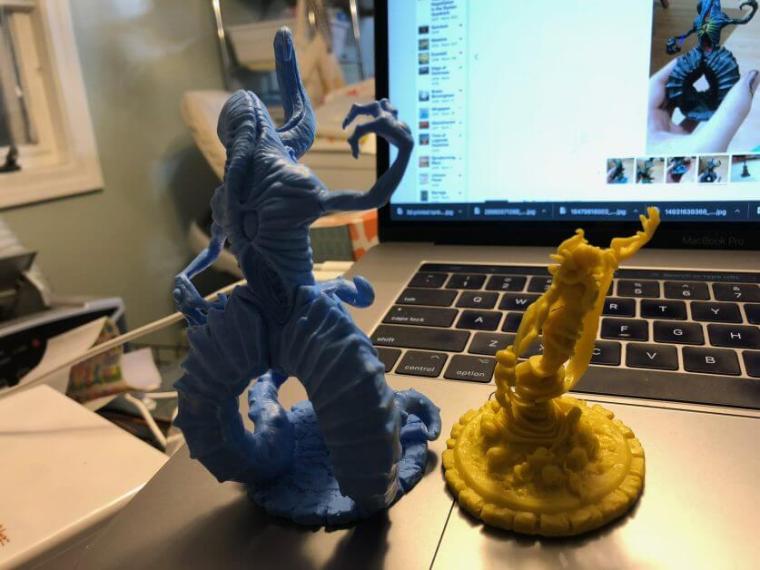
- See how I painted the Cthulhu Wars “King in Yellow” model
Continue reading to see how I painted a model from this great board game!
Who is a “Nyarlathotep”?
Sounds like something you cough up in morning….err nope.
Nyarlathotep is a character in the stories of H.P. Lovecraft, as well as a recurring creature in other works in the Cthulhu universe.
Cthulhu is an ageless inter-dimensional being that is beyond our ability as humans to understand. To attempt to describe Cthulhu with our language would be impossible, and for those that try will be a sure path to insanity.
To learn more about Cthulhu and Nyarlathotep, check out this lore.
How to Paint Nyarlathotep from the Cthulhu Wars Board Game
1. Prepare the model
Clean the model so any model-release or other substances do not contaminate the surface of the model. For speed and convenience, you can use an ultrasonic cleaner as I have, or simply wash with soap and water.
For colors, I use the basic studio scheme with my own style. That is, I’m going to paint Nyarlathotep with my “feel” for what I envision this model should look like on the tabletop.
I know that a blue hue will help distinguish this model from the other in-game factions, so I keep this in mind as I decide how to paint Nyarlathotep.
2. Prime the model
For speed and simplicity, I start with a black Vallejo Surface Primer. I use an airbrush to spray the primer over the entire model. I make sure the coat is even and smooth.

RELATED: TOP 10 AIRBRUSHES FOR PAINTING MINIATURES
An airbrush helps keep the primer application quick as well as consistent. I highly-recommend you use an airbrush or spray can type primer for all your miniature and modeling needs.
(Of course, I don’t abide by this recommendation all the time…shame on me).
3. Basecoat with your primary color
Painting Cthulhu Board Game models will follow the same steps.
After priming, decide on your first major color. This is the color that will coat most of the surface area of the miniature.
I tend to start with a mid-tone color first.

Then, I will add shadows and highlights later. A mid-tone color is the paint that has the “middle” brightness value over the surface you’re painting.
I painted my basecoat using Scalecolor Innsmouth Blue.
I use my favorite workhorse brush, a Citadel medium base coat brush, for most of the work here (95% of this entire model actually).
4. Block-in shadows and highlights
I love this part of painting models.
For me, blocking in the colors is not only easy, it is relaxing. I don’t need to worry about being too clean, or crossing the lines per say.

Instead, the goal here is to paint the large areas of shadows and highlights. You’re trying to create an overall sense of where color and values should go.

You can explore how things work together as a whole at this step.

I used two paints mixed in various ratios for adding shadows: Scalecolor Rlyeh Green and Negro Grey
(You can get the entire Scalecolor paint set that I used here).

After adding shadows, I bring the base coat paint (Innsmouth Blue) back into the picture to restore the areas that I will highlight later.

You can see this progress in the photos.

Again, using the larger base brush I apply these colors in select areas. Shadows in general go into the recesses, and the highlights sit on the raised areas of the Nyarlathotep model.
What a beautifully detailed model!

The video shows you how I get to this to step from priming and base-coating.

5. Add other colors in “blocks” (speed painting tip)
A trick I love to use when I want to paint something fast is to lay down large areas of color in opaque layers.
I don’t glaze at this point. That would be a waste of time.

Just slap on the large blocks of color where you think they should go. You can blend paint later.

This step continues to help me see where paint color should go on Nyarlathotep.
I see the tail as a brighter tone, a light grey/purple color, which I paint with Scalecolor Lendanis Grey.
The exception with this approach is that you must assume you’re not going to paint details until much later, if you do decide to do that at all.

Blending these blocks of color will use wet-blending (see more details about wet-blending see this article about how to wet-blend).
RELATED: 8 MUST-KNOW PAINT BLENDING TECHNIQUES FOR PAINTING MINIATURES AND MODELS
An important tip for painting in blocks is to use good quality paint that has good coverage. You want to apply paint layers in quick successive layers, without streaks.
6. Blend the blocks of color
You can use wet-blending or other methods of blending paint.
For speed, wet-blending for the practiced veteran miniature painter is probably one of the fastest ways to blend blocks of color together.

Check out this video for how to wet blend two blocks of color using wet-blending.

For painting Nyarlathotep, I used wet-blending in the various areas to create the paint transitions across the entire model. Because the model is fairly large, I was able to work fairly easily with this technique.


On a smaller model, you may want to use layering and glazing to blend colors together. See another example of this painting approach here.
To protect the model after all the work I did blending the paint, I apply a dull coat varnish. I use this as a “bookmark”.

7. Add details and accent colors
At this point, you’ve blended your blocks of color. You’re still probably looking for a smoother finish on Nyarlathotep.
Keep reading to see how glazing looks to further smooth out the transitions between colors.
At this point, I have painted most of the major surfaces with the main color (in this case blue).

I paint Nyarlathotep’s eyes with white and black paint. I paint the mouth opening in the chest and the slit down the middle of his head-tail with a flesh-tone.

In general, I’m looking to paint with warmer colors to add temperature contrast to the model. This helps the miniature “pop”.

Because I’ve already blended most of the colors I want on the main skin surfaces of the miniature, I’m careful not to stray onto these areas with the other detail colors, e.g., flesh paint, or white from the eyes.

At this point, most people would be happy to stop and consider this finished. All that would be needed would be to paint the base and this would be ready for the tabletop.

But, as I’m looking for an extra level of quality, I continue with a few more steps.
8. Use washes and glazes for special effects
For the most part, I follow-through with special effects using glazes and washes.

In the past, I used Citadel’s shades and washes. For flesh colors, I loved Citadel’s Bloodletter shade. But, these paints have been slowly phased out.
What do I recommend as an alternative to Citadel washes and shades?
My recommendation for alternative replacements for Citadel glazes and shades, like bloodletter, are Badger’s ghost tint paint lines.
Ghost tints are great replacements for Citadel glazes/washes, because they are highly vibrant acrylics with a similar level of transparency. They are not inks.
With some thinning with matte medium and water, Badger Ghost Tints can replicate most of the properties of Citadel glazes and washes.

To use ghost tints, I tend to mix them with a bit of glazing medium or matte medium and a few droplets of water. This reduces the pigment strength a bit and provides me with a bit more control over the ghost tint.
The ratio I tend to use for most of my work with ghost tints for use as a glaze or wash is about (1:1:1) for ghost tint, glaze or matte medium, and water.

This recreates a lot of the properties of the Citadel glazes and shades many of us are familiar with. Of course, your mile may vary (YMMV) with your preferred style of painting and experience.

I apply this “Fresh Blood” ghost tint, glazing medium, and water mixture in fairly liberal quantities with my base coat brush. I deposit the fresh blood mixture into all the areas base coated with the flesh tone.

Once this glaze is dry, I then pick out the highlights with the original base coat flesh tone paint.
This creates the effect you see below.


9. Use glazes to smooth transitions between colors
In this piece, I wanted smooth transitions between colors.
To further blend these blocks of colors, e.g., highlights into mid-tones, and mid-tones into shadows, I created glazes using my base coat color, Innsmouth blue.
RELATED: USING HOMEMADE GLAZES ON A 3D PRINTED MINIATURE

I mixed my paint in a ratio of 1:3 paint to water. Using a soft brush, I applied thin layers of this more transparent paint solution over the sharp edges.

Depending on how smooth you want your blends, you can glaze for hours on end.
For Nyarlathotep, I worked on these transitions with close 3-5 layers between the sharp edges of color/values. You can see in the photographs below how this looks.
To complete the model, I painted the base gray, washed it with Nuln oil (one of the best washes for miniatures), and drybrushed it with the same base gray.
To protect the model, I varnished the entire piece using Testors Dullcote (see tips for best use).
And, there you have it!

Where to buy Cthulhu Wars?
In case you were wondering where you can buy Cthulhu Wars, you can check out the Peterson Games website.

You can also find Cthulhu Wars on Amazon.
More games in the HP Lovecraft Cthulhu Universe?
Cthulhu Wars is exciting and fun because of the giant miniatures. The rules are easy to learn, and the game is well-balanced with asymmetric gameplay (unlike Chess).
For many players, Cthulhu Wars resonates because it pushes all the right buttons for strategy gamers, and Lovecraft fans. If you’re looking for similar games to Cthulhu Wars with miniatures, take a look at these games.
Of these games, my top 3 favorite games in the Cthulhu Lovecraftian Universe are as follows:
Final Word
I love board games with miniatures. Even more, I enjoy a board game with painted miniatures.
Here are the 9 basic steps for painting Nyarlathotep, a Cthulhu Wars miniature:
- Prepare the model
- Prime the model
- Base coat with your primary color
- Block-in shadows and highlights
- Add other colors in “blocks” (speed painting tip)
- Blend the blocks of color
- Add details and accent colors
- Use washes and glazes for special effects
- Use glazes to smooth transitions between colors
I hope you enjoyed this article on how to paint Nyarlathotep from the Cthulhu Wars. For more details, or if you have any questions, you can leave a comment below.
Happy painting!
Enjoying Your Visit? Join Tangible Day
Free newsletter with monthly updates (no spam)


Tangible Day on YouTube (Miniatures and More!)

By Andrew M. Tan, PhD
Andrew is a commissioned miniature painter with more than 15 years of experience painting tabletop miniatures, photographing models, and testing hobby tools in real-world use. Read his full bio.
Great stuff – love it!
Thanks for talking us through the individual stages, for me, as a relative beginner, it’s very helpful.
It’s interesting to see the different techniques people use and how they vary from one painter to another, and how they each develop their own style – I’m still working on mine, lol!