So, you’re looking to paint your 3D printed miniature. Painting 3D printed miniatures and figures is similar to painting other types of kit-type miniatures and models. This is especially true if you’re using model acrylic paints, such as Citadel or Army Painter model paints.
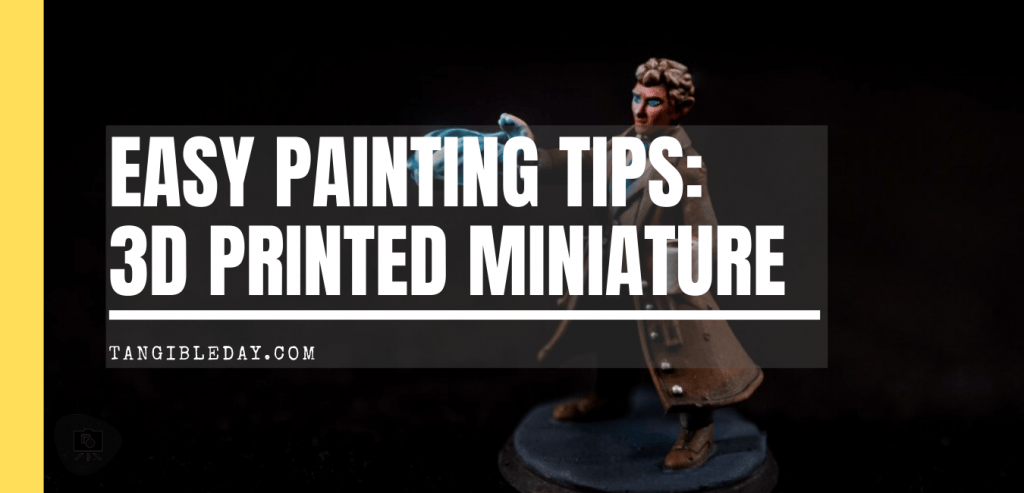
In this article, I show you how I painted a 3D printed miniatures from Heroforge.
Continue reading for tips and tricks on how to paint a 3D printed miniature.

How do you clean a miniature before applying primer and paint?
Every miniature and model should be cleaned and washed.
Bits of debris, dirt, and oil (from your fingers or the manufacturing process) can interfere with proper primer and paint adhesion.
So, cleaning a model properly is standard operating procedure (SOP) in my workflow.
For the quickest, more thorough cleaning job, I toss my miniatures in an ultrasonic cleaner.
Here are some affordable ultrasonic cleaners that I recommend.

It doesn’t take long.
5 minutes in an ultrasonic cleaner filled with water is enough for cleaning miniatures.
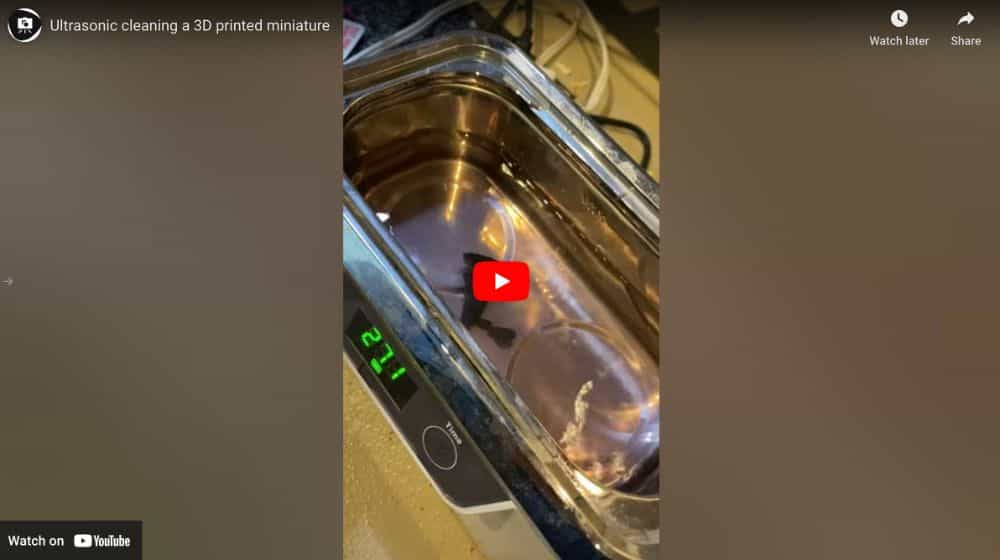
Make sure you dry off your miniature before moving on to the next step. I use a paper towel or hair dryer (just not too hot).

How do you prepare a 3D printed model for paint?
It’s easy!
Two steps:
- Make sure the model surface is smooth
- Apply primer (how to prime miniatures)
A 3D printed miniature is different than a model you buy as a kit. With Heroforge miniatures, the models are printed using a high-precision 3D printer that constructs the prints as a whole-piece.
No assembly required.
The only challenge is making sure the build-layer lines are smooth.
The smoother the surface of your miniature, the more advanced paint blending techniques you can use.

You can smooth out a model by:
- Sanding
- Using a gap filler (followed by sanding)
- Applying layers of a good quality primer, which will gently fill-in and hide the build layers
You can use a combination of the above to prepare the surface prior to painting the model.
For this paint job, I used a 2.5x magnifying headband visor to see details.
How do you prime a 3D printed miniature or model?
For any model, priming is the most important step.
A good priming job can make or break the ease to which you paint the model.

A bad priming job for example, can create a really rough surface, or a surface that doesn’t stick well to the overlying acrylic model paint. Bad news bears!

Good priming can hide imperfections in the sculpted miniature, which is great for 3D prints (which have print artifact layers).

My suggested primer for almost any scale model or miniature is Vallejo’s Surface Primer.

The best way to prime a 3D printed miniature is to spray it on. This provides you with the most even coat. The thin layers you can achieve with an airbrush also makes these kinds of applications much more consistent than brush-on primer.
Of course, everyone will have their preferred method.
If you are comfortable with brush-on priming, or don’t have an airbrush, then the only suggestion I have would be to make sure your primer is applied in multiple thin layers, instead of thick coats.
You’ll ensure that you don’t lose details in the 3D print.

Why is applying the first paint base coat hard on 3D printed models?
The first base coat is harder than you think.
Most people think this is the easiest step for painting miniatures. But, in reality, it only seems easy because base coating a model is usually fast.
It hurts, but it’s over quickly.

Base coating 3D printed miniatures is hard, in particular, because:
- You don’t know how paint will behave across the model due to the build layer lines (e.g., thinned paint will seep across the surface with capillary action)
- Color bleeds into areas unexpectedly because the 3D print build layers (e.g., another description for this effect is “the paint feathers out”)
- It takes significantly more pigment build-up to completely cover the surface a 3D printed miniature (the build layers “absorb” paint; there’s effectively more surface area for paint to cover)
RELATED: ARTIST SHOWS YOU HOW TO PAINT A 3D PRINTED RESIN MINIATURE
When it comes to painting 3D printed miniatures, just be aware that certain techniques you’re used to on regular models may not produce the expected result.
You’ll need a slightly different mindset.
What brush do I recommend you use to paint a 3D printed miniature?
For this 3D printed miniature, I first painted the entire model black to start.
I did this with my favorite workhorse brush from Citadel. It’s a synthetic mix brush with a flattened bristle tip. This allows me to work quickly and evenly across a variety of model surfaces. You can also check out another budget brush option for painting miniatures.

For more control, I used a Raphael 8404 round pointed #1 (or other kolinsky sables). I began painting the base coat colors for the major elements, like the duster cloak, with this brush.
Actually, I love the brush so much for this job, I used the Raphael 8404 for the rest of the project.
What is the best model paint for painting miniatures?
Scale 75 color paints are my favorite paints for small miniatures.
The pigment density and matte finish when dry is great for a wide variety of high contrast “looks” and styles.
The best model paints for painting miniatures are those that cover a surface evenly and completely in only 1-2 layers when undiluted.
With dilution, or thinning, with water, the best model paints become translucent whilst maintaining their binding properties (e.g., they don’t become runny; you still have control).
The best model paints can be used as a reliable glaze that filters the underlying paint job evenly, when thinned with water or acrylic medium.
Continue reading on for what I mean about glazing.
Why take your time with the base coat?
You need to be patient when base coating a 3D printed miniature.
As mentioned above, there are unique painting challenges associated with 3D prints.

For the base coat, you’ll need several (maybe 5-8 more than usual) to completely cover your first primer layers in a smooth even coat.
For this model, I applied the first light brown layer (Scale 75 Orange Leather) in multiple thin coats with my Raphael 8404.
The Scale 75 paint was thinned with water.

I let each layer dry before applying the next. This is so important.
Always let each layer dry before working on top of it. If you don’t have the patience to watch paint dry literally, get a hairdryer.
I love my hairdryer.
Absurd, I know….
Can you glaze on a 3D printed miniature?
Yes!
Well, sorta. The challenge here with glazing a 3D printed model is because the surfaces are generally not as smooth as you might think.
RELATED: MAGNIFYING VISORS HELP YOU PAINT BETTER!
For this model, I mixed two dark colors together.

Scale 75 Dubai Brown and Eclipse Grey (my favorite dark, not black, color for adding shadows on miniatures) were mixed in ceramic palette.

I added water to thin the mixture. Here are some other ways you can thin acrylic model paints.
(I do not describe the ratio of the mixture. But, it doesn’t matter because you’ll probably have some idea of what works best for you, anyway).
Add enough water to create a thinned solution. To ensure you’re not losing the paint “stickiness”, you can add a bit of matte medium.

A tiny dab of matte medium will make sure your homemade glaze doesn’t run everywhere!
How do I apply a glaze on a 3D printed miniature?
There are several ways you can apply your homemade “glaze” (described above).
But, on a 3D printed miniature you need to be a bit more careful!
When I make my own glazes with a mixture of water and paint, I usually end up with a mixture that behaves like a runny wash.
A wash is essentially a pigmented media that is thin enough that you can cover an entire model and only the recesses will have a significant color change.
In my case, the glaze was a bit on the thicker end, because I added a dab of matte medium. This gave me a bit of control of where I applied this thinned paint mixture.
On a 3D printed model, this is important because the recesses are essentially everywhere on the model (the build layers are recesses, too).

And, I didn’t want to pull up the details of the build layer artifacts.
So, using my homemade brew, I controlled where my glaze went. I applied most of it in the shadow areas, or where I imagined shadows would go.
For example, I glazed the darkened color under the arms and around the bend. Inside the cloth curvature and folds, and along the collar of the cloak.

How do I add more contrast?
If you’ve been dabbling in the miniature painting hobby for a while, then you must have heard: “contrast is king”.
Well, if you’re going for the 3D pop “look”, then contrast is what you’re after.
Contrast is the character of a how far apart the brightest and darkest values are on a model or subject.
This is also known as “dynamic range” in photography. The more dynamic range you have in your subject, the more detail and information you’re providing the viewer.

You can add more contrast through darkening or highlighting.
Or, you can add contrast with temperature: by using warm versus cool paint colors.

In this case, I’ve painted the cloak a warm-orange brown color. To add more contrast, in addition to the shadow mixture, I decided to glaze a dark blue color (Scale 75 Abyssal Blue).
This color has a cool tone, which will help me add contrast to the shadows when seen in the context of the warm colored cloak.
This also deepens the recesses visually. The darker blue-toned areas will feel like they are farther away from you.
When you highlight the rest of the model, this helps create that lovely “3D pop” look in miniatures, as you’ll see further below.
I glazed my dark blue tone into the same places that I applied the dark shadow glazing, e.g., under the arms, in the folds of the cloak.

How to finish painting the 3D print with paint layers and highlights?
After the steps above, it’s all downhill.
The hard parts are over, believe it or not.
(Yes, even the Object-Source Lighting, OSL, as you’ll see below is easier than you think).
After each material element on the model is base coated using the approaches I described above, re-add the original colors in layers back on top of the glazed/washed surfaces.
RELATED: USE A HOBBY MAGNIFIYING LAMP TO HELPS YOU PAINT DETAILS
To maintain separation between parts of the model, I painted each section, carefully leaving a thin bit of underlying black paint showing through.

You can see the thin black outline between the shirt and the cloak, for example. Or, between the necktie and the white collar. These are areas are merely unpainted areas of the model.
As with any miniature painting approach, apply paint in thin layers rather than thick coats. Slowly build up the pigments.
Be patient and let paint dry before applying subsequent layers.
Unless you’re wet-blending, which I don’t recommend on 3D printed models, painting in layers makes it easy to change things as you go.

How to paint skin flesh on a 3D printed miniature?
The hardest surface to paint on a 3D printed miniature or model are those that require you to create a smooth gradient surface between dark and light.

Errors in gradient and blending are most apparent on fleshy or organic surfaces.
On human skin tones, the most compelling paint jobs use smooth blending, not the textured-look you might find on things like clothing or weathered armor.

Using a dry palette (my favorite ceramic water color palette), I thinned down Scale 75 pink flesh.

Using my Raphael 8404, I applied multiple thin coats over the face and hands.
I did this until the surfaces were evenly and smoothly coated.

Although not shown well in these images, the skin was then glazed down with a mixture of the pink flesh and eclipse grey (same color I used for shadowing the cloak). Then I re-highlighted back up.
As you’ll see in the next few steps, I refined my miniature slowly as I worked in other element of the piece.
How to paint the object-source lighting (OSL) effect of the 3D printed fireball?
Easy!
Use all the same painting techniques I used for other parts of the model for shading and highlighting.
But, now to paint OSL, reverse the order of highlight to shadows.
Base coat using white paint the object that you want the lighting to come from (The Source of Light).
If you remember, we started other parts of the model with black paint.
Starting with white gives you a sense of where the fireball light will come from.

I’m painting a blue fireball.
So, after the white layer, cover the entire surface of the light source in blue (or whatever your main color is for your OSL paint job).

Dabble (also known as glaze with thin paint) areas of where you think the light from the blue fireball should go.
It might be on the cloak, certainly on the hand from whence the fireball emerges. There might also be some blue lighting might also be on the face.

Once you decide where the glow will come from, and where it might go on the model (e.g., the cloak the face, the hand), then all you need to do is “push the color” back into the model.
You push color back into the model by glazing.
Yes! Use the same glazing you used above for filtering the shadows, e.g., adding the cool abyssal blue to the recesses, to push your OSL glow back down into the model.
Integrate the piece with glazing.
Glazing is your friend.
Then, when you’re done with glazing….

Add more glazing!
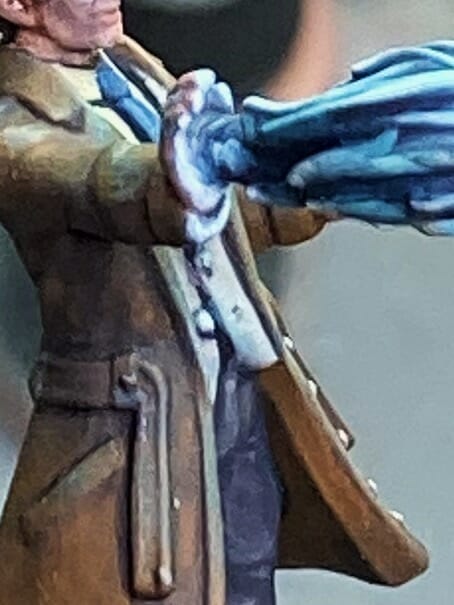
How to “push” colors into the miniature (color integration) via glazing:
- To hide edges between colors, all you need to do is make another glaze mixture of the two colors. Apply that middle color in the transition area.
- For example, mix blue and brown to create a middle color glaze to blend blue glow effects on the brown cloak.
Then, add more color to highlight and darken the fireball in the places you think look good.

Use the same approaches as with the cloak that I describe above.
Base coat, then glaze, then glaze a bit more, then layer up and highlight.
Some people might say there’s a concrete formula, but I’m not so sure.

(I don’t like following art rules, generally)

In a nutshell, this is how I used the colored paint on the fireball:
- I painted the fireball with a base coat of Scalecolor white, followed by Caribbean Blue. Then, I painted the recesses with my Raphael 8404 with Scalecolor Deep Blue.
- Mid-tone and highlights were a mixture of Mediterranean Blue and Caribbean Blue. The brightest highlights of the fire were a final mixture of Caribbean blue and white, then pure white in select places.
How do you use photography to check your model paint job?
Here’a great article on how to use photography to see where your model might need more work.
When you think you’re finished…well, you’re finished.

Unless, you want to really push it, you can stop when the model looks good to your eyes.
At some point, you’ll realize there is diminishing returns to continue painting.
When I do want to understand where I can improve I use photography.
A photograph reveals imperfections that your eyes can’t see normally.
RELATED: BEST LAMPS FOR PAINTING MINIATURES
Well, you might ask, if your naked eyes can’t see it, then does it matter?
No, but in painting competition or display showcases, the lighting and the environment may reveal things that your normal viewing distance would not show.
Finally, when you’re sharing your work online via social media, all those photographs will show every detail. This is especially true if you’re using a high resolution camera.
If your model looks good with a photograph, I’d say you can be pretty happy with your work. Nit-picking only slows you down from making more great art.
Why a photo light box helps show off your 3d printed paint job?
If you’re looking to really showcase your work, I’d recommend a photo light box for taking miniature photos. Do you need a light box? That’s another topic of discussion.

This can really help you see those details you worked so hard to add in your miniature painting.

In this project, the even lighting and dark background really reveal the OSL fireball effect nicely.
The blue glowing fireball draws the eye, and the glowing effects that we glazed so carefully on the other parts of the model really sell the effect.

Final Word
This post hopefully gave you some insight into how I approach painting 3D printed miniatures. I used this Heroforge miniature because it provides a simple sculpt with a flair (the glowing fireball).
As you might have noticed, I only used simple techniques throughout the entire piece. No fancy airbrushing of colors (yeah, just priming), or advanced blending techniques.
Sure, glazing is a major component of painting this miniature. But, as you’ll see glazing is one of. those core things you can do with acrylics that help you add interest and contrast with very little work.
A key feature of 3D printed miniature are the build lines.
Maybe, the technology will become so robust in the future that those tiny layers won’t show on the surface. However, until then, painting 3D prints will always have that slight challenge.
The best advice for painting 3D printed miniatures is to take your time. Learn how paint behaves and leverage your experience to your advantage.
In other words, practice!
Happy painting!

Tangible Day on YouTube (Miniatures and More!)

Thanks for that – I’ve always found OSL difficult, but I’ll give this a go and see what happens.
I’ve got an Ultrasonic bath, and I never even considered it for cleaning miniatures, something else to try!
Totally agree on using photography to spot the areas you need to work on. I can be really happy with something I’ve finished, but then I use my SLR and it looks like a different miniature!
Awesome glad this helped! Ultrasonic cleaners are great for cleaning and stripping paint off resin, or metal minis (as well as airbrushes). Btw, I love photographing miniatures 🙂 and the ability to see areas that need more contrast is just a bonus. Thanks for reading!
This is a very good writeup on painting miniatures, and a great source of information on OSL, thank you very much! I have included your work in the recommended resources section of my article about the topic: https://alkony.enerla.net/english/the-nexus/miniatures-nexus/miniature-hobby/painting-light-effects-object-source-lighting-osl-miniature-painting-guide
Awesome!