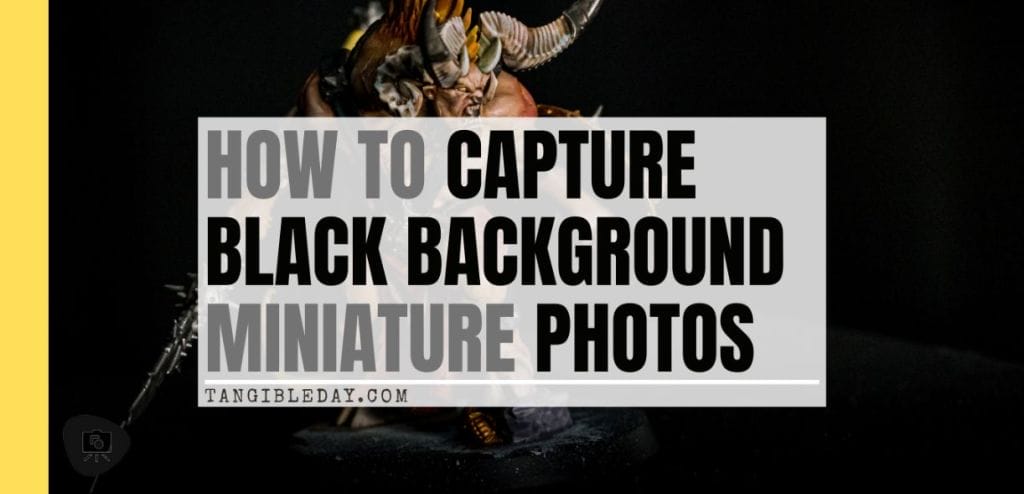
Last updated November 2, 2024. By Andrew M. Tan.
A true infinity black background is a great way to create a dramatic atmosphere in your miniature photos. But, many people don’t realize how difficult it is to create a true black background, until they take their first few pictures. A black backdrop in your photos of painted miniatures is hard to achieve! Sometimes the background comes up as a dark gray, not really black, or you get dust or debris showing up in the image.
In this article, I show you how I achieve a true black background in my miniature photos. The tips and tricks in this guide will ensure that you’re ready to take better pictures of your miniatures with a true black background everytime!
Camera Manual Mode and “The Exposure Triangle”
Many people struggle with how to get a true black background in their miniature photos.
The best way to do this is to set your camera in manual mode. If you’re using a smartphone camera, there are apps that will give you full manual control as well. When you use manual mode, you are directly controlling three variables that comprise “the exposure triangle”.

The exposure triangle is three factors: aperture, shutter speed, and ISO settings that all work together to make a picture. When you choose one of these three options as the priority, the other two are automatically prioritized as well. Take some time and play around with these values on your camera until you find a balance that looks good.
Aperture
Aperture is a measurement of the size of the opening in a lens. It’s measured in units like millimeters or inches. Your camera’s aperture determines how much light reaches the sensor. This drastically changes the image’s depth-of-field (DoF, or the amount of subject area that is in focus), and influences how much background blur there is in your photos (also known as “bokeh”). For example, when you set your aperture to a lower f-stop number (a smaller aperture), more light will reach your sensor and less background will be blurred.
Shutter speed
Shutter speed is a measurement of how fast your camera shutter opens and closes. The higher the shutter speed, the less light will reach your sensor. Note that with moving subjects, shutter speeds that are too slow can cause blurry images in certain conditions. For photographing miniatures, you can use any shutter speed you want as long as you have your camera stabilized on a tripod. Your subjects don’t move (obviously), and a camera on a tripod won’t suffer from your shaky hands.This is the setting you’ll want to experiment with most when shooting miniatures with a black background.
ISO
ISO (or International Organization for Standardization) is a measurement of how sensitive your camera sensor is to light. The higher the ISO, the more sensitive your sensor will be and the more light will reach it. This will make it easier to take a picture in low light situations, but you may also get “noise” in your photographs. Take pictures with miniatures at lower ISOs when you want to have a full black background so that there isn’t any noise in the photo.
Follow this simple workflow when setting up your camera settings for photographing your miniatures. First, decide what your aperture value will be. Then, set up your shutter speed and ISO value accordingly.

Check out this article to learn more about “how to use the exposure triangle in miniature photography“. Continue reading below to learn how to photograph miniatures with an infinite black background using your camera or smartphone.

Quick Setup Guide for Capturing Miniature Photos with Black Backgrounds
1. Use a black backdrop (or something dark)
Find the perfect backdrop. Look for something dark, like black velvet cloth or an even a dark window curtain. You can even use a large TV screen or computer monitor (turned off). Bottomline: You’re looking for a backdrop material that will be dark enough to contrast with your miniature subject and reduce the chance of reflections bouncing from your light source and ambient lighting.
Hang your background behind your subject as far away as possible to take advantage of light fall off. “Light fall off” is a term that states that light intensity diminishes exponentially with increasing distance from the viewer.
When photographing miniatures, use this strategy to capture a crisp image of your subject while making the backdrop black: Keep your subject bright. Allow light to fall off to the background.
2. Setup your lighting
For best results when looking to capture a black background for your miniature pictures, your lighting setup is essential! Taking pictures that look great is all about lighting.
You can use any light around your house for miniature photography. But, to make things easier, it’ll be best to use dedicated studio lights, such as LED ring lights setup near your subject.
You’ll want to do is setup your light source directly in front of your miniature. This is especially important for capturing the darkest, blackest backgrounds in your photos. The idea here is to light up only your miniature, while avoiding or reducing the amount of light hitting the backdrop you’re using. Another tip for helping you with this is to move your model as far away from the background as possible (closer to both your camera and light source). Here you’re taking advantage of “light fall off” (as mentioned earlier).

Now some photographers suggest using a flash that lights up the subject or object in an intense exposure. With automatic settings on most cameras, the intensity of a flash can darken and hide the background, leaving the backdrop in complete darkness with little or no detail, e.g., an infinite black background. Personally, I do not recommend using a camera flash when taking photos of my miniatures, because the light source is too harsh and tends to washout colors and contrast.
3. Adjust your camera settings (use manual mode)
How you adjust your camera settings will determine whether your black background comes out well, or ends up in the digital waste bin. For this, you should set your camera in manual mode. While on a tripod, learn how manually changing shutter speed, ISO, and aperture, e.g., the exposure triangle, will affect the overall look of your images.
If you’re using a smartphone or dedicated camera, take a few test shots of your miniature. You should have your camera attached to a tripod to avoid camera shake and blurry images. Experiment and play. Adjust your camera shutter speed, ISO, and aperture settings until you create images with a black background without grain or noise. You can see more details of how to do this below for smartphones and cameras.
RELATED: SMARTPHONE VS CAMERA—WHAT IS BETTER FOR MINIATURE PHOTOGRAPHY?
For most cameras, I recommend playing with two options for photographing a true black background for miniatures. First, experiment with ISO settings between 100-1600 depending on the strength of your light source and the sensitivity of your camera’s sensor. Note that professional level cameras will let you use higher ISO settings for any given situation with less grain or noise.
Second, try shutter speeds from 1/30 of a second to as long as 30 seconds using different aperture sizes until you get the desired level of darkness. I recommend trying aperture sizes between f/8 to f/16 to achieve sufficient depth of field (DoF) to keep your model entirely in focus.
With manual model, you’ll be rewarded with a systematic and patient approach. Take lots of test shots, adjusting each setting as you go until you find your desired level of blackness.
Learn more about DoF and how to use focus-stacking to help you take sharper pictures of your miniatures.
Setup Your Miniatures to Take Advantage of “Light Fall Off”
A camera can only record a limited range of light or in technical terms: exposure. Exposure is the measure of how much light the camera’s image sensor is exposed to during a shot.
To photograph black backgrounds with miniatures, start with understanding where all the potential light comes from that illuminates your model. For most, this would be the light source and the ambient lighting in your room. Using a light box and studio lighting placed in front of your subject can help you control light sources.

When setting up your miniatures, think about what kind of comparative amount of light (or lack thereof) exists on your backdrop. Because the strength of light intensity drops exponentially with distance, you will have less and less light from your backdrop (darker) if you place the backdrop farther from your miniature.

Summary: Consider the subject-to-backdrop distance for photographing black backgrounds.
How to Photograph Black Backgrounds (iPhone Smartphone)
Let’s start with photographing a miniature with a black background with an iPhone smartphone camera.

In this case, you may not have access to conventional manual mode settings unless you download an app. The good news is that there is an awesome trick I use with the native camera app in my iPhone! No manual mode settings needed! Here’s what you do.

1. Setup your miniature with a dark or black backdrop

Place your model where you want it within the image frame. Using a light source, any you like, place it as close to the model as possible. The best location for your light for this kind of photography style is directly in front of your miniature, i.e., flat lighting style.

2. Adjust your light intensity and location
An LED ring light is the easiest to set up, because you can photograph your models through the middle of the light ring. Operate your iPhone (or other smartphone, e.g., Android) camera as you would normally. Compose your photo, etc.

3. Use the “drag and slide” iPhone camera feature to darken the backdrop to black
Then, comes the easy and fun part! With your iPhone camera live screen, to darken the backdrop to a pure black background, press the screen–touching the area you want in-focus to activate the “AE/AF lock” function–then, hold and drag the slider down.

Take a few photos and adjust your exposure until you’re happy with your image.

4. Edit your image in the smartphone
Most of you already know how to use your native photo editing apps in your smartphone. When I’m done taking my picture, the first thing I’ll do to edit the photo is to use the crop function. In this case, I’ll crop and compose as close to the miniature as possible. Filling the photo frame with the subject (less margins) looks best in my opinion.

You can play with color temperature, correct white balance, and all the other editing bells and whistles as you please. You can export to Photoshop, or other great (free) apps like Google Snapseed, if you prefer.

How to Photograph Black Backgrounds (DSLR or Mirrorless Camera)
Photographing miniatures with a regular camera will generally yield higher quality results, regarding contrast, color, and sharpness. But, it does take a bit more technical skill and thoughtfulness to produce professional results with a normal camera, as compared with a smartphone.
Here’s how I do it.
RELATED: MACRO PHOTOGRAPHY FOR MINIATURES AND MODELS (SIMPLE TIPS)
1. Setup your light source and miniature with a dark backdrop
Place your miniature model where you want it in the frame. With a light source, any kind that you like, place it as close to the model as possible. The best place for producing a pure black background with your light source is to use a flat light style, e.g., frontal, diffuse illumination.

An LED ring light, as mentioned above, is a perfect choice, because they are so easy to set up with your camera and tripod. All you have to do is shoot through the ring center.
2. Compose your subject within the frame
Line up your miniature subject and compose it within the image frame. Use manual or auto-focus to make sure the parts of the model you want sharp are actually, sharp. You may need to consider focus-stacking if your model is too large, or if you’re photographing a lot of models at the same time, e.g., Warhammer 40k Space Marine unit, or Imperial Knight.

3. Adjust the camera aperture, ISO, and shutter speed for correct exposure
Use a simple workflow to find the proper exposure with your manual mode camera settings. If your camera has a “live-view function” turn it on so you can see how your manual setting changes affect the picture in real-time.

Start with an aperture of f/8 or more for a good depth-of-field (DoF). Then, set your ISO as low as possible. The ideal ISO is 100, which produces zero noise or grain in photographs. For this guide, however, I set my ISO to 800 so the photos in this article would show up bright enough for you to see. Finally, slow down your shutter speed until your image appears how you like it with a dark, pure black background.
If you’re have difficulty after changing these exposure triangle settings, and find your image too dark or bright, you may need to change your light source strength, distance from the miniature, or aperture setting.

Take a lot of photos with different settings until you get the hang of what you think looks good. You can review your photos in editing software and select the best images later.
4. Edit your photos for a darker, pure black background
The advantage of using a camera for photographing miniatures is the quality and resolution of the digital image files you capture. Using photo editing software, like Lightroom or Photoshop, you can enhance the contrast of your miniature photos.

Using brush tools like “clone” or “heal”, you can remove or delete dust particles and other debris that show up in the black backdrop. If you’ve captured your photos well with the proper manual settings above, you shouldn’t have to do much editing to get your backdrops to a pure black tone.
Here is a comparison of what a photo captured on a smartphone looks like compared with an image from a camera. Both images underwent simple editing for color and contrast. What do you think?

Other Helpful Photography Tips for Miniatures
The key to getting that perfect, crisp and clear look of your miniatures in front of pure darkness is taking time out to edit what you don’t want distracting around them first! Take these few tips into consideration if you’re looking for some ideas when going through this process yourself from start-to-finish:
- Choose a solid black background: When it comes to taking pictures of miniatures, you want to take your time in choosing the backdrop for them. You don’t want a busy or distracting patterned black backdrop. For best results, use a solid black color with a matte finish.
- Fill your frame with your subject by cropping: Cropping is an important step in finalizing a miniature photo. If you take the time to edit and crop unnecessary space around your subject matter, e.g., the painted mini, your pictures will look a lot better and more interesting.
- Compose your photo, carefully: You should take a moment to compose your subject in the frame before taking the picture. This will help keep any unwanted items from showing up in the final image. There various ways to compose a miniature: you can center the subject, place it to the side using the rule-of-thirds, or use layers within a diorama to engage your viewer.
Recommended Backdrops for Miniature Photography
- Black Velvet Fabric Photography Backdrop
- White Photography Backdrop
- Double-Sided (Matte or Gloss) Black and White Photo Backgrounds
RELATED: BLACK OR WHITE BACKGROUNDS FOR BETTER MINIATURE PHOTOS?
Conclusion
In miniature photography, the black background is a great way to create drama and mood in an image. From a technical standpoint, photographing a pure black backdrop is elusive until you know how to use light to your advantage.
I hope the tips and tricks in this article help you achieve a true black background in your miniature photos. With practice, you’ll learn how to photograph your miniatures without thinking about how to do it. Check out these photography articles for more helpful tips and tutorials about photographing miniatures and more!
Happy miniature photography!
Are you photographing miniatures for social media? Did you find this article helpful? Let us know! Leave a comment.
Enjoying Your Visit? Join Tangible Day
Free newsletter with monthly updates (no spam)


Tangible Day on YouTube (Miniatures and More!)

By Andrew M. Tan, PhD
Andrew is a commissioned miniature painter with more than 15 years of experience painting tabletop miniatures, photographing models, and testing hobby tools in real-world use. Read his full bio.