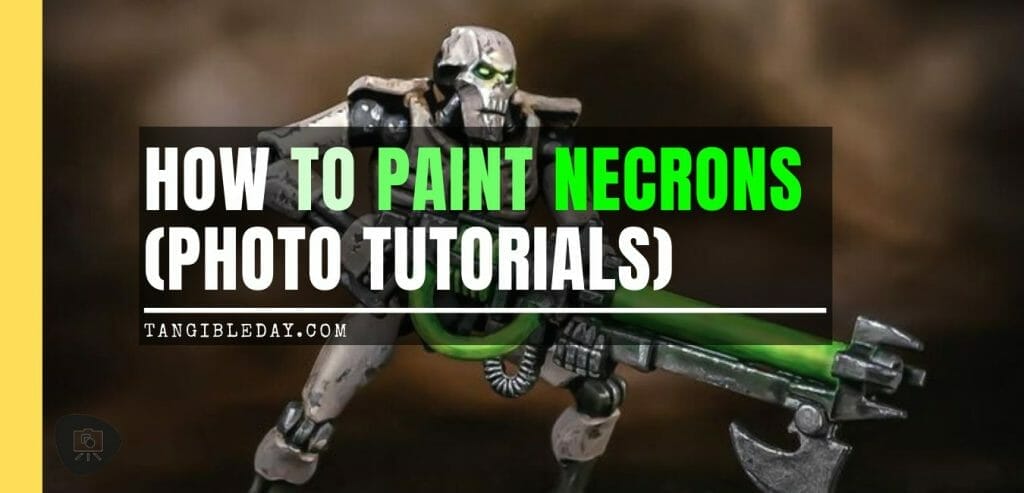
How do you paint Necrons? Necrons are a science fictional race of aliens that you can play in the tabletop miniatures game in the Games Workshop Warhammer 40,000 Universe. The Necron line of miniatures are unique and highly-detailed sculpts that come in plastic kits. As with all Games Workshop models, Necron kits come with easy instructions for assembly. And, despite the intricate complexity of the models, you can use simple techniques and methods to paint your Necrons.
In this article, long-time friend and fellow miniature painter, Eric Festa shares his photo tutorials for how he paints Necron miniatures (see more of his incredible work @Col.Festus). As you’ll see, his incredibly unique style and approach are simple, but very effective. Better yet, his method is approachable for every painter of any skill level. For the most part, you’ll see that Eric mainly uses Citadel paints and supplies, but he has also branched out into using other hobby paints and mediums.
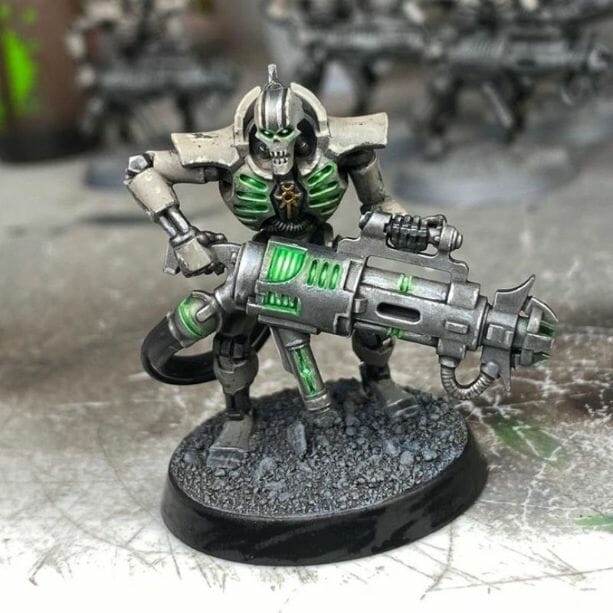
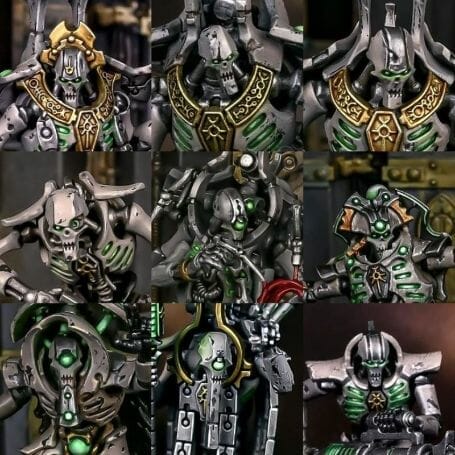
Let’s whet our appetite with a few finished painted Necrons
You’ll notice that the stylized motif of these painted Necrons follows the “grimdark” or “blanchitsu” miniature painting style with a bit of a brighter, unique spin.
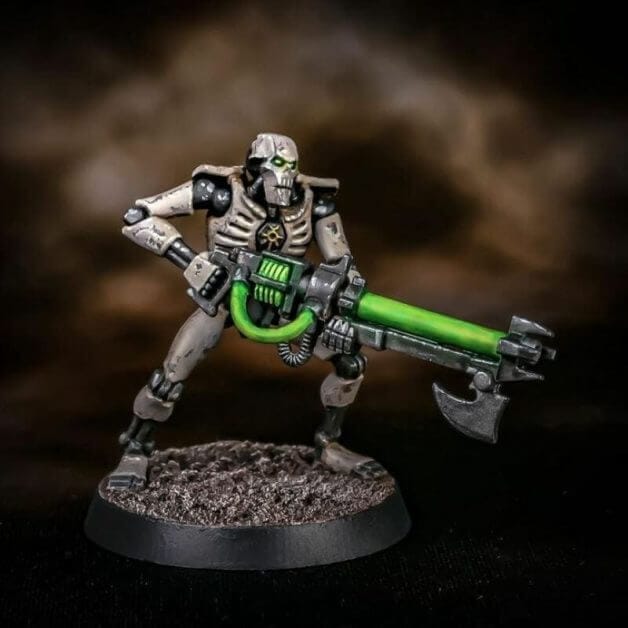
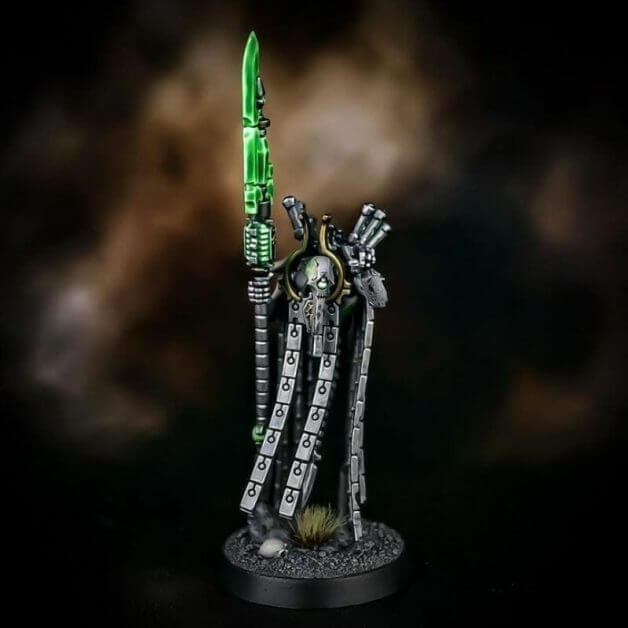
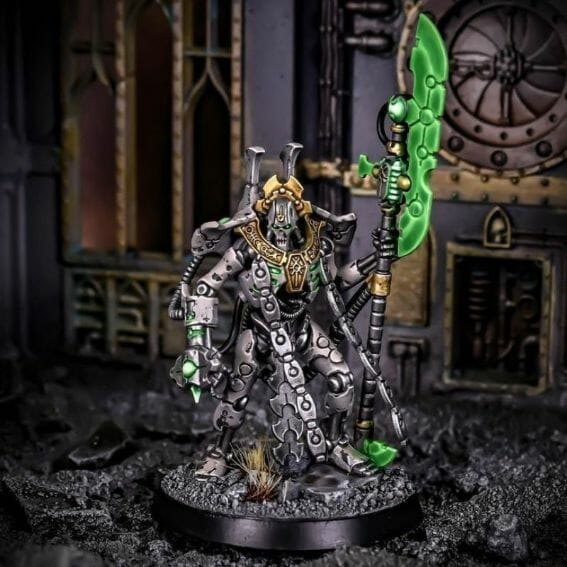
Continue reading to see how Eric Festa painted these incredible-looking Necron models!
How to paint simple Necron bases?
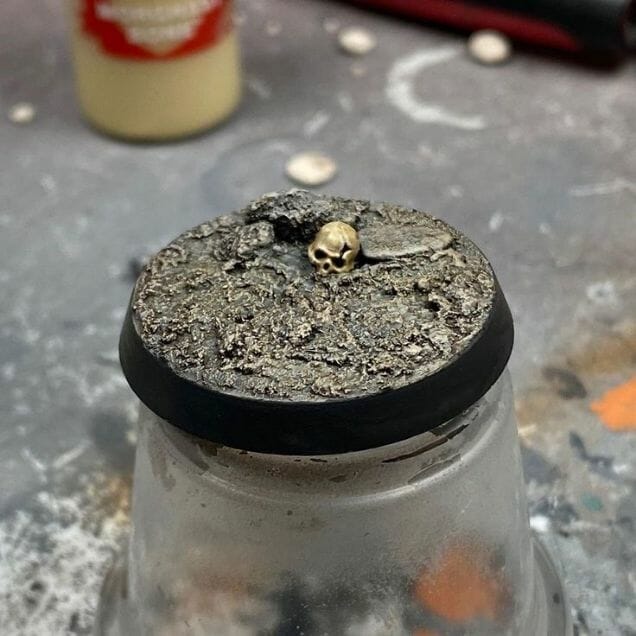
Eric Festa uses a simple approach for creating the bases for his Necron army. This is important because speed is a hallmark of Eric’s method. Simple, fast, effective. If you’re wondering what paintbrush Eric uses most of the time for painting minis, it’s the venerated Winsor & Newton Series 7 (pointed round size #1).
Here are 5 simple steps for how to paint a Necron 40k base:
1. Base with Astrogranite (Citadel Technical Paint)
2. Drybrush with Rakarth Flesh
3. Drybrush with Screaming Skull
4. Wash with Agrax Earthshade
5. Rim with Black
For the Citadel technical paint, I’ve discovered that you can use alternative basing products that may be less expensive (but a tad bit more work). You can also see a review of some of the favorite Citadel shades and washes here.
How to paint Necron armor?
The approach for painting Necron armor is a combination of simple, easy methods. Once Eric Festa established this workflow, he carried it through the entire Necron army. As you can see, this gives his Necron army an overall consistent “look”.
To start the paint job, Eric prefers to primer with black primer (which is the best color primer for painting fast). More about primers for painting miniatures here. For some of these techniques, an airbrush was used for spraying even, thin coats of paint over the models. You can learn more about airbrushes for painting miniatures and check out the reviews of the best 10 airbrushes. Eric uses an Iwata HP-C airbrush for his miniature painting.
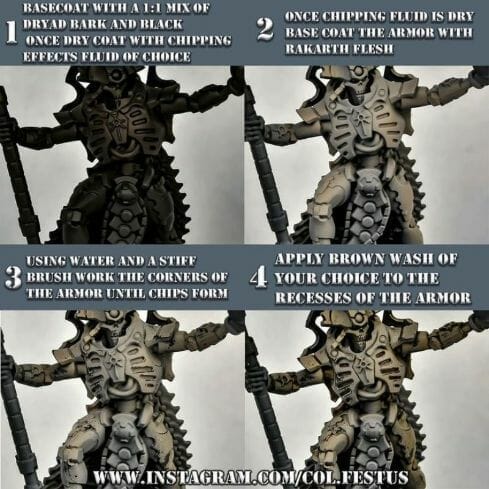
Here are the 4 steps for how to paint the base Necron armor with chipping effects:
- The basecoat is a 1:1 mix of Dryad Bark and Black paint, and use a chipping medium (like AK Interactive chipping medium) over the entire surface and let it dry
- Basecoat the armor with Rakarth Flesh (an airbrush helps)
- Using water and stiff brush, work the corners and edges of the armor to form “chip” and “dings” in the surface
- Apply a brown wash (any choice) to the recesses of the armor
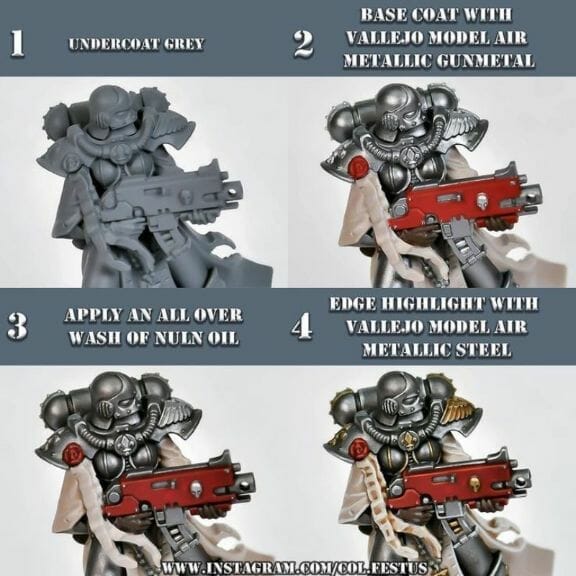
Here are the 4 steps for the steel aspects of the model (modified from a formulae Eric uses for painting his Sisters of Battle miniatures):
- Start with a gray color on model elements you want to paint steel
- Basecoat with Vallejo Model Air Metallic Gunmetal (or any darker-color metallic you prefer)
- Apply a wash over the entire model with Nuln Oil
- Edge highlight with Vallejo Model Air Metallic Steel
Iwata HP-C Airbrush
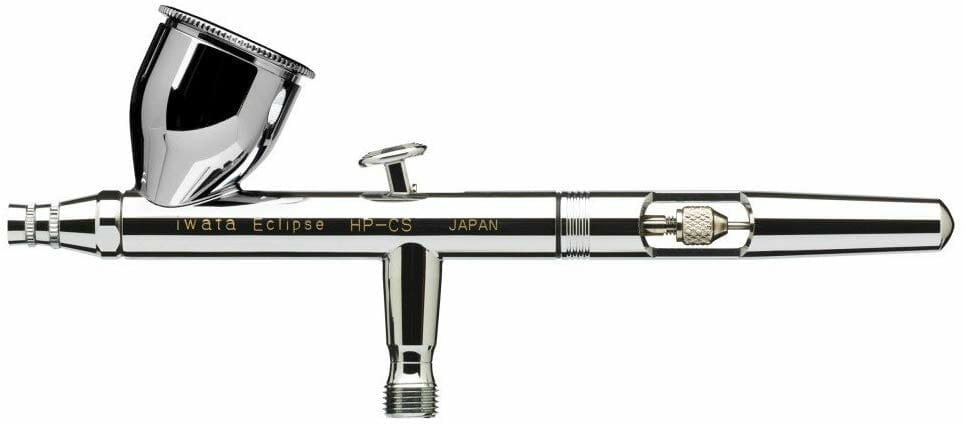
The Iwata HP-C is a Japanese-made, high quality double-action airbrush. The HP-C is one of the most versatile airbrushes you can get for painting miniatures and models. For more details about this airbrush, check out this article or click the link below.
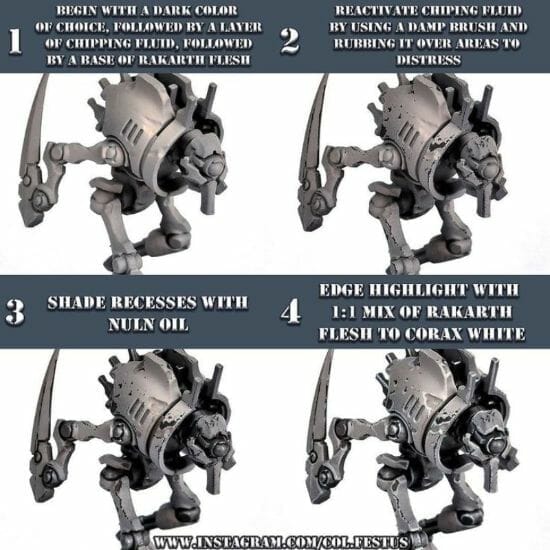
For a different tank on painting the weathered, chipped armor on Necrons, here are 4 other paint steps:
- Start with a dark color, any you prefer, followed by a layer of chipping fluid medium and an overlying base of Rakarth Flesh
- Reactivate the chipping fluid by using a damp brush and rubbing the bristles over areas to remove the thin layer of Rakarth Flesh, e.g., chipped paint effect
- Shade the recesses of the armor on the model with Nuln Oil
- Edge highlight with a 1:1 mix of Rakarth Flesh to Corax White
How to paint gold metallic accents on Warhammer 40k Necrons?
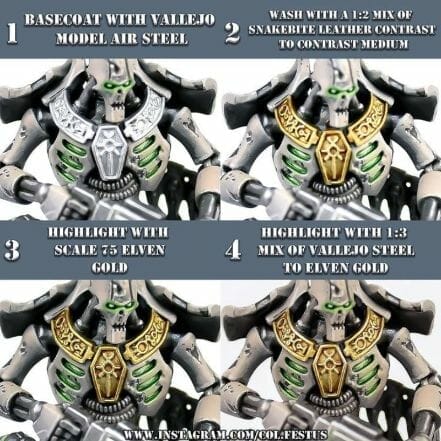
You can see the tiny spurts of warm gold metallic on the Necrons throughout this painted army. The warm hue adds contrasts to the cooler color tones on the model. But, you’ll notice that the gold doesn’t overwhelm the piece, and only accents key parts of the model. Gold bring special attention the face and head, ringing the neck, some aspects of the weaponry.
Here are the steps for how to paint metallic gold in this Necron color scheme:
- Basecoat the areas you want gold with Vallejo Model Air Steel
- Wash the surface with a 1:2 mix of Snakebite Leather Contrast to Contrast Medium
- Highlight with Scale 75 Elven Gold Metallic paint (or use a similar gold metallic)
- Highlight with 1:3 mix of Vallejo Steel to Elven Gold Metallic
How to paint the green lenses on Necrons?
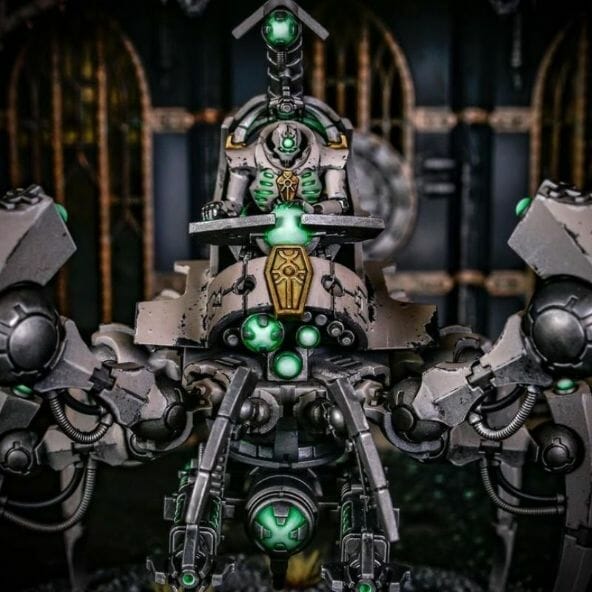
To give Necrons their hallmark evil-robotic aesthetic, you may want to consider painting their eyes, visors, and lenses with a mysterious glowy look. In this Necron paint scheme, these elements are a enigmatic green color.
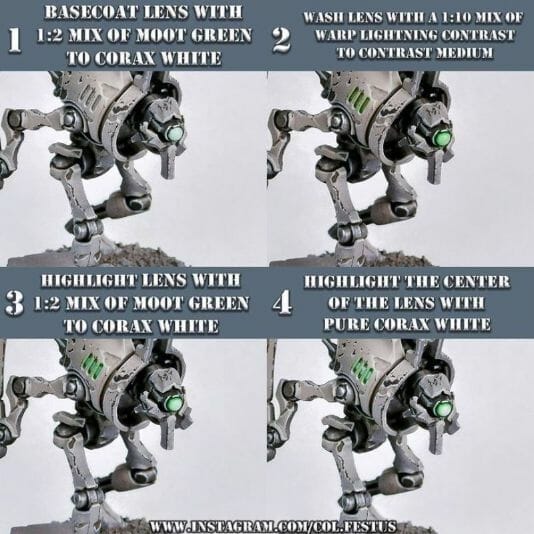
Here are 4 easy steps for how to paint the green glowy effects on Necron eyes and lenses:
- Basecoat the lens with a 1:2 mixture of Moot Green to Corax White
- Apply a wash/shade with a 1:10 mix of Warp Lightning Contrast to Contrast Medium
- Highlight the lens with a 1:2 mix of Moot Green to Corax White (same as step #1)
- Highlight the center of the lens with pure Corax White paint
Note that you can use these techniques with different colors for your own models.
How to paint Necron weapons?

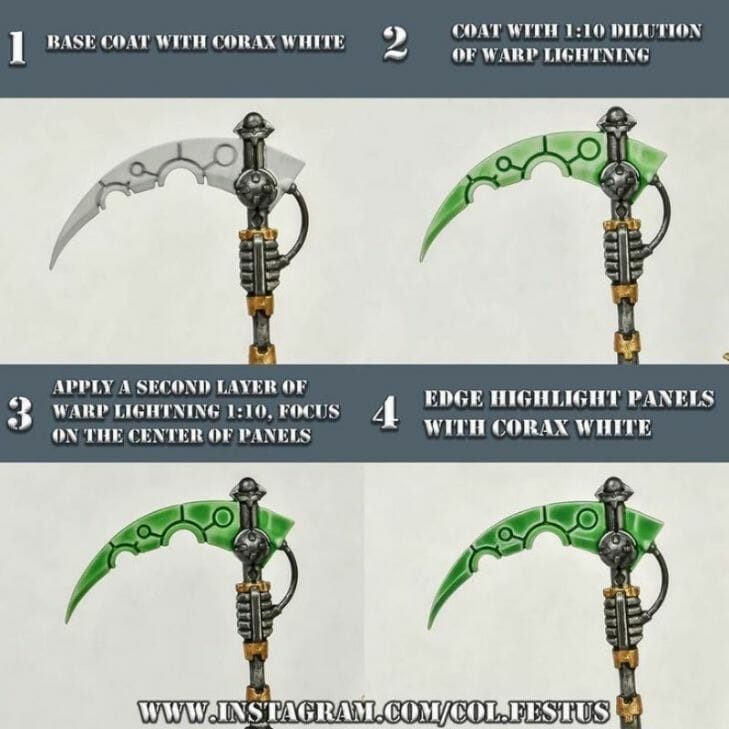
The bladed weapons on Necrons are a major eye-turner, especially for HQ models. How are these weapons painted? Eric uses a simple approach that is quick and easy to do. Check it out!
Here are the 4-steps for painting Necron weapons:
- Basecoat the weapon with Corax White
- Coat the entire weapon with a 1:10 dilution of Warp Lighting Contrast paint to Contrast Medium
- Apply a second layer of Warp Lighting (1:10 dilution in step #2), allow some of the pigment to pool in the center of each panel (see image below)
- Edge highlight panels with Corax White
How to paint glowing plasma weapon effects?
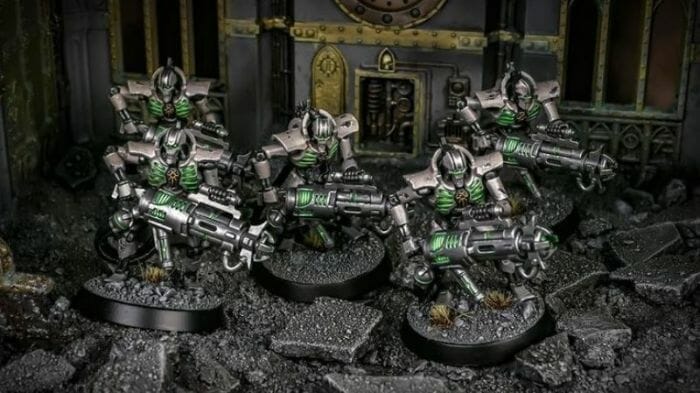
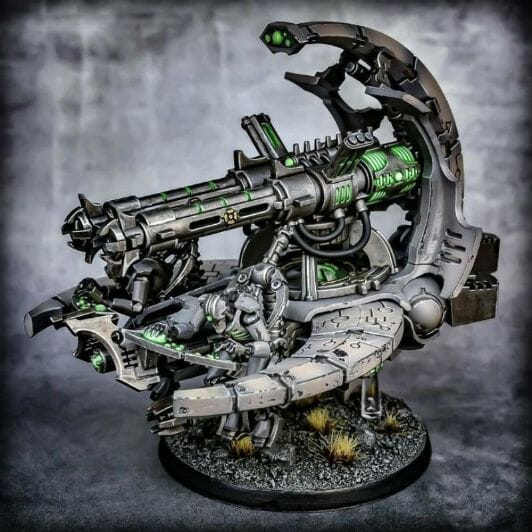
There are many ways to paint miniatures with the object source lighting (OSL) glowing effect (here’s another way). The method shown below for the green plasma effect on Necron weapons is the simplest method I’ve seen with the best overall appearance.
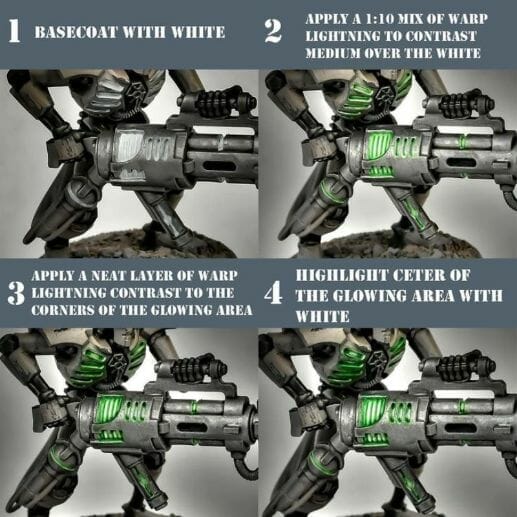
Here are 4 simple steps for creating the glowing plasma effects on Necron weapons:
- Basecoat the source of the weapon effect with white
- Apply a 1:10 mix of Warp Lightning to Contrast Medium over the white painted area
- Apply a neat layer of Warp Lightning Contrast to the corners of the glowing area on the weapon
- Highlight the center of the glowing area with white (the raised curvature, see image below)
Conclusion
I hope you enjoyed this brief tutorial photo series provided by Eric Festa. For more tutorials and how-to examples of his fantastic work painting Warhammer 40k and other miniatures, including terrain, check out his Instagram page @Col.Festus. If you have any questions, you can leave a comment on his page or below.
Thanks for reading!

Tangible Day on YouTube (Miniatures and More!)
