

Published September 7, 2026. Last updated October 5, 2026. By Andrew M. Tan.
White paint has a habit of showing every brushstroke. Straight from the pot, it can cover details with a thick, clumpy layer. Add too much water and the paint may move more easily while leaving an uneven, streaky surface behind. I have spent enough time chasing those marks around a shoulder pad to know how quickly a simple basecoat can become the whole evening.
For a smooth white basecoat by brush, I mix 1 part opaque white hobby paint with 1 part Golden High Flow Acrylic Titanium White, add no water, and apply 2–3 thin coats over a smooth light primer. I let each layer dry fully before touching it again.
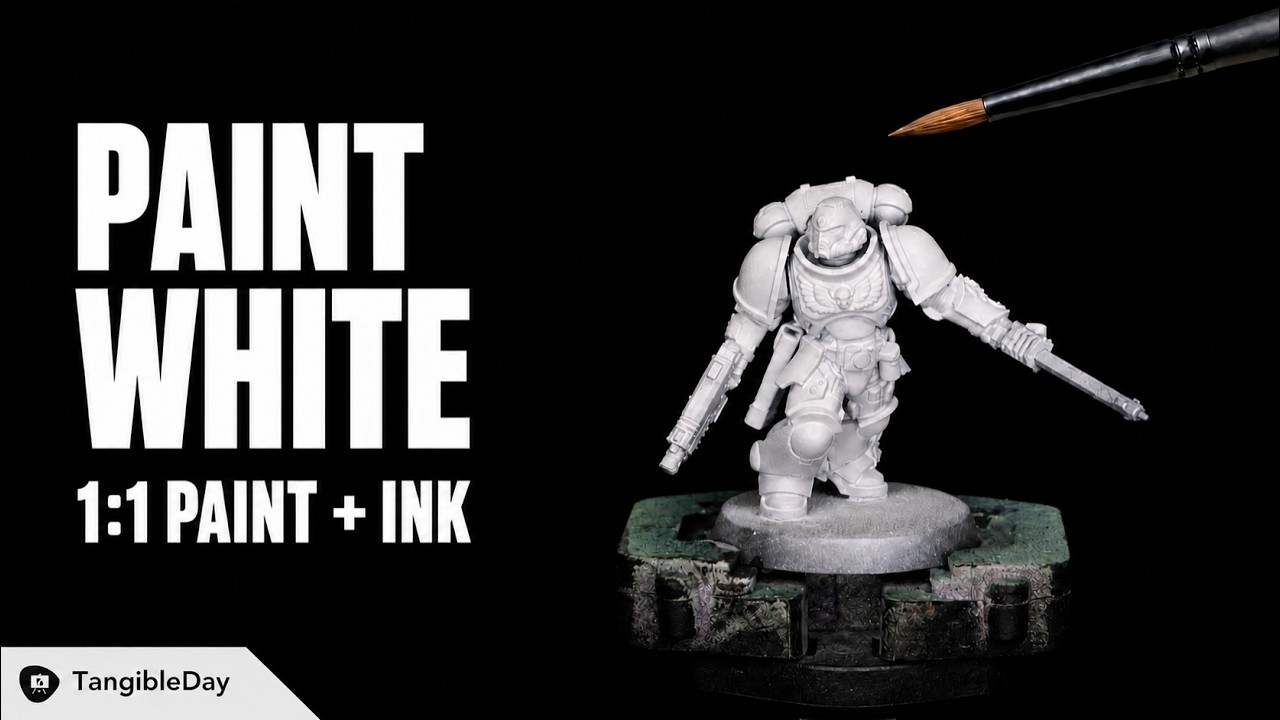
In this tutorial, I’ll show you the plastic card tests that led me to this 1:1 mix, then walk through the same method on a Warhammer 40K Space Marine.
Key takeaways
- Begin with a smooth light-gray, ivory, or white primer whenever possible.
- Mix equal parts opaque white hobby paint and Golden High Flow Acrylic Titanium White.
- Skip the water for this particular mixture.
- Apply 2–3 thin coats and allow every coat to dry completely.
What you need for this white basecoat method
Affiliate note: Some links below are affiliate links and help support Tangible Day. The method itself only needs a light primer, two white paints, a palette, and an ordinary basecoating brush.
| Material | What I used in the video | Why it matters |
|---|---|---|
| Miniature | Warhammer 40K Space Marine | Broad armor panels make streaks and surface texture easy to see. |
| Primer | Light-gray Vallejo Surface Primer | An even, bright foundation shortens the path to pure white. |
| Opaque white paint | Citadel Ceramite White | This provides the body and coverage in the demonstrated mix. |
| High-flow white acrylic | Golden High Flow Acrylic Titanium White | Its thin, free-flowing consistency helps the thicker hobby paint move across the surface. |
| Brush | An ordinary basecoating brush | You do not need an expensive detail brush for this job. |
| Palette | A dry ceramic palette in the demonstration; The Palette or a Redgrass Everlasting Wet Palette are optional alternatives | A wet palette should also work, although it was harder to show clearly on camera. |
| Optional holder | Golden Maple miniature holder; a Citadel painting handle is an alternative | A holder keeps both hands available and makes the model easier to turn. |
The video uses Ceramite White because that was the opaque white on my desk. Treat the 1:1 ratio as a starting point when using another brand, since different paints have different consistencies. Golden identifies the second product as High Flow Acrylic Titanium White. I call it “white ink” in the video because it behaves like one, although it is technically a high-flow acrylic paint.
Product availability can change. If the primary Golden listing is unavailable, check this alternate Amazon listing for Golden High Flow Titanium White or the Titanium White listing at Blick. You can also experiment with Daler-Rowney Acrylic White Ink, although I did not use it in this demonstration. Test it separately and do not assume that it will behave at the same 1:1 ratio.
Premium brushes are optional here. If you are also building a general painting kit, you can find Golden Maple brushes directly or Golden Maple brushes on Amazon. A Winsor & Newton Series 7 pointed round No. 1 is better reserved for controlled detail work. An ordinary basecoating brush remains the practical choice for covering the armor in this tutorial.
Related: A good primer is the foundation of every clean paint layer. See my Vallejo Surface Primer review and application tips for a closer look at the product used here.
How the four white-paint tests compared
I tested each mixture on a dark card before taking it to the miniature. The card made the brush marks obvious and saved the Space Marine from becoming the experiment. Here is what happened in this particular test.
| Method | Flow from the brush | Coverage and surface | My takeaway |
|---|---|---|---|
| Opaque white straight from the pot | Slow and heavy | Thick, clumpy, and likely to obscure fine detail | Too thick for a smooth basecoat |
| White paint thinned with water | Easier to move | Streaky and uneven through several coats in my test | More brushing did not solve the surface problem |
| White paint mixed 1:1 with ivory | Improved | Better coverage with an off-white color and visible brush marks | Useful as a lighter undercoat, though it did not give me the pure white finish I wanted |
| White paint mixed 1:1 with Golden High Flow Titanium White | Smooth and controllable | Thin, consistent layers with the best balance of flow and coverage in the demonstration | My preferred starting mix for a pure white basecoat by brush |


Step 1. Start with a smooth light primer
Inspect the primer before you mix any paint. The surface should look even, feel dry, and preserve the sculpted edges, vents, rivets, and armor panels. A rough or heavy primer coat will remain visible through every layer that follows.
I used Vallejo Surface Primer through an airbrush for the demonstration. You can also apply primer with a regular brush. My brush-on primer guide for miniatures explains that process in 3 steps.

Step 2. Place your opaque white paint on the palette
Put a small amount of opaque white hobby paint on a clean palette. You only need enough for the area you can cover before the mixture begins to dry. A regular basecoating brush is fine. Save the expensive point for the details that deserve it.
The opaque paint supplies the coverage. Its thickness is also the problem we are about to solve.
Step 3. Add an equal amount of high-flow white acrylic
Add roughly the same volume of Golden High Flow Acrylic Titanium White beside the opaque hobby paint. The ratio demonstrated in the video is 1:1.
Golden describes High Flow Acrylics as ultra-thin acrylic paints with an ink-like consistency. That makes Titanium White a useful partner for the much thicker hobby white in this recipe.

Step 4. Mix the two whites without adding water
Blend the two paints until the mixture looks uniform. I use the back of my brush in the video, which is hardly glamorous and works perfectly well.
Do not add water to this demonstrated recipe. The high-flow acrylic is already changing how the opaque paint moves. When you try another brand of white, mix a small test batch first and adjust from what you see on the card.

Step 5. Test the mixture before touching the miniature
Brush one coat onto a dark or neutral test surface. Use even strokes and let the paint settle. The first layer may remain translucent, especially over a dark card. You are checking the surface quality at this stage. Look for controlled brush marks, a thin film, and no heavy ridges.
My 1:1 mixture covered less than a thick coat straight from the pot. It also stayed much smoother, which allowed the later coats to build coverage without burying detail.

Step 6. Apply one thin coat with a basecoating brush
Load the brush and spread the mixture across the armor in smooth passes. Cover the surface without scrubbing the same area as it begins to set. Move around the model and watch for pooling near panel lines, under shoulder pads, and around the chest ornament.
The mixture should leave the brush easily and form a thin coat. A small amount of primer showing through is normal on the first pass.

Step 7. Leave the coat alone until it is dry
Set the miniature down. Let the layer dry fully before you return with more paint. A basic hair dryer on a low, cool setting can shorten the wait if you keep it moving and avoid heating the model.
This pause does more for the finish than another dozen nervous brushstrokes. Painting asks for attention, and part of that attention is knowing when the surface needs your hand and when it needs time.
Step 8. Build the white with 2 or 3 thin coats
Apply a second coat using the same method. Add a third where the primer still shows through or the value remains uneven. A light undercoat reaches a clean white faster than a dark one, which is easy to see in the side-by-side card test.

Stop when the dry surface looks even and the sculpted detail remains sharp. Fresh acrylic can appear glossy or slightly uneven while wet, so be patient and only judge the finish after it has settled and dried.


Do you need an airbrush to paint white miniatures smoothly?
No. An airbrush can produce a very smooth coat quickly, and it is a good option for armies or large surfaces. This tutorial is for when you’re using an ordinary brush. The 1:1 mixture gave me a smooth, detail-preserving basecoat without special brushwork or expensive tools.
If you want to use the same Golden white through an airbrush, see how I use it while airbrushing zenithal highlights.
Can you use another brand of white paint?
Yes, with a test. Different whites vary in opacity (e.g., their ability to provide coverage) and consistency. Begin at 1:1, make a small card swatch or use a model you don’t really care about, and adjust only after the test dries. The useful result is a mixture that leaves the brush smoothly, holds enough coverage to build in a few coats, and preserves the miniature’s details and textures. I’ve also tried this approach with Vallejo and Army Painter paints, as well as Daler-Rowney inks.
Where this method fits in a complete paint job
This process creates a smooth white basecoat. You can continue with recess shading, panel lining, glazing, edge highlights, weathering, or the color scheme your model needs. If basecoating itself still feels uncertain, my 7-step guide to smooth miniature basecoats covers brush loading, paint consistency, drying, and coverage in more detail.
When you are ready to move past the base color, compare my 8 miniature-paint blending techniques. Those methods begin where this smooth white surface leaves off.
What white-paint mixture works at your hobby desk? Share the paint, ratio, and primer color in the comments so other painters can compare notes.
White becomes manageable when you stop asking one coat to do everything. Begin with an even primer and adjust the paint until it flows. Then wait for each thin layer to dry. The method is simple. Patience is part of the technique.
Until next time, happy miniature painting!
Enjoying your visit? Join Tangible Day!
Leave a comment, or follow Tangible Day.



Tangible Day on YouTube (Miniatures and More!)

Affiliate disclosure: I am a participant in the affiliate programs for Amazon Services LLC Associates and other vendors. These programs are designed to provide a means for me to earn revenue by linking to affiliated sites.
By Andrew M. Tan
Andrew is a commissioned miniature painter with more than 20 years of hands-on experience painting tabletop miniatures, photographing models, and testing hobby tools in real-world use. Read his full bio.