
Are you a miniature painter in need of some creativity? Then look no further than photography, an art form that uses light as the primary medium. Taking photos is about more than just the technical components; it’s about expressing yourself and conveying your own unique story. Gregory Culley is a master of grimdark photography and his methods are inspiring many aspiring miniature painters, artists, and photographers.
In this article, Gregory Culley generously shares his method and talent in the art of grimdark photography. This style of photography focuses on dark and moody settings, usually with a menacing ambiance or atmosphere.

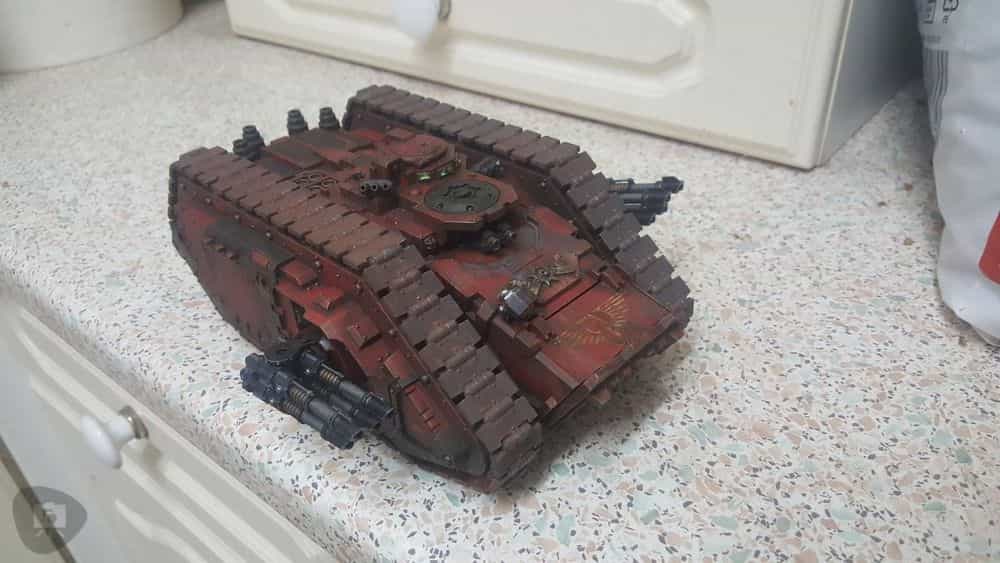
The Art of Miniature Photography
From our vantage point, Gregory’s methods can be used to capture scenes from historical settings, horror movies, and also real life events. Of course, the focus of his work has been with Warhammer 40K tabletop miniatures which he brings to life with his photography.
Gregory Culley’s work is notable for its use of natural light and shadows, which help create the haunting atmosphere that defines grimdark photography.
RELATED: WHAT DOES GRIMDARK MEAN?
He also uses a lot of atmospheric smoke and fog to give each scene an ethereal quality. Through careful experimentation with shutter speed, exposure time, and f-stop, he’s able to create beautiful images with some wild effects.

For those of you that are new to photography or are just starting out, Gregory Culley also offers helpful tips and tricks on how to get started and improve your skills. He emphasizes the importance of practice and experimentation, as well as proper lighting techniques.
Read on to learn more directly from Gregory about his methods and madness, as well as some of his top tips for becoming a master at grimdark photography!
Influences and Development
Thank you for stopping by to learn more about my work. I am Gregory Culley, a miniature painter, artist and photographer living in the United Kingdom. As a youngster, I was mesmerized by the captivating reruns of Captain Scarlet on television. Then my interest developed further with The War of the Worlds—both the 1953 film and Jeff Wayne’s musical version.

Out of these two works, it was undeniably The War Of The Worlds that had made an immense impact in me emotionally; especially when I discovered that all those miniature cities and machines were actually being lit up to look real! At such young age, this realization left me astounded- thus planting the seed for what would eventually become my passion later in life.
The Draw of Space Ships
My life transformed when I watched Star Wars (Episodes IV, V and VI) at Christmas for the first time. Again, I was marveled by the realism of its universe and ILM’s revolutionary work.

This encouraged me to explore my creativity through drawing all these images that were stuck in my mind; however, it was evident that my ambition went beyond what I could achieve with just talent alone. Eventually this caused me to lose interest slowly but surely.

As I entered my teenage years, I grew to be a great admirer of Star Trek (especially the ships and special effects).
My painting and drawing skills were still in need of improvement, however, my father started teaching me how to use his SLR camera system. Although he wouldn’t allow me to actually take any photos using it yet, the knowledge was slowly seeping into my mind.
A Contagious Disease Called “Miniature Painting”
When I was 14 or 15, my older brother had a breathtaking Blood Angels army from 3rd Edition. He is an excellent painter and illustrator and his work made the models look absolutely magnificent, so naturally it drew me in.

To join this hobby of miniatures painting myself, I saved up money to purchase some second-hand Space Marines from car boot sales – not having heard of thinning paints before – I haphazardly applied thick coats of Humbrol paint on them.
I was quite pleased with myself, until I compared my accomplishments to those of my brother’s painted model army. This realization made me realize that there was much more work ahead of me and so began a long path forward on which I could continue to improve.
A Story About Dyslexia
I have dyslexia, which means I can have trouble with reading and writing. I found myself in a unique position, as my dyslexia made it hard for me to study other people’s artwork or tutorials, but also gave me the freedom to just experiment and find my own way of doing things.
(Writing this article was a challenge in itself, and I had some help.)
During my secondary school years, I began to develop a strong passion for bringing stories to life through writing. However, my dyslexia and unreadable handwriting became major obstacles that prevented me from properly expressing myself on paper.
This made it nearly impossible for me to bring the scenes playing in my mind out into the world! (Trust me – this is extra difficult without spell check).
How Did I Get into Photography?
As the years flew by, leaving school and college, entering into “adulthood”, I left some of my creative hobbies behind.
That is until one fateful day my housemate purchased a point-and-shoot camera. It immediately sparked something inside me; intrigued by its capabilities and functions, I wasted no time in getting myself Canon Powershot A4000 IS.

That thing was amazing! Everywhere I went it came with me for several years until eventually upgrading to a bridge camera and then finally settling on a secondhand Canon 1000D DSLR although admittedly not very impressive compared to other cameras out there.
I started to become more committed when it came to photography, and on Saturdays I would head down to the public library, where I devoted my time reading up about photography. During the week after work, without access to internet or editing programs, my focus shifted towards getting things right in camera.
This pattern of behavior persisted for many years until a new job opened up for me, and I bought my first home. This stabilized a lot of things, and I was able to get Photoshop, Lightroom and other programs to supplement and expand my photography know-how.
Beginnings in Miniature Photography
After acquiring a new home, computer, internet connection and finally Adobe Lightroom and Photoshop with a full-frame camera in hand, I started taking gigs as an up-and-coming music scene photographer while also building models on the side.

After acquiring my 100mm macro lens, I was eager to put it into action. To test its capabilities, I whipped out my Blood Angels army for some shots – not exactly the most impressive results but still enough to spark a seed of potential that would eventually blossom into something much better in years to come.
Inspired by YouTube, But Learning by Doing
YouTube has been an invaluable resource for me and provides a wealth of knowledge, from documentaries on the art of Industrial Light & Magic (ILM) to mini painting tutorials (which I use merely as guidelines rather than following them verbatim).
Ultimately the vast majority of my learning has come from trial and error. Trying different angles, experimenting with light sources and even using macro photography to capture the details that make all models unique.

At this point, today I’m devoted to crafting miniature models and scenes that embody my creative vision. This is done through precise painting methods, weathering techniques, as well as the assembly of somewhat complex miniature landscapes with careful artificial lighting arrangements.
Applying practical special effects for filming or photography can occasionally be a tricky feat. It almost feels like I need more hands or longer arms! Nonetheless, I’m persistent in giving it my best shot every time (pun intended).
How Do I Paint Miniatures?
Here is my general material list for miniature painting:
- Cheap airbrush for painting large volumes quickly (prime and basecoat)
- A set of good brushes that keep a good point
- A collection of old brushes for dirty work
- Wet and dry palette
- Paint thinners and mediums
- Enamel and oil washes (streaking grimes, etc)
- Typhus Corrosion (Games Workshop product)
- Rust pigments and fixer
- Baby wipes
- PVA glue
With these and a strategic selection of colors you can do almost anything.
Basic Miniature Painting Philosophy
Before painting a model, it’s essential to consider the context and theme of the piece. I won’t delve into every minuscule detail here—this isn’t a comprehensive guide on painting after all—but let me provide an overview: there is much more that goes into pre-painting than simply picking up your brush!

I start by thinking about the model itself and its background and how I can fit it in with a thematic setting.
To begin, I dive into the background of my subject and gather a sense for who they are and what is happening in their world. Then, I look closely at the materials that compose this miniature—metals, ceramics, cloth or flesh?

To help bring it to life realistically on its scale size, I scour images online with an eye out for realistic colors, textures, such as the rust you may see from the undercoats on cars.
I’ll scour anything that can add dimension to craft these miniatures authentically. Fortunately there’s plenty of resources like YouTube where fellow miniaturists share useful tips.
READ MORE: WHAT IS GRIMDARK?
Once you start painting, having someone talking about the same process on YouTube can be immensely helpful. Literally have YouTube running in the background about painting miniatures can help you with your focus, though music can also be a great way to pass the time.
Take your time: Pause every now and then to consider how the mini is progressing and ask yourself if there’s something extra that could add to sell its overall vibe.

Being bold or even tad reckless can be incredibly rewarding; some of my most cherished miniatures were crafted from stepping out of my comfort zone and attempting something new.

Despite moments throughout the process where I thought to myself, “Ahhh no, this isn’t going as planned,” I kept advancing until I saw the whole piece in its entirety.
In the end, it’s all about telling a story with these tiny works of art. That’s what makes it so thrilling.
How Do I Photograph My Painted Miniatures with Authenticity?
Here’s the equipment I use to photograph miniatures:
- Camera – Canon 6D (firmware: Magic Lantern)
- Lenses – Canon 70-200mm f/2.8 usm L, Canon 100mm macro f/2.8 usm, Canon 50mm f/1.4 usm
- Tripod – Tripod, Hama travel with ball head
- Filters – Rotating polarizing filter 52mm thread (fits the 100 and 50mm)
- Lighting – 2x Neewer 640 bi colour LED panels with barn doors and soft boxes with stands; an old LED work light and a UV torchlight
- Special effect equipment, e.g., smoke, flame – Fine grade wire wool, a 9 volt cell, egg whisk, smoke machine, garden spray bottle, fish tank, paper and accelerant
- Miscellaneous – Macro extension tubes
- Editing software – Adobe Lightroom and Photoshop
Creating the image
Before you pick up your equipment and get ready to shoot, take some time to think about what kind of image you would like to capture. I usually brainstorm during the week so that when I have free time on weekends, I can go out and shoot my ideas.

To help spark creativity, it’s helpful to look at reference photos in a similar style or scene that catches your eye. Then deconstruct them by analyzing what works for you and think about why. This will allow you to refine those concepts into creating something unique.

Although not all of your ideas will come to fruition, and you may have days where you can’t seem to generate any great concepts, this is normal. Don’t let it drag down your spirits too much; just start planning for the next idea! This experience can be a wonderful learning opportunity.
Location, location, location
When it comes to creating the perfect image, having an adequate shooting location is essential. Do you have enough space for both setting up and working? Also, can you regulate the amount of light entering your workspace?
Although some are blessed with their own studio spaces, I’m not one of those fortunate individuals – instead my setups and scenes must be constructed in a timely manner within an hour after any children have gone to bed. My preference is to take pictures after dark as this allows me more control over lighting conditions.

Lighting is the key to a successful photo shoot
Before I add lighting to my subjects, I conduct a preliminary mock setup of the scene to identify any potential adjustments that need to be made before bringing in any equipment. This way, I can ensure that my vision will translate well into a 2D image.

While paying close attention to detail and accuracy, I build the scenery accordingly; whether it’s outdoors or on top of a table surface – whatever could help boost its visual impact. I also pay special attention to how shadows may play across the field of view and within the composition of the photo.

Once I’ve settled on an appropriate background, I then focus my attention to lighting by determining what will work best for the scene.

To generate a larger quantity of light, two LED panels on stands come first. The LED work light also provides hard lighting or backlighting for the subject. It also provides some bonus lens flare for an extra boost of drama. If appropriate, UV light helps to bring out more vivid colors in miniatures that are painted with glow-in-the-dark substances.
Camera and lens operations for taking more realistic photos
I have been relying on the 70-200mm with macro focus extension tubes for almost a year now. The reason being that it gives off an appearance of photography taken through a 70-200 lens, thus making my photos look more vibrant and realistic due to compression effects.

Accurate focus is paramount when capturing the perfect shot, and this setup makes it possible. The depth of field can be incredibly restricted while shooting with an optical viewfinder and manual focusing simultaneously – I typically choose to close down my lens aperture between f/4-18 based on what subject matter I’m photographing.

If you really want to make your image look realistic, attention must be paid to the details. Be sure to hide all bases and use scale-appropriate materials in the scene; this includes even small things like water droplet sizes. Doing so will help ensure an immersive experience for viewers of your image.

To bring more depth and authenticity to an image, I prefer creating special effects on set rather than spending hours in Photoshop. It’s much more enjoyable!

However, for those of you who like post-processing , that’s great too. Just make sure to keep it to a minimum, as the goal is to capture the image you want in camera.
Editing and post-processing images
I use Adobe Photoshop and Lightroom for my post-processing and editing work. After a successful photo shoot, I only need to add subtle tweaks to my images. To achieve this, I use Lightroom for delicate adjustments and analog effects such as light leaks or corroded looks in order to make the image pop the way I prefer it.

Photoshop is my go-to software for more intensive edits and special effects though I try to get my images perfect in camera before spending time editing them. This includes combining multiple exposures or making cuts and selective adjustments.
The most important thing is to keep it natural and realistic, as viewers can easily tell when the final product has been heavily touched up during post-processing. If a photo looks too ‘perfect’ then that’s often a sign of extensive editing.
Warning: Trolls and Bullies
Don’t allow yourself to be influenced by others! If someone is giving you a hard time about your work, don’t give them the satisfaction of responding. I learned this lesson myself when somebody insulted my work and I took an unnecessary two-year break rather than powering through. It was not something I should have done.
Rather than letting other people’s opinions stop you from progressing in life, use their words as motivation to keep going forward even harder with more determination and ambition.
Finally, there is no need to put down other photographers; we are all in the process of learning and growing each day. As for me, I have been trying to write about my experiences in photography by utilizing my spare time despite having dyslexia and exhaustion.
Let’s come together as a community and share our stories while providing insight into how to capture amazing shots!
Conclusion
I hope you found Gregory’s advice and insights on miniature photography helpful, and that you now feel inspired and ready to take on the challenge of shooting realistic, innovative (maybe even outlandish) images with your camera!
Whether it’s through manual focusing, scale-appropriate materials, or post-processing edits, there are a variety of ways to create stunning shots. Just remember: don’t be afraid to experiment and take risks for the best results. Have fun and keep shooting!
Thank you for taking the time to read about Gregory’s journey in photography. We wish you the best of luck on your own photographic journey! Keep creating and inspiring! 📷 💪 🤩 🚀 🙌🏼 For more miniature photography inspiration, check out Gregory’s Instagram feed.
Are you a miniature painter, photographer, or interested in getting into the hobby? Let us know in the comments below! Happy mini painting and photo taking! 📸 😊
Enjoying Your Visit? Join Tangible Day
Free newsletter with monthly updates (no spam)


Tangible Day on YouTube (Miniatures and More!)
