
How do you take better miniature photos? Taking great pictures of your miniatures is an important skill as miniature painter and scale modeler. You don’t need expensive equipment or even a dedicated camera to capture professional quality photos of your painted miniatures.
In this article, I share my experience in tabletop miniature photography and show you how to take better pictures of your painted miniatures and models. If you’re a tabletop gamer or a hobbyist who creates dioramas, the basic principles and skills I show you will help you take better pictures and create images that show off your hard work.
Read on for more details about how to take great pictures of your miniatures!
Key Points
- Learn how to operate your camera or smartphone using manual settings
- Understanding how to optimize the variables in the “exposure triangle” will give you the basic foundation for proper brightness, contrast, and color in your miniature photos
- Your skill and vision is much more important than the kind of smartphone, DSLR, or mirrorless camera you use to take miniature photos
How to Take Better Miniature Photos
Let’s start the easiest point to make for taking great miniature photos of your models.
Light is the most important variable for taking better photos of your models. Good photography of any subject, including miniatures, starts and ends with good lighting. If your lighting is bad, then it doesn’t matter how beautiful your subject is, your photos will let you down.
Once you understand how to place your models in good ambient light, then the hard part is over. Seriously. After lighting your models, all you need to do is understand how to adjust the settings of your camera to capture that wonderful lighting.
Your camera equipment, accessories, tripod, photo light box, and other doodads are secondary to good light. I’m repeating myself for a reason! Light makes all the difference in creating amazing photos of any subject, including miniatures and scale models. How you light your model will affect how your camera “sees” the subject.
RELATED: BEST PHOTO LIGHT BOX FOR MINIATURES AND MODELS
Light affects everything in photography.
To leverage your lighting system, e.g., ambient room lighting, ring light, flashes, etc., you will have to experiment and play. Learn to use your camera settings and study how your lights affect your captured final image. Every photographer has an eye for what they like.
READ MORE: FULL LIGHTING GUIDE FOR GREAT MINIATURE PHOTOGRAPHY
6 Tips for How to Take Better Miniature Photos
1. Have a vision
When you approach learning how to take better photos, have a goal in mind. Look at photos of miniatures you admire. Consider what you like about those images and try to replicate it with your lighting and camera equipment.
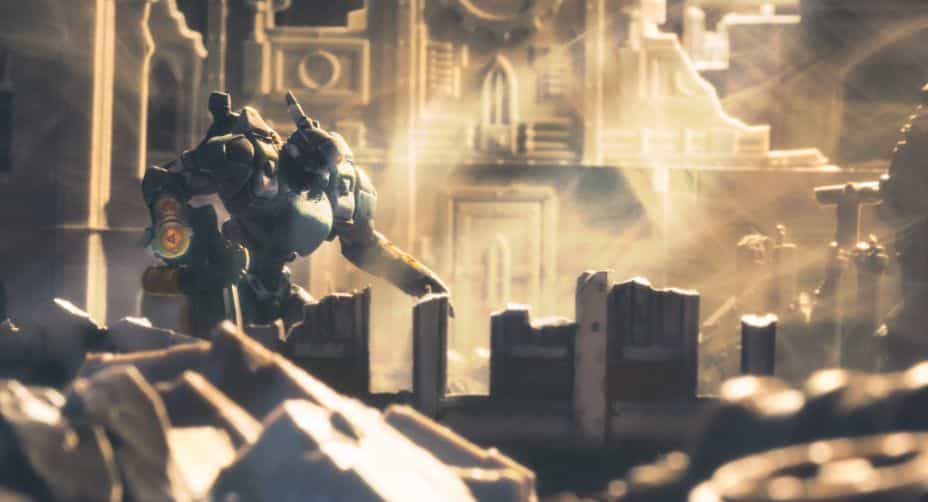
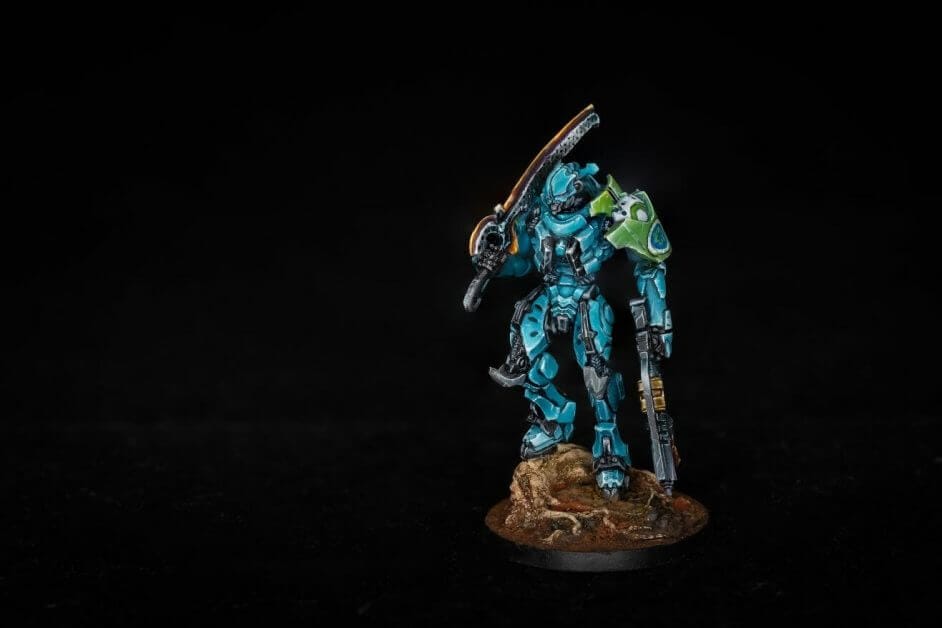
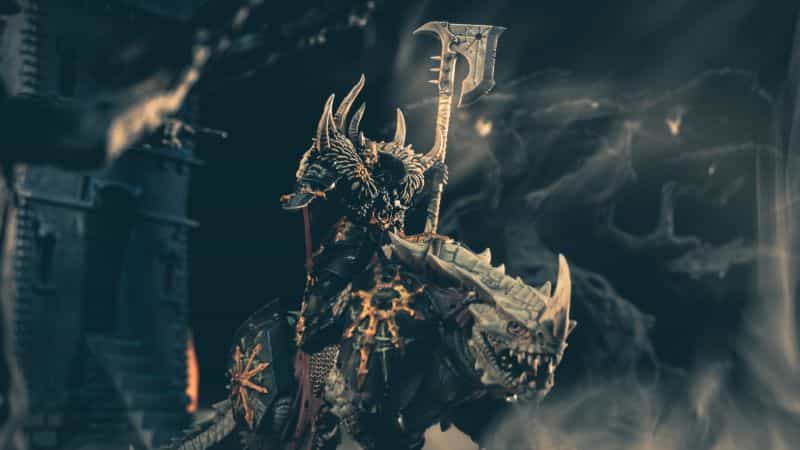
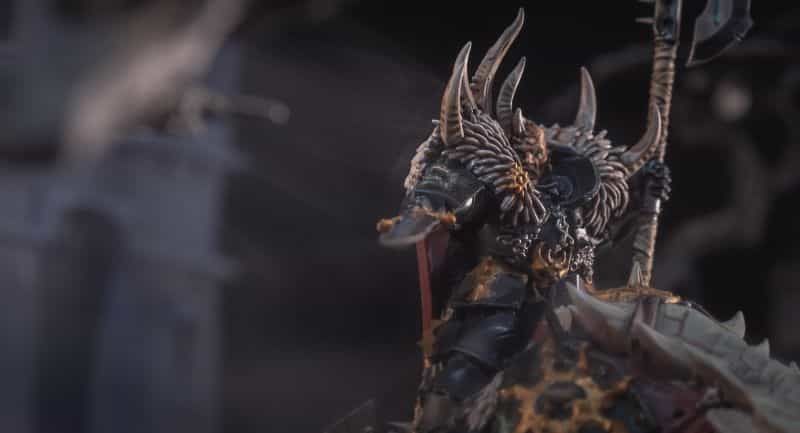
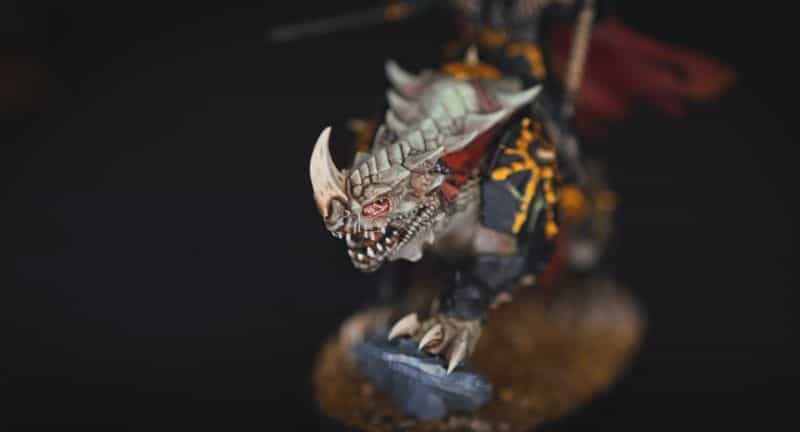
For my photos, I prefer a black backdrop where the model emerges from the darkness in bright vibrant color. You can see the examples of some of my photographic efforts in this article or in my gallery.
There are also ways to photograph models in natural environments. And, in some cases, using a light box or studio environment is a limitation. Here are the pros and cons of using a controlled studio environment for photographing miniatures.
2. Adjust your camera’s perspective
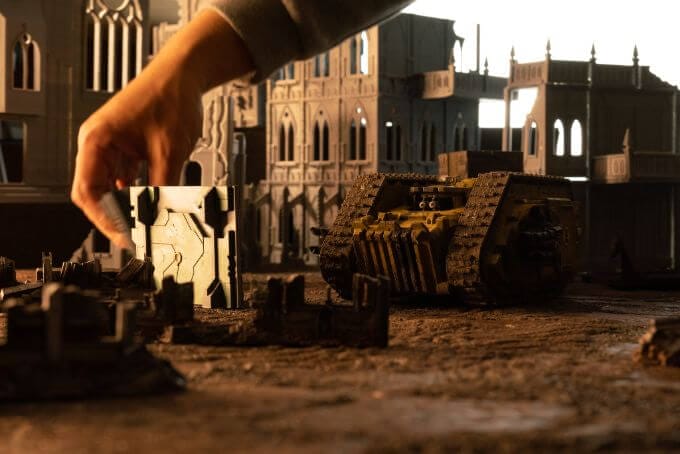
Lower your camera lens to the “eye-level” of your model. The perspective of your photo matters and you want to bring your viewer to the level of the miniature (which is often low to the ground). This will help immerse your viewer into the image.
In fact, I often recommend that miniature photographers pretend they are in the same “world” as their models. Get down into that small world your miniatures live in and try and see their environment through their eyes using the lens of your camera.
By bringing yourself into the miniature world, you take your viewers with you and engage them with something new. Everyone loves surprises. Showing them your models from an immersive perspective will do just that–shock and awe.
3. Slow down the action
Wait a second, models don’t have “action!” Well, I mean slow down the action of your hands shaking or the micro-vibrations in the camera while you’re holding it to take pictures. Any motion in the camera can risk you making pictures that are blurry. If you want sharp images, here’s what you do.
You can speed up your shutter speed to stop any movement. Or, you can use a tripod to stabilize your camera to the floor or a tabletop (e.g., mini-tripods are useful for miniature photography).
If you don’t have a way to stabilize your camera, you can use a faster shutter speed. Be aware that a fast shutter speed will reduce the light your camera gathers and could make your image “noisy” due to ISO sensor gain. Read more about the exposure triangle.
4. Apply the appropriate white balance
The white balance of your photo refers to the color palette across your entire image. For example, white color on your subject should remain white. With a good white balance, your pictures will accurately reproduce the colors on your model. Most cameras have a setting to adjust white balance (or you can “fix” this in post-processing software, like Lightroom).
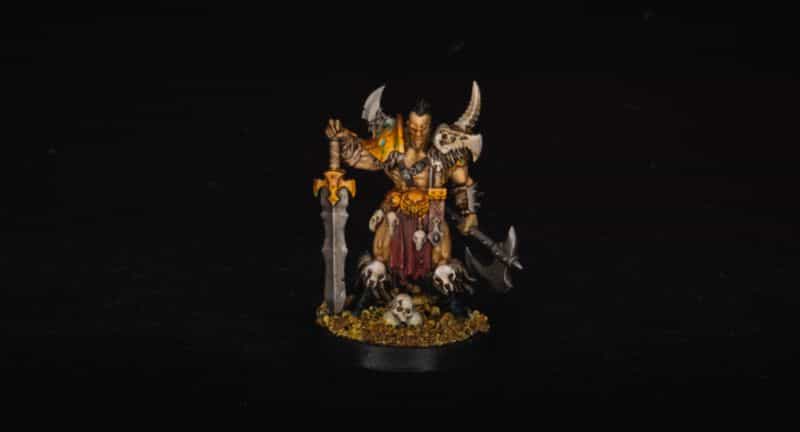
5. Compose the miniature subject
The position of your model, its angle in relation to the camera lens is an important consideration in good miniature photography. Some angles work better than others to create an interesting silhouette for your subject in the image. Also consider the context of the environment, the backdrop, in your photo. Consider using the rule-of-thirds for placing your model in the most compelling location in the frame.
6. Find and use good light
The lighting around your subject is the single most important factor in how your photo will appear. Light governs everything for the composition, the colors, and the final quality of the image. For best results in miniature photography, use light that is sufficiently bright, color neutral (~5000 Kelvin), and soft.
Continue reading below to see how you can use ambient light along with the “exposure triangle” to capture great photos of your painted miniatures.
READ MORE: BEST LIGHTING FOR PAINTING MINIATURES AND MODELING
What is the “Exposure Triangle”?
The exposure triangle is a diagram that outlines the relationship between the 3 key features of any camera’s ability to capture light. The exposure triangle reveals how your camera captures light with its different settings of shutter speed, ISO, and aperture.
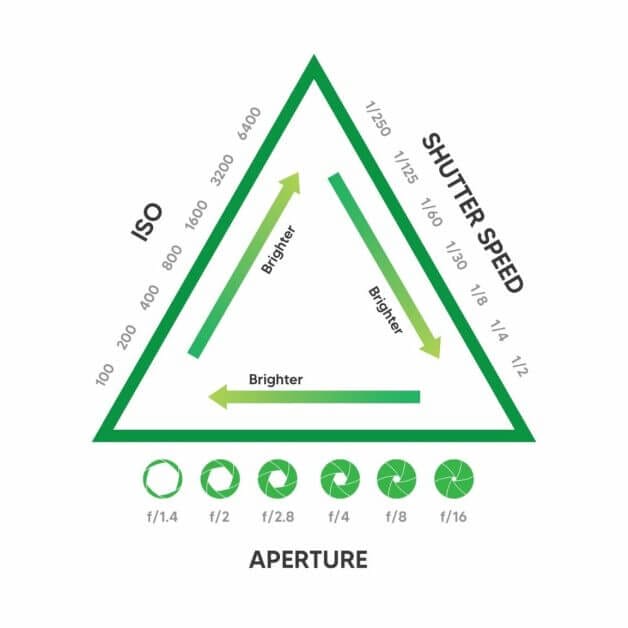
Whether you’re shooting with a smartphone or DSLR camera, you’ll want to learn how shutter speed, ISO, and aperture work together in the exposure triangle. Here it is in simple terms!
Shutter Speed
Shutter speed is how fast the shutter in your camera opens and closes. A camera shutter is like window curtain that blocks light from hitting a camera’s sensor. When you press the camera trigger, the shutter “blinks”.
We measure the speed of a shutter in fractions of a second, e.g., 1/2, 1/60, 1/250 and so on. The faster your shutter moves, the less light that enters your camera. A faster shutter will also stop motion, as your camera will only “see” a part of the external environment for a short time.
Aperture
Aperture settings control the size of the opening in your camera’s lens. A large aperture allows a lot of light into your camera, while a small aperture allows less light to enter the camera. Aperture is measured by f-stops, which denotes the mathematical formula of light entry as an exponential.
It isn’t necessary to fully understand this formula for you to properly use aperture. But, for those who are curious, in its simplest terms, the f-number in a camera is the ratio of the focal length of your lens (e.g., measured in millimeters) to the open diameter of the “pupil” or aperture of a lens. Ultimately, the f-stop or f-number is measured as a fraction (f) unit.
Learning how your aperture affects your miniature photos is really important in miniature photography. How you use a camera’s aperture affects the brightness of your photo, as well as the depth-of-field, e.g., the amount of your model that is in focus and sharp versus blurry. For more about f-stops and how it can affect your miniature photography, check out this article.
ISO
ISO is a measure of the sensitivity of the the sensor of your camera. Back in the days of analog film, a photographer used the ISO as the measure of how sensitive film was to light exposure. In general, the higher the ISO value, the more sensitive the film or sensor.
In digital photography, we can change the ISO to make our camera more sensitive to the light that hits the sensor. With a high ISO, your miniatures will appear brighter. Of course, the limitation of using a high ISO is that it can produce “noise” or a grainy appearance.
The best ISO to use in your camera that will produce zero noise or grain is 100. In most consumer cameras, you can raise your ISO to 800 to 1600 without too much noise interfering with your images. Most professional, full-frame cameras can go up to 6400 to 12,800 ISO before images appear unusable for most applications.
How to Balance ISO, Shutter Speed, and Aperture for Miniature Photography (Best Camera Settings)
There are many philosophical approaches to balance ISO, shutter speed, and aperture for miniature photography.
Some photographers may suggest you start with a small aperture for a good depth-of-field (DoF), then adjust ISO and shutter speed accordingly. Others may suggest you keep your ISO at 100 to avoid noisy/grainy images, then adjust the other two settings to compensate for the lower light sensitivity of the camera.
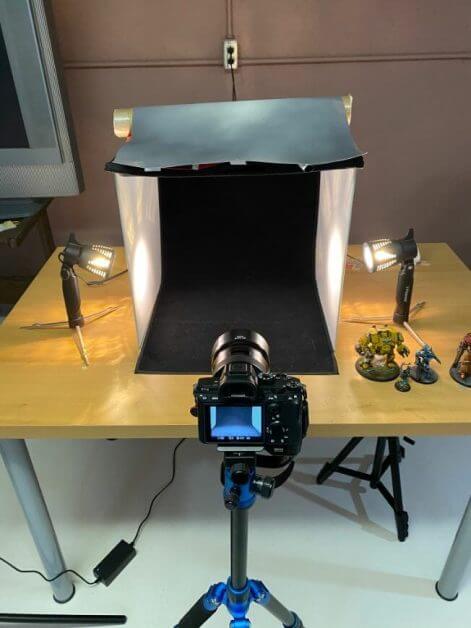
The best settings in my camera that have worked well for me, reliably producings great pictures, require that I start with my camera mounted to a tripod. It also requires that you know where and how to adjust the manual settings of ISO, shutter speed, and aperture on your camera. Some smartphones have apps that let you shoot pictures in manual mode with fun sliders or buttons.
Best Camera Settings for Miniature Photography
Now that everything is stable on the tripod, I will start with an ISO of 100 to remove any potential noise from the image. Then, depending on my miniature, I’ll adjust my aperture to f4. With my favorite 40mm full-frame lens, this gives me a shallow depth-of-field. Some parts of my model will be sharp, but other elements will be blurry. This is okay!
For artistic reasons, I often like having some parts of my painted miniatures a bit blurred out. Of course, if it’s a large model or if I want more “professional looking” results, I’ll increase my f-stop or close my aperture down to f8 or even f11. This increases the depth-of-field and puts more of my model into the “sharp zone”.
To help you create sharp images of an entire large model or groups of smaller miniatures, I’ve written a great article about depth-of-field and how to use “focus-stacking”
After I get my camera’s ISO set to 100 and aperture settings the way I like it for the artistic or professional look, I adjust my shutter speed to keep my subject bright in the photo. This usually means I have to slow the shutter down. With the tripod, I don’t mind the slow shutter because there won’t be any shaking of the camera.
Here is my recommended workflow for optimizing the settings in any camera:
- Stabilize your camera on a tripod.
- Use constant ambient lighting (no flash).
- Set the camera to manual mode.
- Set your ISO to the lowest number. This is usually 100.
- Close your aperture until you are comfortable with the depth-of-field.
- Slow your shutter speed down until your model subject is bright enough.
In this workflow for balancing the exposure triangle, you’ll notice that your images will be too dark until you slow down your shutter speed. A low ISO of 100 and small aperture (f8 or a bigger f-number) will darken the photo. By slowing down your shutter speed, you’re allowing more light to hit your sensor (e.g., the window curtain stays open longer).
Final Word
To take better pictures of your miniatures, remember that good lighting and how it interacts with your model is the most important variable you need. If you don’t like how your pictures look, and you’re not sure how to fix it, consider the possibility that your light is too dim or coming from the wrong direction.
Once you have good light, use the tips and camera setting workflow in this article to help you take the best image you can. It’ll take some practice, but once you figure out the basic settings you need for what you want to achieve, then you’re only limited by your artistic vision.
There’s a lot to know about taking great photos of miniatures. Things like white balance, color grading, and other aspects of making professional quality photos are also important topics.
For more information about taking great pictures of your models, dioramas, and tabletop games, here are a series of miniature photography articles that I’m continually adding and updating to give you the best info I have about the hobby. I’m always learning ways improve my work and totally open to sharing what I discover!
Are you looking to improve your miniature photography, or want me to share something about a specific topic? Let me know with a comment below!
Happy miniature photography 😃 📸


Tangible Day on YouTube (Miniatures and More!)

Pingback: How to Take Better Miniature Photos with a Ring Light (Tips and Guide) | Toy Newz
Pingback: The Most Popular Tiny House Regulations – DunkingPro
Pingback: Painting Competition 017: Choose Your Weapon – Bromad Academy
Pingback: Painting Competition 018: From the Backlog – Bromad Academy