What techniques do I use for paint blending on miniatures? This is a very common question, but not a simple one to answer. There are many ways to blend paint on a miniature. Each method has an advantage and disadvantage. In fact, some techniques that you may find difficult, others might find easy. And, vice versa. In principle, blending paint involves any technique that creates a transition between two layers of paint.
In this article, I share my experience with the techniques that I’ve applied over the years of painting a lot of miniatures. As someone who likes to experiment and discover new ways of doing things, I’ve distilled some of what I learned into short summaries.
READ MORE: BEST 5 MODEL PAINT MIXERS AND SHAKERS
Summary: 8 Miniature painting techniques for miniatures and models:
| Miniature Painting Technique | Description |
|---|---|
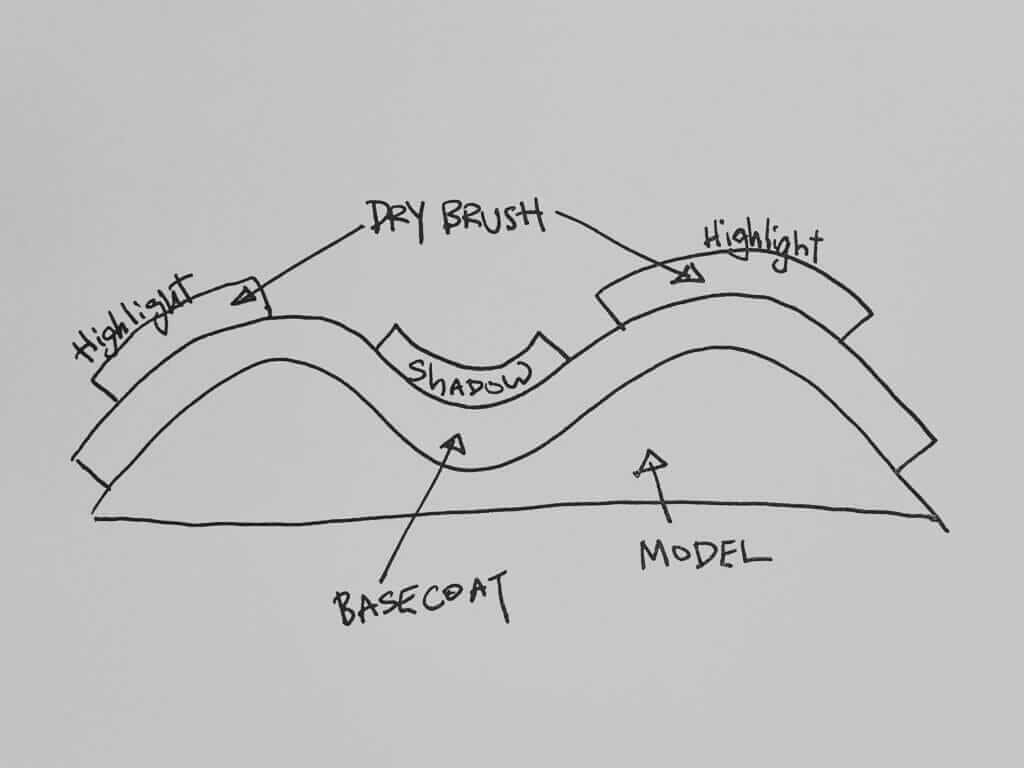
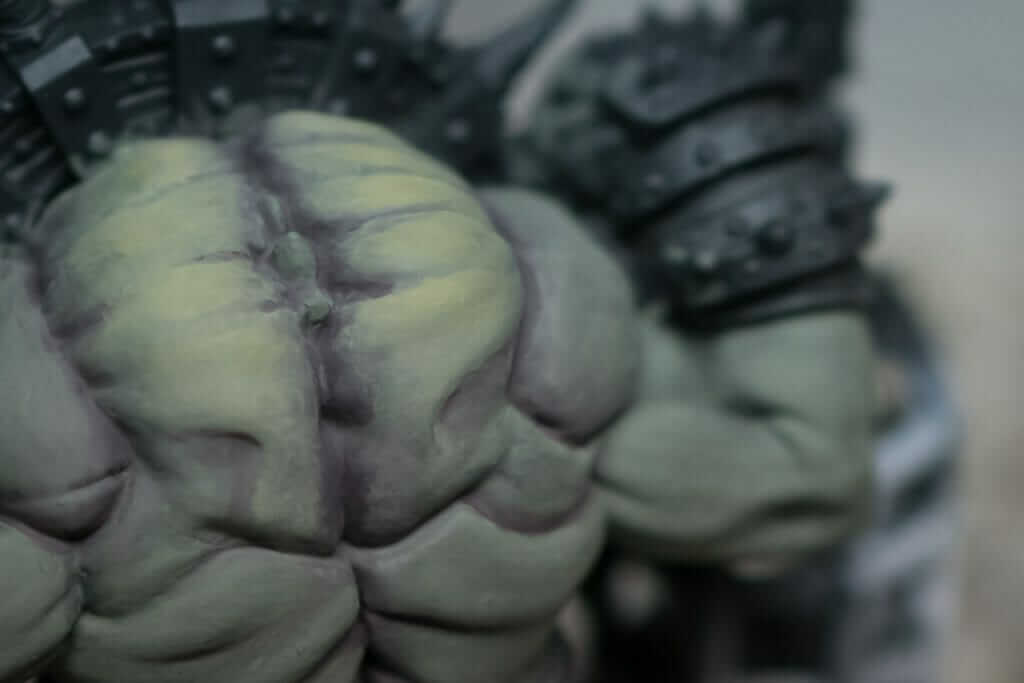
| 1. Dry Brushing | This is a straightforward technique where the majority of paint is removed from the brush before applying it onto the miniature. The residual paint in the bristles is then gently swept over the raised surfaces of the miniature, enhancing its texture and highlighting its details. It’s especially effective for bringing out the topography of surfaces like fur, scales, or armor. |
| 2. Layering and Glazing | Layering involves the application of several thin coats of paint to create smooth color transitions. It requires careful thinning of the paint and a steady hand to ensure clean, precise strokes. Glazing, on the other hand, involves applying extremely thin, almost translucent layers of paint over a base coat. It can soften hard transitions between colors and create subtle color shifts. |
| 3. Two-Brush Blending (TBB) or Spit Blending | This is a technique wherein two brushes are used simultaneously. After applying the paint with the first brush, the second (clean) brush is used to blend the wet paint into the underlying layers. The term “spit blending” comes from the practice of some painters using their mouth/saliva to keep the second brush moist. This technique allows for smoother color transitions. |
| 4. Feathering and Loaded Brush Blending | Feathering is a form of wet blending where two or more colors are blended together while still wet. A loaded brush blending is a variation of this technique. It involves loading the brush with two colors: One in the belly of the brush and another at the tip. When applied, it results in a smooth gradation from one color to the other. |
| 5. Stippling | This technique involves applying paint in small, tightly spaced dots to create a textured or gradient effect. Stippling can be used for various effects such as rust, weathering, and creating a gradient of colors. |
| 6. Airbrushing | Airbrushing uses an airbrush tool to spray a fine mist of paint, which allows for smooth transitions between colors and is ideal for covering large areas or creating gradient effects. The method provides a lot of control over the intensity of color and can produce very smooth transitions, but it requires specific equipment and a certain level of skill to master. |
| 7. Wet Blending | Wet blending is the application and blending of two or more colors while the paint is still wet. This technique is a bit challenging as it requires a quick workflow to avoid paint drying before its complete. But the technique allows for seamless color transitions and the ability to create unique color combinations and effects. |
| 8. Wet-in-Wet Blending | Similar to wet blending, wet-in-wet blending involves applying and blending multiple colors on the model while the paint is still wet. However, the difference lies in the fact that wet-in-wet blending involves introducing a new wet color into an existing wet color (or a pre-dampened surface with just water), rather than blending two newly applied colors. This can create soft transitions between shades but requires a quick hand and a solid understanding of how different colors mix, and how paint behaves with surface tension on a model’s surface. This is a very advanced miniature painting technique. |
Read on for blending techniques for painting miniatures and models.
What is paint blending?
In painting miniatures, an artist can apply a HUGE number of methods to achieve the same effect.
When blending paint on a model, the painter is applying layers of paint and creating a transition between the applications.
The transition or blend between two paint applications (either of a different color, value or tone) requires some knowledge of how paint behaves on the brush and the working surface.
In principle, paint blending is simple. Take two layers of paint and create a transition. Of course, the blend between paint applications can be coarse or smooth.
A professional or competitive painter may be able to achieve very smooth blends. In many cases, the transition is so clean that even under magnification or under bright lights, the layers of paint are imperceivable.
Why blend paint on a miniature?
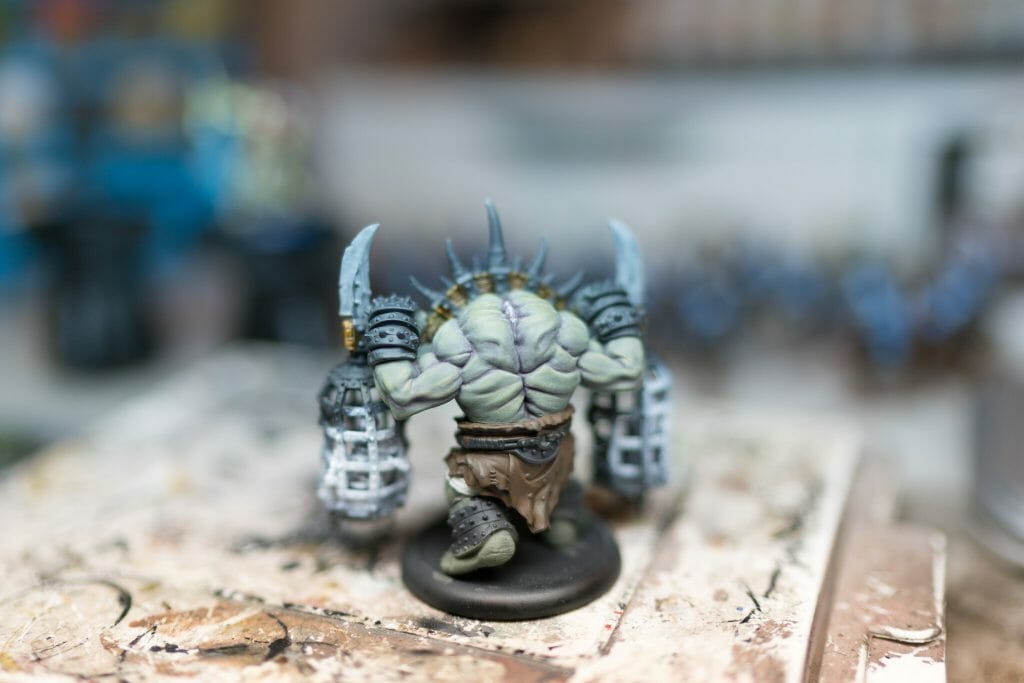
In all of miniature painting, the art of making a model come alive requires creating a sense of place. We all agree that painted miniatures always look better with color. Acrylic paint is the most popular kind of paint for miniature painting.
The simplest way to do blend paint is to start by adding contrast. But when it comes to the art of painting models, This can be done with acrylic or watercolor washes. Or, simply using specially formulated “contrast paint“. Trying to add depth through contrast is always a good idea.
If you look at most comic books, for example, the bright colors against black line art pops off the page. In miniature painting, most artists try to create the same “3D pop”. A comic book paint job certainly stands out amongst the crowd.
In fact some kinds of miniature paint styles have emerged with a comic book “look”.
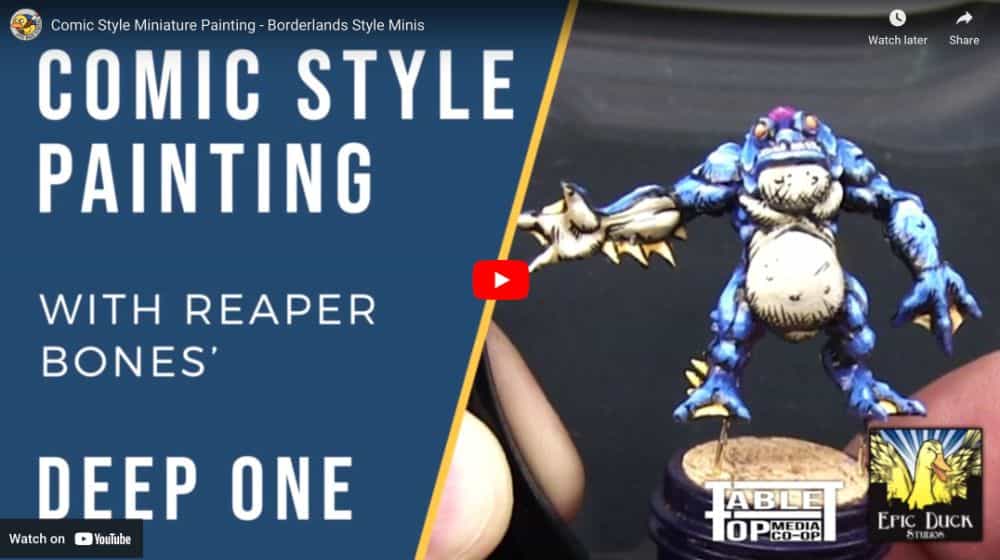
Blending paint on a miniature takes the contrast game a step further. Paint blending allows you to create contrast, while maintaining a sense of realism.
Blending paint removes the comic book or cartoony look.
And, if done well, paint blending can do amazing things for a model’s final appearance.
For example, Object Source Lighting (OSL) require some level of paint blending technique. If you’re looking for a non-metallic metal (NMM) effect on your miniature, then knowing how to smoothly blend paint layers will become essential (check out my top 3 websites showing you how to paint with the non metallic metal style).
Where do I begin?
If you’re just starting out at the hobby of painting miniatures, blending might seem daunting.
Don’t fret. We all start somewhere. The miniature painting hobby is a spectrum of discovery.
I know for a fact that with constant time in the hobby chair, a bit of elbow grease, a few tips and tricks from your friendly painting community, you’ll make progress fast.
Practice, practice, practice.
Don’t be afraid to experiment and fail. Learn about the different kinds of materials you can use, e.g., paint brushes, miniature paint brands, and start painting. That’s all you need to focus on; Spend time with a brush and make models become more than a simple object.
Below is a summary of blending techniques that I ordered from easiest to hardest. Some may argue the ordering of technical challenge, but I think these blending techniques build upon each other.
As you learn the easy techniques, you gain knowledge on how to overcome some of the skill hurdles in the more advanced miniature painting methods.
8 most common blending techniques for painting miniatures and models:
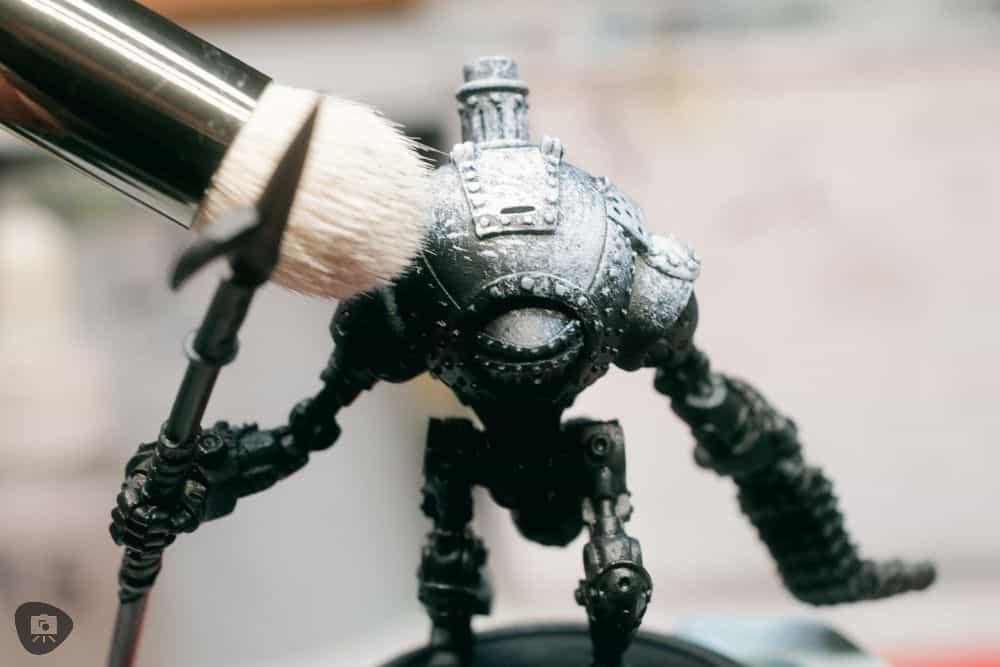
1. Dry brushing
Dry brushing is a powerful blending technique. The painting process with a dry brush is perhaps the simplest and fastest technique you can apply right now.
For more details about dry brushing check out this full drybrushing guide.
Dry brushing is an approach that applies paint pigment to the raised surfaces of a miniature. This approach also gives you a lot of control. Subtle applications with a dry brush will create a gradual build up of pigment.
Dry brushing advantages….
The greatest advantage of drybrushing is that it is relatively fast and very easy to learn. It’s the core method you’ll want to use for slapchop or speed painting. You don’t need expensive tools and it’s great for new painters to start seeing results that they can be proud of.
For these reasons alone, dry brushing is what I recommend most miniature painters should learn first. It’s a basic technique that works well on plastic miniatures, metal, and resin miniatures.
Even professional mini painters use dry brushing for their competitive works. For tabletop quality miniature painting, dry brushing generally creates a grain-like, powdery look.
You can, however, achieve very smooth transitions between colors and paint layers by applying multiple, very light coats.
Here’s how you get smoother blended transitions with dry brush:
As you build up more of your highlight color, slowly shrink the area that you are dry brushing.
This will subtly add pigment to a smaller area of the model, which naturally creates the gradient from the main base color to the dry brushed area color.
In competitive, professionally applied dry brushed models, it is possible to have more than 20-30 light coats of dry brushed layers.
Of course, if you’re simply looking for a good quality paint job, you won’t need so many dry brushed layers for a great paint blended look.
2. Layering and glazing
There are so many definitions for paint layering in regards to creating blended transitions. I would not consider this an advanced painting technique, but does take some practice To layer paint and glaze, it’s often best to start with a smooth coat of paint of a single color and work up from there.
For blending, the use of paint layering to create blended transition means using very thin paint applied in multiple and progressively shrinking areas on the model.
Paint layering can be used to blend highlights or shadows with either light or dark value paint, respectively.
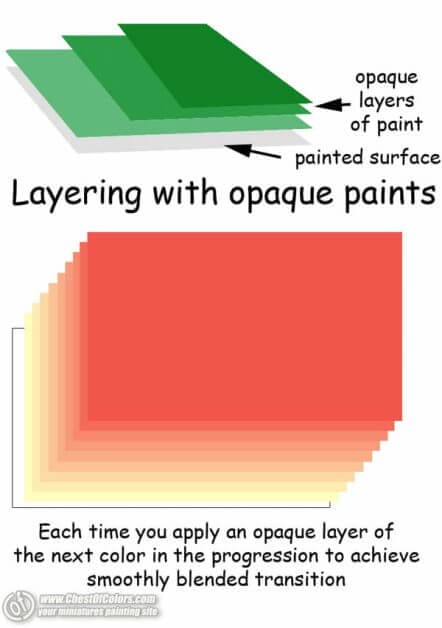
Layering can use two kinds of paints for blending transitions:
- Opaque paint
- Translucent paint (e.g., glazes)
With opaque paint, layers of paint are applied in progressively smaller and smaller areas over the same area. With thin coat, the application of subsequent layers of paint allows the underlying base paint to show through less and less. This is a great technique to create highlights as you work from a dark color to a brighter color.
The slow buildup of the new color through the addition of smaller surface applications of opaque paint layers is the foundation for creating the transition gradient. It’s just a matter of time that you’ll be able to create a smooth transition from one layer tone to the next.
Take a closer look at glazing
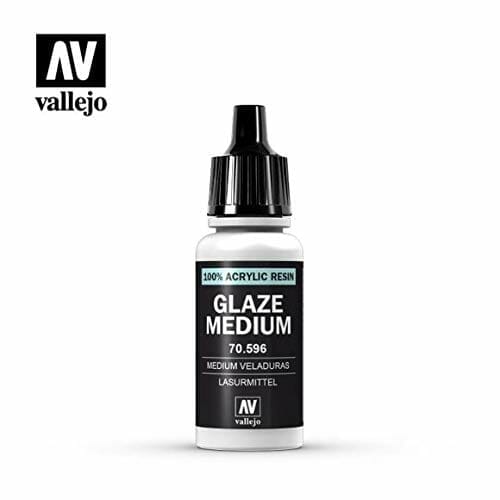
The use of translucent paint, or glazes, is similar to the use of opaque paint, but has the effect of tinting rather than covering the underlying base paint color. This painting process with glazes is similar to layering, but takes a tad more patience.
With multiple layers of glazes, the paint pigments will gradually build up, and the translucency of the thinner, see-through glaze paint will cause the layers to “blend” together.
READ MORE: HOW TO GLAZE MINIATURES
You are essentially mixing colors on the model itself through thinly applied pigment layers. The more translucent layers you apply, the smoother the blend.
However, the more layers you want to apply, the thinner or more translucent the paint should be.
Glazing is more than the sum of its parts
To help you layering and glazing, there are artistic glazing mediums. I mentioned some of these mediums in another fun painting article.
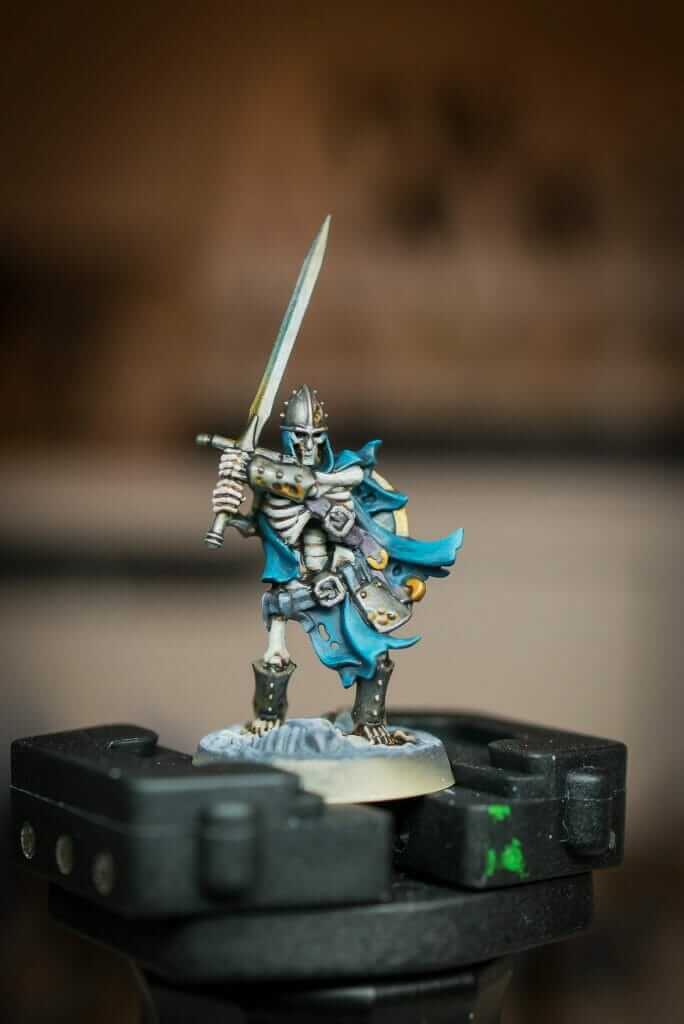
Pro tip: Combine layering and glazing together, then use a edge highlight in the final stage to make the painted model “pop”. The edge highlights help a viewer discern shapes on the painted mini from a distance, giving the piece that much more stage presence. Contrast is the key here. Additionlly, a good tip is to use a bright paint color as your edge highlight over a darker paint for the best effect.
Matte mediums are often very useful for blending with layers. Paint can be thinned down a lot with water, but will become too “runny”. To maintain control over your layering, mixing your paint with a glazing medium will help a lot.
Overall, there are many styles of layering and glazing that painters use. Some artists use thicker paint and fewer layers to save time (and sanity).
Ultimately, even thicker paint applications, despite the transitions being more visible, the effect of blending with layers of paint is quite dramatic on the tabletop.
3. Two-brush blending (or spit blending)
By namesake, you’ll need two different brushes for this blending technique.
- A brush to apply paint to the model
- Another brush to manipulate the paint’s translucency while it is still wet. This brush will usually be dampened with saliva or spit.
Two-brush blending is a technique promoted by Privateer Press. See video below.
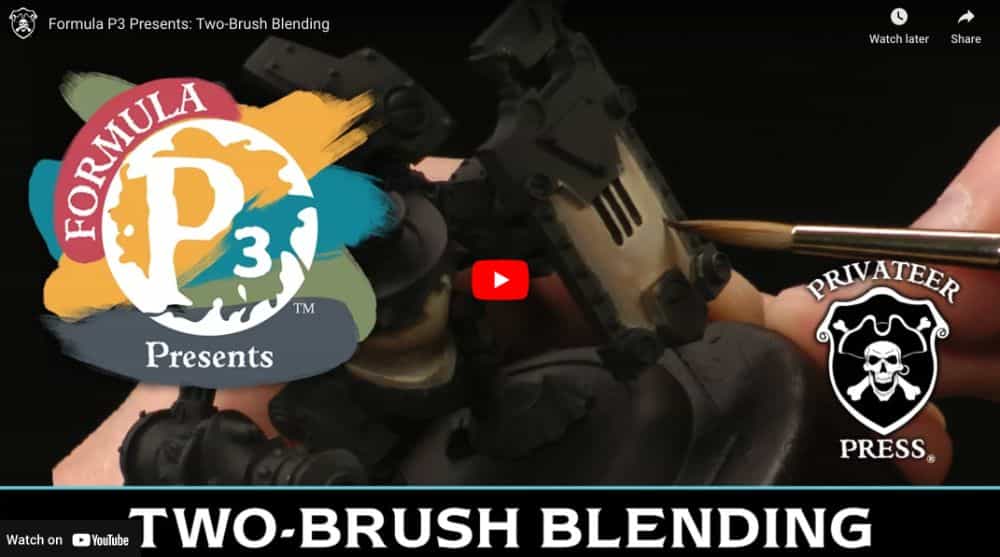
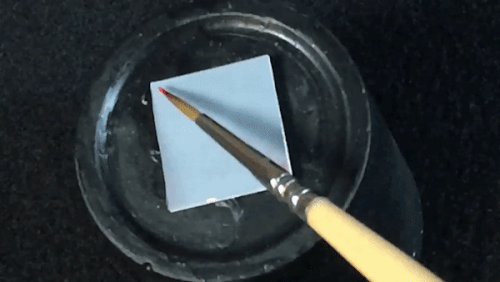
To perform two brush blending (TBB), paint is rapidly applied with the first brush in a line or dot/blob on the model surface. Then, using the second brush, the still wet paint is pushed and pulled into the desired shape and area on the model.
Tips for two-brush blending
The key with two-brush blending is that the second brush must be dampened with a blending medium (which is not the same as the mixing or glazing medium mentioned above).
You can find acrylic blending mediums online or at art stores.
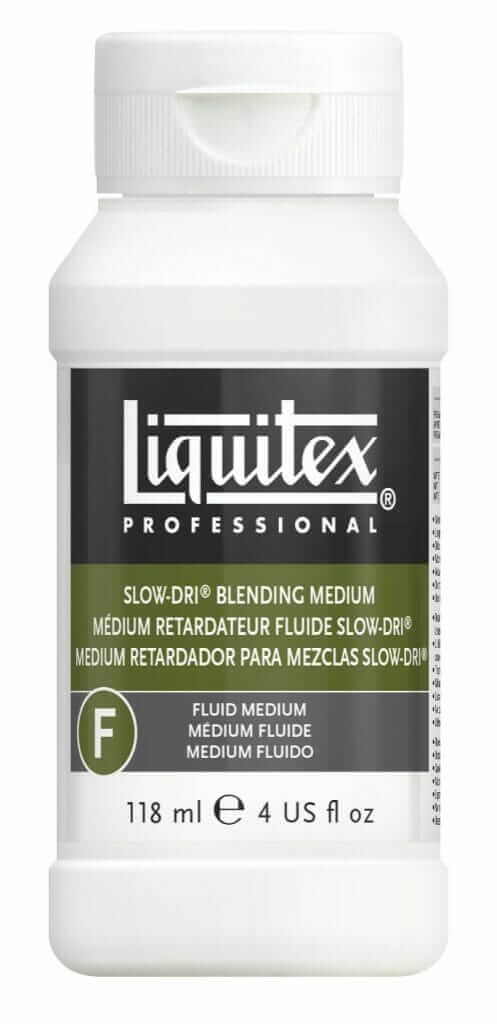
| Liquitex Slow-Dri Blending Medium (Recommended) |
|---|
| Buy on Amazon |
| Buy on BLICK Art |
Saliva is arguable the best blending medium for acrylic paints. Many advanced miniature painting techniques use saliva or spit for blending.
Whether it is safe or not is up for debate, but I personally consider it mostly safe for most light-duty hobby painting activities with acrylic model paint.
RELATED: IS ACRYLIC PAINT BRUSH LICKING SAFE?
If you decide to use saliva and lick your brushes, make sure your paints are non-toxic. Paints like P3 and Citadel paints are labeled non-toxic. But, other miniature paints may not be. Be careful.
Any hobby or model paints that contain heavy metals, like cadmium or cobalt, can contribute to cancer or other health issues.
Note that saliva is pretty viscous and slimy, so paint won’t stick to your second blending brush. You can blend away without too much trouble of wiping away your initial paint application.
Professional level miniature painting with two-brush blending?
What is awesome about two-brush blending is that you can make huge jumps in paint color without the tedium of slow layering and glazing.
Competitor painters often use two-brush blending in speed painting contests.
The smoothness you are able to achieve with two brush blending transitions with only 2-3 layers of paint allows you to work very quickly. The time-to-completion on a model with smooth paint transitions is very short indeed.
4. Feathering and loaded-brush blending
Feather blending is the foundation you need to learn before loaded-brush blending.
I put both on this list, because in general, you’ll end up wanting to try both for a lot of your miniature painting work. This is especially true if you’re aspring to master the more advanced painting techniques.
Feathering and loaded-brush blending are both incredibly versatile and powerful methods for almost any miniature painting special effect.
In feather blending, you use a single brush with a “practiced movement” where the pigment is deposited on the model in a controlled fashion. The brush movement is a zig-zag, or back-and-forth stroke, e.g., a sweeping or mopping the floor kind of motion.
RELATED: 50 USEFUL MINIATURE PAINTING TIPS
As you can see from the example (above), feathering provides you with a very fast way to apply paint and blend out the transition.
For more details on how-to-feather, check out the overview of the technique Pirate Monkey Painting.
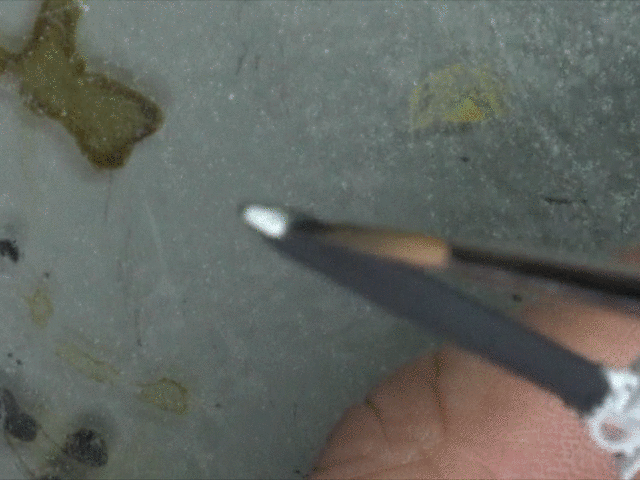
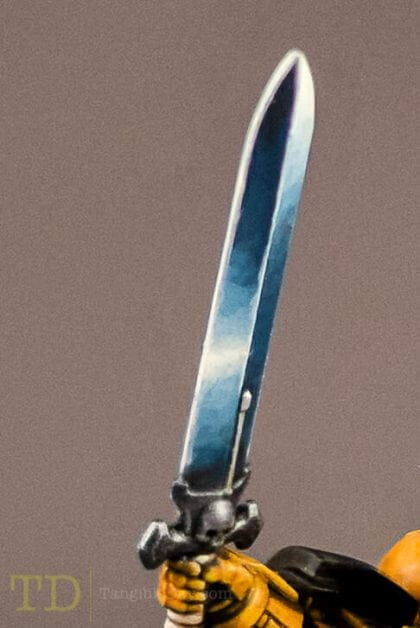
How to perform loaded-brush blending
In loaded-brush blending, the two paint colors are “loaded” onto the single brush. Generally, a darker color is loaded first, followed by a highlight color on the brush tip.
See the video below for how loaded-brush blending is used to paint a sword.
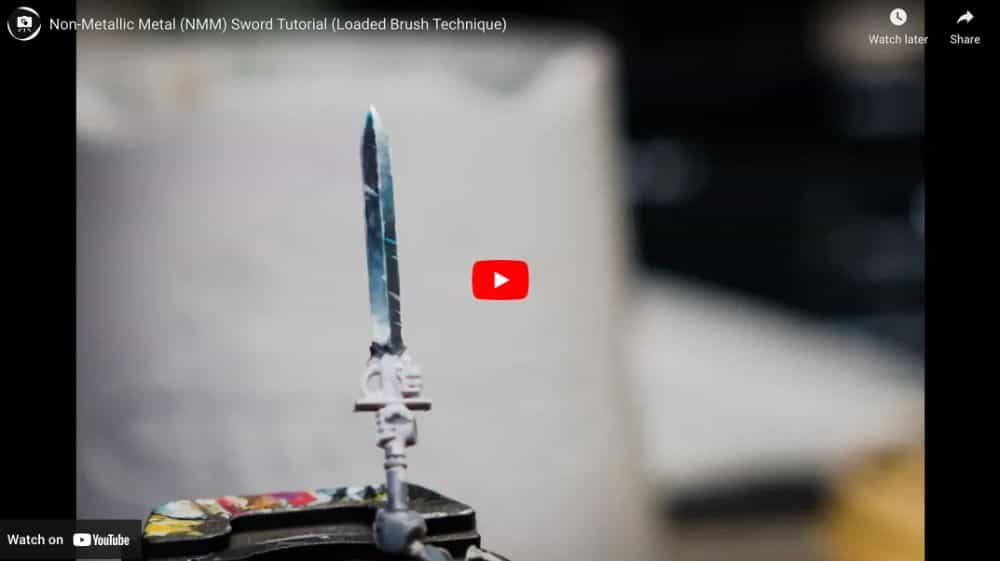
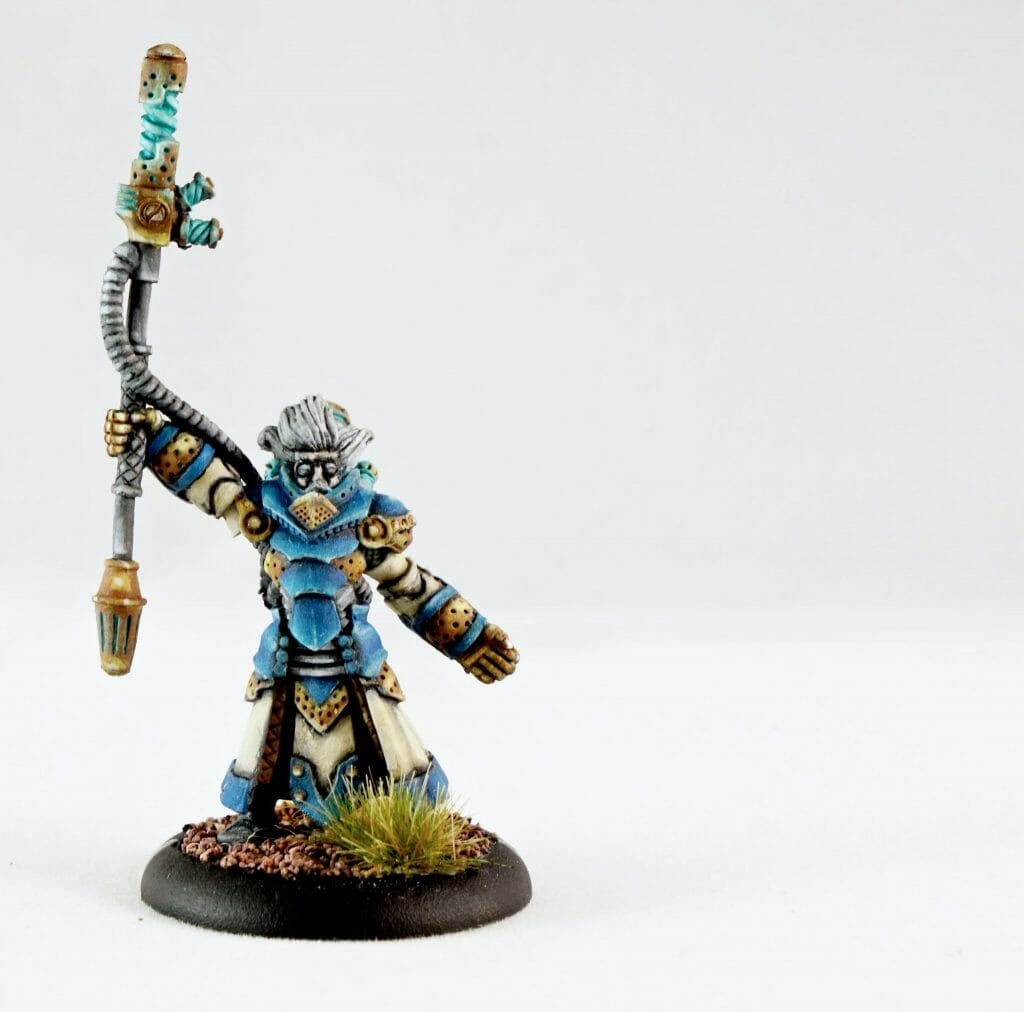
Loaded brush blending has become a widely adopted approached for many types of miniature painting effects, such as non-metallic metal (nmm).
If feather or loaded-brush blending technique is followed through with a glaze, the smooths can become very smooth and creamy, indeed.
As note, applying a glaze after any technique listed on this list will help smooth out rough areas of paint transition. Glazing is that important to learn if you want smooth transitions.
READ MORE: FOR A GOOD FOUNDATION, APPLY A GOOD PRIMER
With any of the more advanced paint blending techniques on miniatures, feathering and loaded-brush blending will require a lot of practice. Keep experimenting with how you hold your brush.
Work your way up to this technique by internalizing how paint behaves when it is on your brush, leaving your brush, and how paint behaves on the surface of your model.
5. Stippling
Stippling in miniature painting is the technique of applying paint with a stiff brush with very little paint on it.
In drawing techniques, stippling is when an image is created by the combination of many “dots” placed in strategic locations.
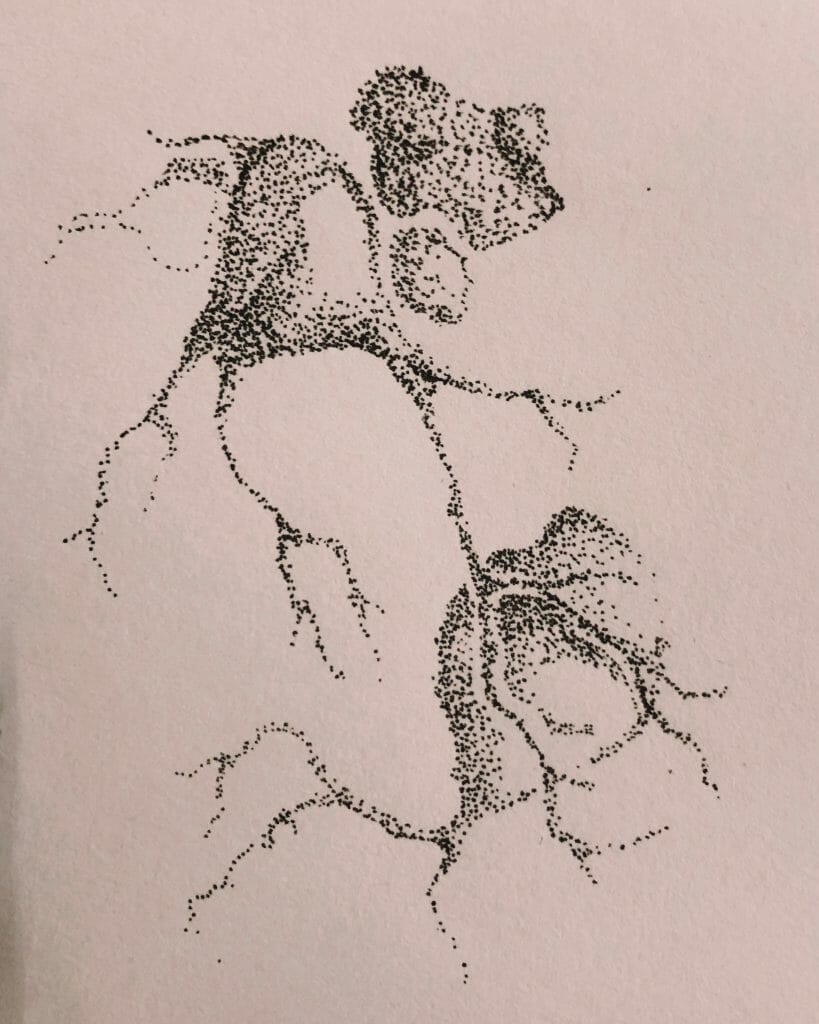
Similarly, in miniature painting, blending colors can work through the combination of applying random “dots” of paint through stippling. I think this is one of the most powerful, underutilized approaches in the painting hobby.
When it comes to painting your own miniatures, the stippling technique helps you paint details while blending paint colors together. Super useful. More than this….
Stippling has the effect of adding texture to a miniature.
The technique of stippling in miniature painting can be used two ways, but is best used over a layer that has already been blended.
How to stipple miniatures
Using a stiff haired brush with only a bit of paint (e.g., similar to dry brushing), touch or tap the surface of the miniature with the tips of the bristles. You will get a stippling or dotted effect as you keep tapping the brush.
RELATED: CHECK OUT THESE LOW-COST SYNTHETIC BRUSHES: GREAT STIPPLERS AND DRY BRUSHES
For shadows, use a dark color. For highlights, use a light color. Simple as that.
This is a great technique for adding mud, dirt, or cloth texture to a model. When using dry pigments mix them with an acrylic medium when you use the stippling effect. The pigments will stipple a lot better, sticking to the model’s surface.
To make cloth look like worn leather, you can try stippling methods shown here.
Another method for stippling is to use a softer natural sable brush. But, I wouldn’t recommend using a brand new brush as stippling tends to destroy brushes.
What you do with the softer brush is apply paint on the model with tons (I mean like a lot) of tinsy, tiny dots all over the area you want to have the blended, textured effect.
The easiest way to know where to put the dots is to already have the area blended by some other method (e.g., layering).
6. Airbrushing
If you’ve been a miniature painter for a while, you’re already familiar with the possible outcomes with airbrushing.
Airbrushing miniatures beyond simple primer or base coat application (i.e., the first paint layer) is an advanced technique.
RELATED: COMPLETE AIRBRUSH GUIDE FOR PAINTING MINIATURES
For advanced miniature painters, the skilled use of an airbrush can create some of the creamiest, smoothest blends on medium- to large-sized models.
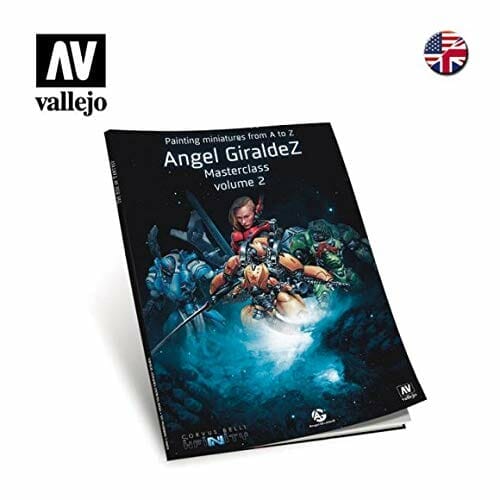
Angel Giraldez, who literally wrote the book on airbrushing miniatures in the sci-fi Infinity the Game Universe, inspired me to work with my airbrush a lot more. For other books on how to paint miniatures, check out my reviews.


How to start airbrushing miniatures
There are a ton of tutorials online about how to airbrush miniatures. For airbrushing, video tutorials are particularly useful.
In addition to book references, videos on airbrushing provide you the nuances of how paint behaves as it travels from the nozzle.
A key aspect to using an airbrush for blending and creating smooth transitions between paint colors is a firm grasp of controlling the paint spray pattern.
As paint leaves the nozzle of an airbrush, it projects outwards in a cone. The angle the cone interacts with the surface of your model, as well as the pressure and amount of paint in the airflow, powerfully effects how the paint is applied.
My suggestion for those starting out with an airbrush is to play.
Yes, just play around with your airbrush. Learn how air pressure, paint viscosity, and distance/angle from your model effect the paint application.
Of course, be aware that your painting desk may not be immediately suited to the possibility of overspray from an airbrush. Here, a spray booth could help and try to make sure you have proper ventilation if you’re airbrushing indoors.
In a nutshell, airbrushing is a tool you need to learn really well if you want to blend paint colors together. It doesn’t take much to make a mistake with airbrush.
My experience and journey with airbrushing
Check out this video if you’re wondering what simple, but fairly advanced things you can do with an airbrush.
Personally, I love airbrushing my miniatures. I have probably painted half of my miniatures in my collection with an airbrush.
As a tool airbrushing provides me with ways to blend paints, coat models, apply special effects in a very quick and unique way. As someone who dabbles in 3D printing, an airbrush has also become a vital tool for painting my 3D prints.
However, despite all the advantages of airbrushing, the tool can have significant disadvantages. Good airbrushes aren’t cheap.
I have a really solid budget model (a Badger Patriot 105), but reach for the more the detailed-oriented airbrushes for most of the professional work I do (Badger Sotar 20/20, IWATA High-Line, and Harder & Steenbeck Infinity airbrushes).
Why do I own so many airbrushes?

Every airbrush has a specific job. Just as there is likely no best paint brush, there is no single airbrush that can do everything.
If you’re just starting out, remember “pay for the quality you need”.
Are you simply base coating your models, or are you trying to apply advanced paint blending techniques to your miniatures?
If you have more questions about airbrushing, the equipment or the technique, you can leave a comment for me below. I’m happy to help!
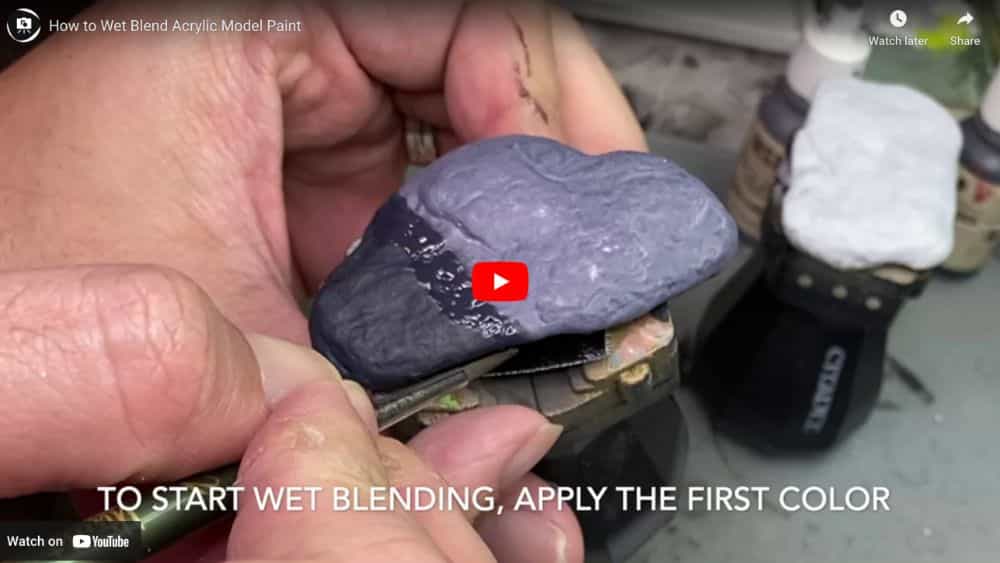
7. Wet blending
Wet blending is one of the hardest, if not most advanced techniques for blending paint. The wet blending approach is the mixing of two paint colors directly on the model, while both paints are still wet.
The hardest part about wet blending is maintaining control.
The best place to start learning how to wet blend is on large open surfaces of a model. You start with a blob or line of one color applied on the model, and then with a clean brush apply the second color next to the first.
RELATED: HOW TO WET BLEND MINIATURES AND MODELS
Between the two wet paints, you leave a small gap. Using another clean brush, you pull the two wet paints together, mixing them in this gap. If you’ve done wet blending correctly, the transition between the two colors is flawless.
And, that is the advantage of mastering wet-blending.
The result you achieve with wet-blending is theoretically above and beyond what you can achieve with any other blending technique. This is because the two paints are literally mixed/blended directly on the model.
Tips and insights into wet blending minis
In my experience with wet blending, some paint brands are easier to use than others. For example, Citadel Paints are more difficult to wet blend than compared with Vallejo Model Color.
I think this has to do with the formulation and how quickly the different paint brands dry. In general, I find Vallejo and P3 paints the easiest to wet blend.
Another observation in regards to wet-blending: white, yellow, and orange colored paint are the hardest to wet blend on a model. For these paint colors, I tend to use other methods to create smooth transitions.
I reserve wet-blending to colors and paint brands that I know work well. You’ll have to experiment and learn for yourself what works. Hopefully, I’ve given you a starting point if you haven’t tried already.
Finally, I should also add that wet-blending works well if you don’t thin with water. Water added to paint actually speeds up drying in my experience. Yes, this doesn’t seem intuitive.
As you try to wet-blend, the more binding medium you have available, the easier time you’ll have. You can add some paint drying retarder or give a wet palette a try (I always use a glazed ceramic dry palette for this technique).
8. Wet-in-wet blending
Some may argue this technique is easier than wet-blending. I’ve tried teaching this technique to many people, but only those painters who were comfortable with wet-blending (see #7) learned this technique quickly.
Wet-in-wet blending is similar to wet-blending. However, instead of two area of wet paint on the model, you first apply a layer of water to the model.
Plain water.
How to perform the wet-in-wet blending technique with acrylic hobby paint
Wet the entire surface you plan to paint. Keep it pretty wet (but not so much water that you lose control). If you prefer, you can also mix a little acrylic medium or paint drying retarder into the water.
What you’re looking for in this first coat of watery-film is a wet surface that stays wet for a little while, but not so much that the water runs out of control.
If you’ve gotten this far, add a slightly diluted bit of paint into or onto the places you want.
The pigment will bleed into the wet surface, and diffuse out into a transition. With the tip of a clean, damp brush, you should have enough control to smooth out the diffusing paint.
I’ve used this technique to great effect for applying dark lining and as a substitute for glazing.
As an advanced paint blending technique, I actually prefer wet-in-wet blending more than wet-blending, airbrushing (!), and two-brush blending.
The wet-in-wet blending technique gives me a good balance of control, quality outcome (e.g., smoothness), and speed.
Summary
I’m sure I missed some blending techniques. There are certainly many ways to do the same thing. The techniques I listed and described here are those that have concrete use in painting miniatures.
- Dry brushing
- Layering and glazing
- Two-brush blending (TBB) or spit blending
- Feathering and loaded brush blending
- Stippling
- Airbrushing
- Wet blending
- Wet-in-wet blending
I hope this gives you a good overview of the possible methods you can use to paint your models. Maybe, I’ve even inspired you to try a new technique. Let me know!
Happy painting!


Tangible Day on YouTube (Miniatures and More!)

Great coverage of the techniques and I appreciate the shoutouts.
Thanks. Your tutorials are helpful!
A great introduction, thank you !
Awesome! I appreciate the comment 🙂
Great article! Quick question about “wet-in-wet blending”… Is this similar to how a wash works? How does this technique differ from a wash?
Good question! The wet-in-wet blending technique is similar to a wash, but with a lot more control. You apply a bit of water to the surface with a clean brush, not too much, e.g., so it doesn’t run or drip, and then apply some paint to this dampened area. The pigment flows through the water dampened area. If done well, it acts like a really thin glaze or wash that you have a lot of control over. The nice thing, too, is your first step with water allows you to decide where the paint will eventually go. And, if you make a mistake, you can dry up the water and start over before blending in the paint.
Pingback: Why It's Bad to Thin Metallic Paints, and Other Metallic Painting Tips - Tangible Day
Pingback: DND Miniature Paints for Dungeons and Dragons (Top 3 Sets Reviewed) - Tangible Day
Pingback: How To Import Images Into Photoshop – DW Photoshop
Pingback: Finding The Way Through the Maze: Keeping Momentum in Miniature Painting Projects - Tangible Day