How do you paint a resin 3D printed miniature or model? 3D printed tabletop miniatures are easy make and paint with a resin 3D printer. Because of the high quality sculpts, painting a 3D printed miniature made with a resin printer is also the same process as painting any other regular miniature or scale model kit. For a while, making finely detailed miniatures with a 3D printer was difficult with almost any consumer-grade 3D printer. If you were looking to 3D print D&D (Dungeon and Dragons), Warhammer 40k, or other tabletop fantasy miniature figurines, you had to either outsource the job to a 3D printing company or purchase a very expensive 3D printer. Fortunately, the speed of technology has outpaced our expectations, and resin 3D printers that can print small-scaled miniatures are commonplace and affordable.
In this article, Cory Dolbashian, a recent PhD graduate in physics at the University of South Carolina in Columbia, United States, shares his experience working with his first resin 3D printer. He also shares how he painted his resin 3D printed model.

Read on for a unique perspective into resin 3D miniature printing, and how Dr. Dolbashian painted this 3D printed model.
How did you start your 3D printing and miniature painting hobby?
Although I’ve only begun to seek new techniques, feedback, and improvements in the last 5 years, I’ve been a miniature hobbyist for more than 16 years. I am a recent recipient of a PhD in physics and fascinated by the intersection of my hobbies and my career.
In general, I tend to seek a systematic approach for working with miniatures, including painting them. But, like many, I am much more satisfied with a carefree approach when embarking on miniature painting projects.
RELATED: 3D PRINT AND PAINT A WARHAMMER 40K TANK
Most of my miniature hobby history has been army painting for various games (Warhammer Fantasy, 40k, Warmachine/Hordes), but this changed recently when I bought my first resin 3D printer, the Epax X1 (other affordable resin 3D printers include the Anycubic Photon). This fine instrument ran me about 400$.
Is 3D printing tabletop miniatures for painting worth it?
As a miniature painter, I have no regret with going this route with 3D printers. Resin 3D printers are amazing machines. Whether you’re 3D printing display pieces, models for your next RPG DnD adventure, or Warhammer 40k wargaming table, 3D printers are are a great tool in any hobbyist’s arsenal.
Here are 3 examples of the best resin 3D printers for printing miniatures and gaming models:
| Image | Printer | Check Price |
|---|---|---|
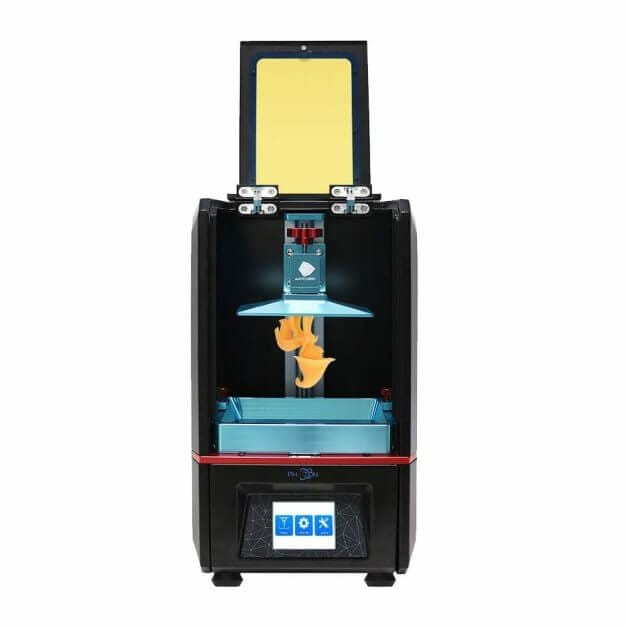 |
ANYCUBIC Photon | Check Price |
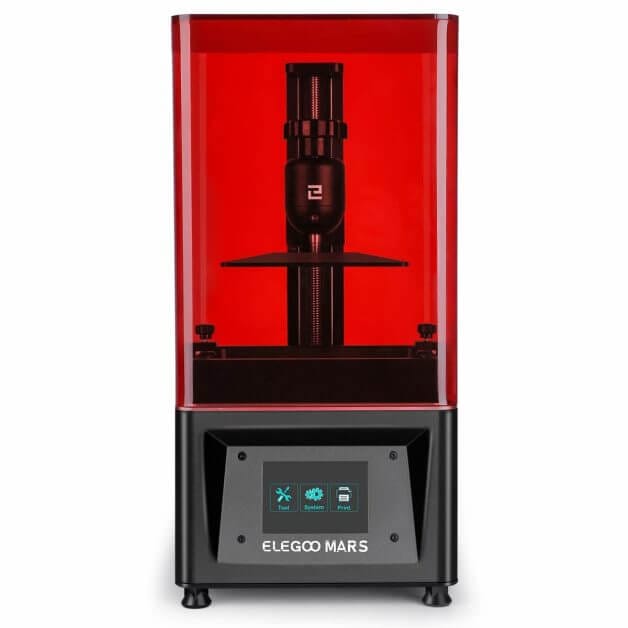 |
Elegoo Mars | Check Price |
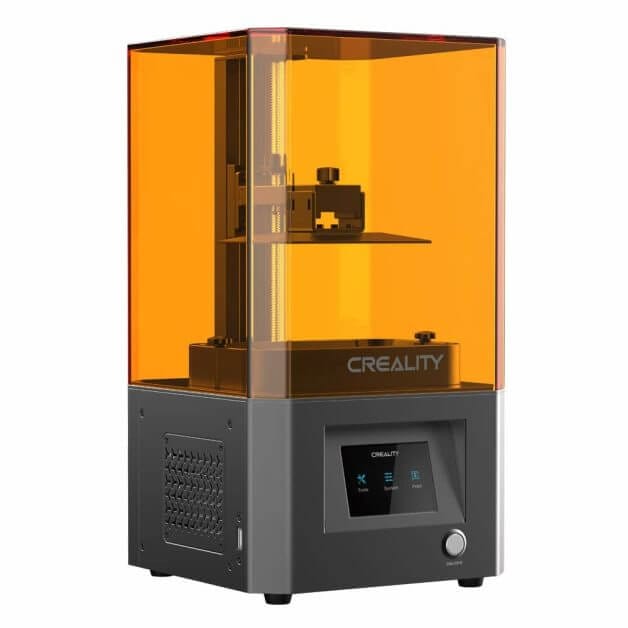 |
Creality | Check Price |
How economical is resin 3D printing miniatures, really?
Excluding the cost of a 3D printer, a high quality 75mm 3D print costs about $12 (e.g., $10 for the 3D printable file, and 2$ for the resin).
So, in general, I can make as many mistakes painting a large of small scaled miniatures, because the cost to trash it is worth it for “the learning experience”.
Of course, it’s not as simple as that, because I use electrical power to run the printer. Add to that the disposable materials to clean prints, etc., paper towels, alcohol to wash off the uncured resin, and other perishables.
But, if you think about it, the value in 3D printing miniatures isn’t in pure monetary terms. The value comes from “learning” and “growing”. For me, that means not being afraid to try new things with my painting approach on the mini. I’m not destroying a hugely expensive model I purchased.
So, what is the real reason I think 3D printing is worth it?
This brings me to my next point.
Why 3D print miniatures?
Often when painting, I am stuck in the mindset of “not ruining” a model.
This is largely because I feel my mini painting has to fit a certain army color scheme or maybe because I know that I spent 45-70$ on the sculpt. Wanting the model to look the best with the least chance of failure, I often end up painting safely, with maybe a little experimentation happening on a smaller element of the model.
The great thing about 3D printing is that it has alleviated this fear of failure while painting a miniature.
The physical cost to print a model is less than $2 of resin. The largest cost is only the initial purchase of the 3D printer and the cost of the 3D printable file (unless you find what you want for free in an open-source database like Thingiverse).
The point here is that I have more than a single chance to paint a 60$ display model. Now, I can do have multiple chances for the same or less cost to get my painted miniatures just the way I want it.
This mentality has helped me shift my focus from high quality tabletop to finally experimenting with all the techniques that a generic “color scheme” has prevented:
- Finding interesting color compositions
- Experimenting with different skin tones
- Painting busts
- Playing with texturing
- Finding my favorite hue of each color
- Understanding value and saturation
- Experimenting with OSL
- Trying some freehand
With no fear of “ruining” a model, and excluding the middle-man of production through 3D printing, I am free to find exactly the model that I want to paint.
And, importantly, I can use that 3D model to practice exactly what I want!
Essentially, my canvas has become infinite and now I am free to practice miniature painting techniques.
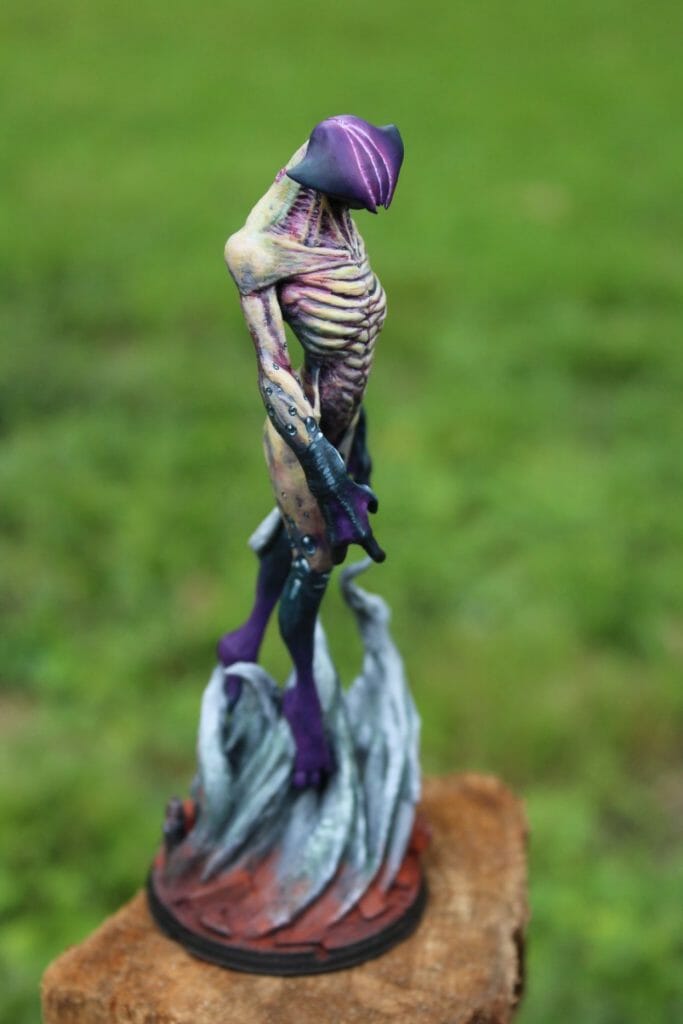
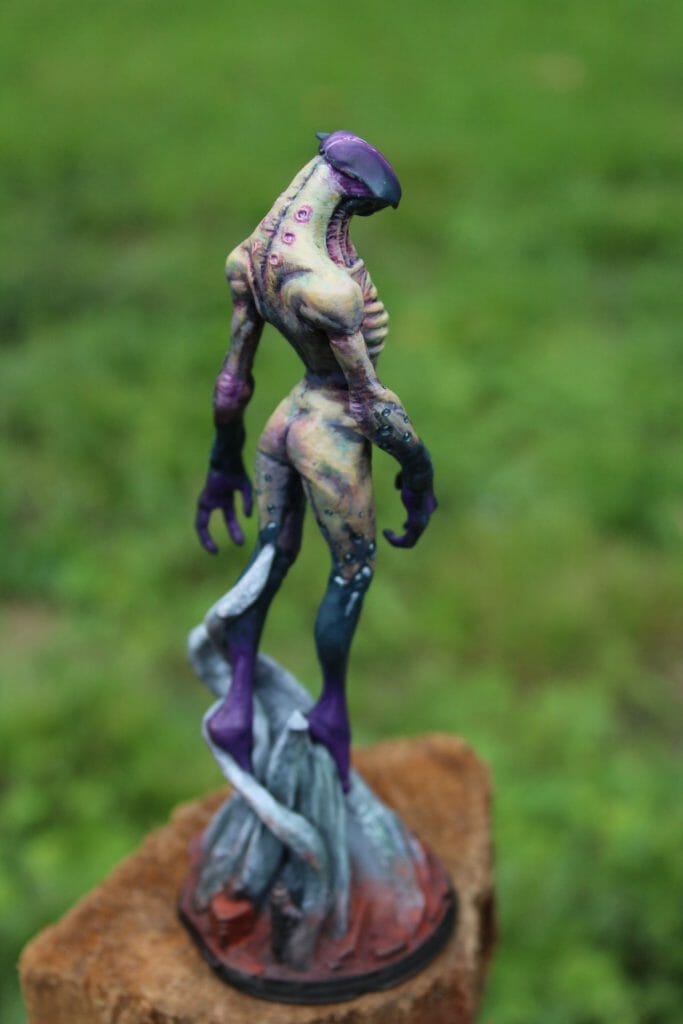
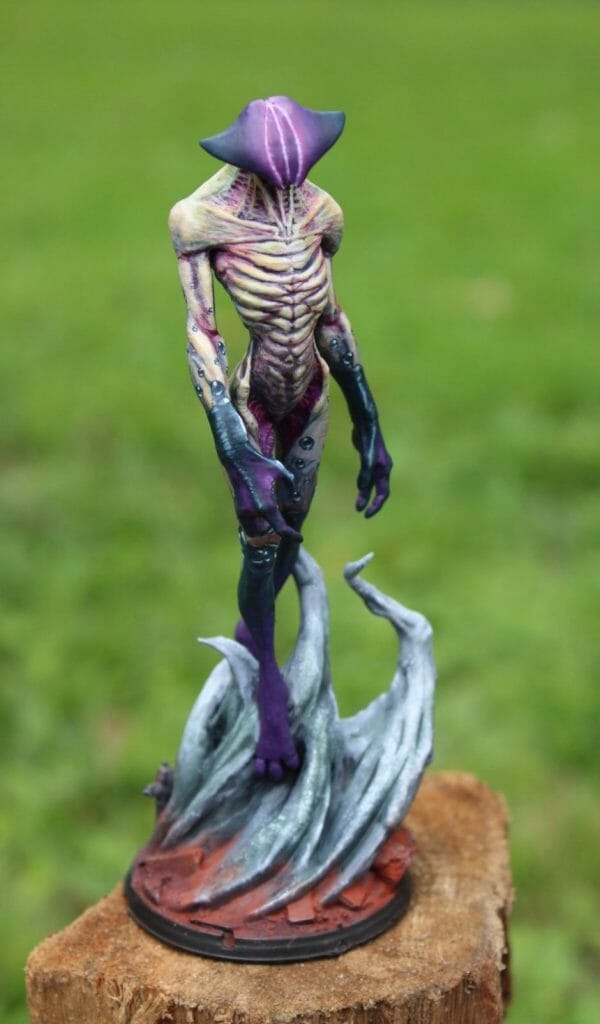
And, this is what I did with the following model: the “Aliencrab”.
3D printing the “Aliencrab” model
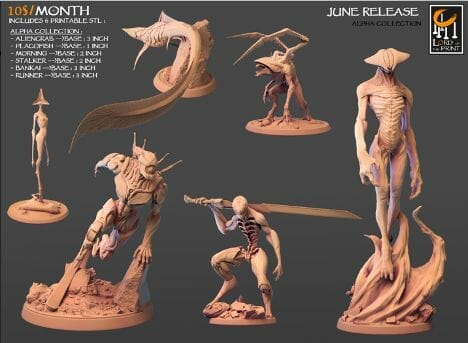
This particular model comes from the “Lord of the Print” Patreon.
For those that don’t know, Patreon is a subscription to particular artists who you want to support. In return for your financial support (through the subscription), you may receive rewards as a thank you. In this case, the “Lord of the Print” Patreon is a group of 3 digital artists for 2D and 3D artwork.
The cost for entry and support of the Patreon artists is between $5-10 per month. In this case, you may be rewarded with 5 or more 3D models for printing.
In my opinion, the Lord of the Print Patreon artists create beautiful 3D sculpts with proportions and textures that do not pander to the Dungeon & Dragons (DnD) or Warhammer motif. Their work is unique.
Of course, admittedly, I am not married to any Patreon group. I tend to switch between 15 different Patreons, month to month (only paying for 2-3 at a time). I only buy-in if I see something that catches my eye for painting.

In this article, I present something that I really wanted to paint: the Aliencrab, a humanoid sculpt with it’s elongated, striated musculature and slim proportions.
What makes a sculpt great for 3D printing and painting?
Other than pure aesthetics, here is what makes a model great for 3D printing and painting: detail, proportions, and a sense for the 3D printing technology.
Will it look good coming off my 3D printer?
Looking at the Aliencrab, I was certain it would be wonderful 3D printed model.
And, if I’m being perfectly clear, I was compelled by the model set because each one seemed to tell a unique story in a unique setting.
The dynamism and musculature of each model was so well placed, so real, that even without clothing or armor, I would have the opportunity to paint with different techniques. For example, I could paint NMM on smooth, carapace like surfaces, or even object source lighting (OSL).
RELATED: 8 MUST-KNOW MINIATURE PAINTING TECHNIQUES FOR BLENDING COLOR
Finally, all the models in this set exuded so much character that I just had to paint them.

3D printing the Aliencrab
Throughout the years, my mother always asked me: “why do you paint such ugly monsters?”
(Of course, she means anything that isn’t your generic “human”)
In this case, my response is that the model already feels alive to me. Thanks to the sculptor, the Aliencrab is just begging for paint.
With a 3″ (or 7.6cm) base diameter, the 3D model was about 10 inches tall. This was too big to fit in my 3D printer.
So, to make it fit in my 3D printer, I scaled the file to 66% of the original size so I could print it in one piece.
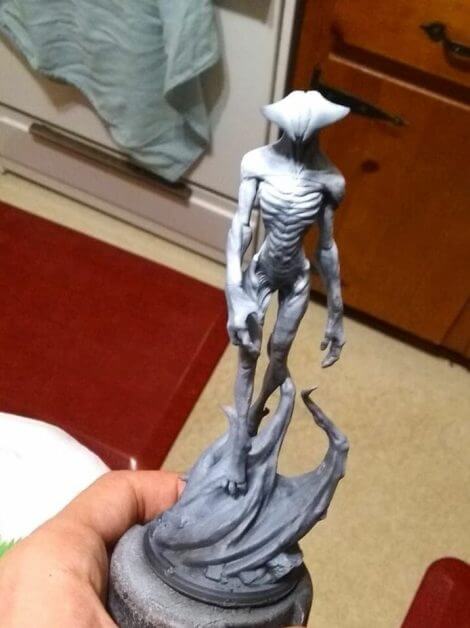
Everything printed out perfectly, except the toes, because I forgot to put scaffolding supports under them. To compensate, I sculpted the front toes myself, but you’ll notice a few missing in the back. Oh well, this is why 3D printing is great for me. I can mess up without worrying too much!
The final resin 3D print was hollow with a base diameter of close to 50mm (as a result of scaling). The total cost for the most was about $2.50 worth of resin.
I cleaned the model and used ultra-violet (UV) light to cure the resin.
You can see more details about how to work with resin 3D prints here.
Preparing the 3D printed model for paint
I started with a priming job with Badger Stynylrez surface primer.
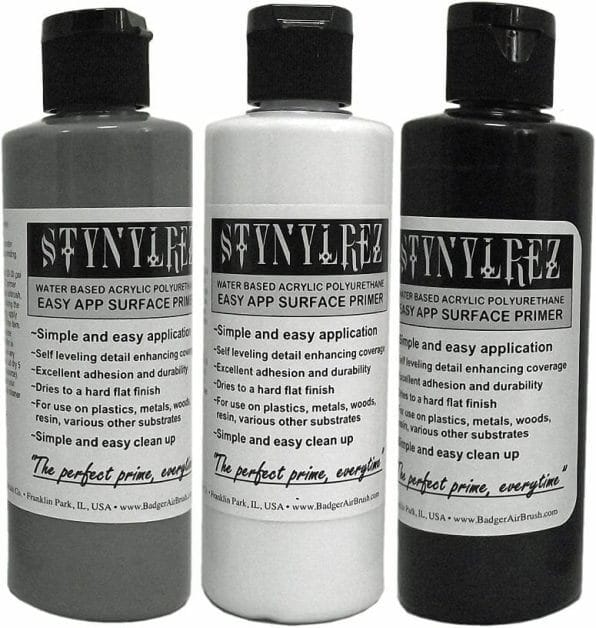
RELATED: BEST 10 PRIMERS FOR PAINTING MINIATURES (TIPS AND USE)
I started with a zenithal priming application using Stynylrez primer. I started with a black colored primer. This was followed by an airbrush application of Daler Rowney white ink.
Aside from showing me the general details of the model, priming like this helps with 3D prints because resin is often semi-transparent. Without primer, finer details are hard to visualize with the naked eye.
Here are 4 painting goals for this 3D printed resin miniature
There were four things I wanted to achieve with the paintjob of this 3D printed model:
- Pale yellow-tinted skin
- High contrast elements somewhere on the skin using a blue-turquoise color
- Harmonious or balanced color composition
- Eye catching, but not overpowering OSL in the slits on his head
These were the general ideas that kept bouncing around in my head while I started.
Here’s how I painted the resin 3D printed “Aliencrab” (10 key steps)
1. Basecoating the first color
I am generally impatient in early basecoating steps, but also refuse to use my airbrush for anything other than priming. Thus, I used a regular brush to apply the first basecoat.
I wanted yellow for the base skin tone, but not a vibrant saturated yellow, so I started with a base of Iraqi Sand (VMC)+ Ivory (VMC),+and Sepia ink (VGC).
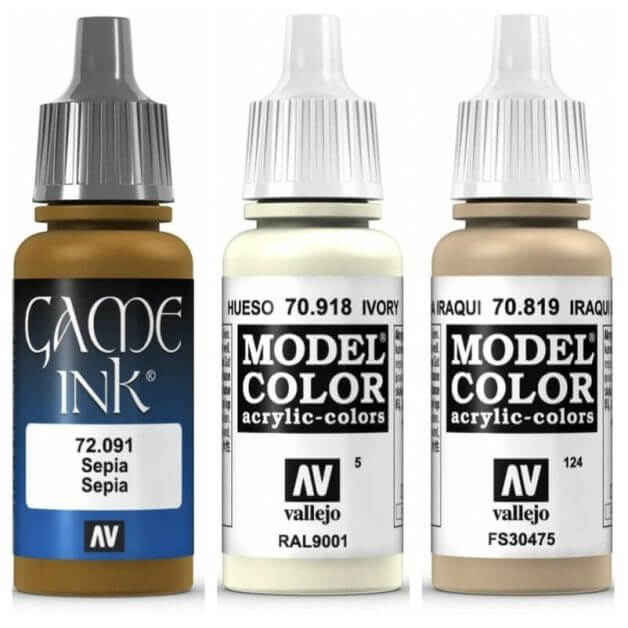
There is no real recipe other than “I liked how it looked, and it fit what I had in my mind.”
I often like to add inks to my regular paint colors if they are a similar hue, as inks reduce the viscosity of the mix, without diluting the coverage. Adding water or other transparent thinning mediums make it hard to maintain good paint coverage.
2. Apply a wash over the entire model
MORE: RECOMMENDED BASIC WASHES FOR GENERAL MINIATURE AND MODEL PAINTING
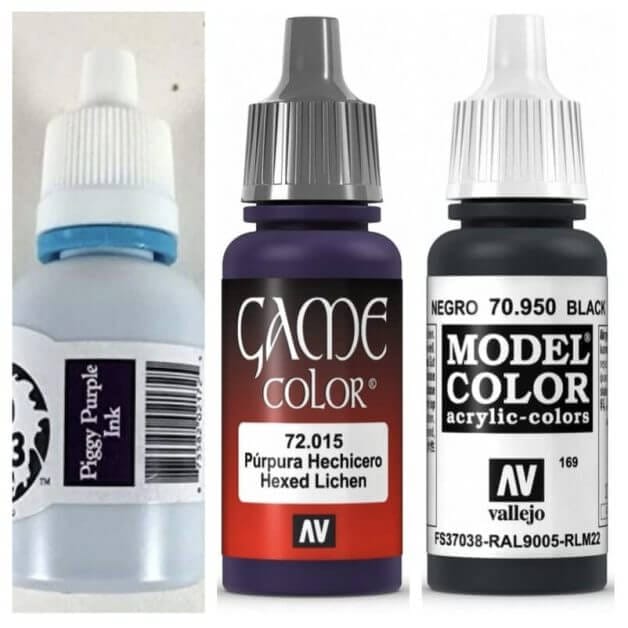
Following the yellowish basecoat, I washed over the whole model with a dark purple made with Black (VMC) + Hexed Lichen (VMC) + Piggy Back Purple ink (P3) + water.
The idea was that I could establish some dark contrasting shadows if I did it carefully to keep things from drying on flat surfaces. But, I was impatient and ended up with lots of tide marks over the organic raised surfaces.
Oh, well.
Lesson for next time: let your washes dry properly. Don’t overwork a still-wet surface.
3. Compose color surfaces (decide where main colors will go)
Here’s where improvising often helps you.
As Bob Ross would say, “there are no mistakes, only happy accidents”.
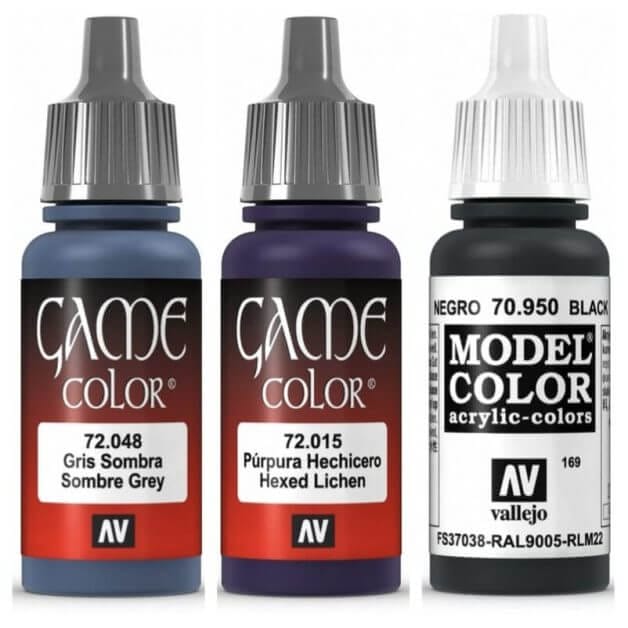
In an attempt to clean up the previous step, I carefully applied a desaturated purple shade: Hexed lichen (VGC) + Sombre Grey (VGC)+ a hint of black.
This was painted into areas in which the volumes of the model itself would cast a shadow: the undersides of muscles, under the head, in the crotch, behind legs etc.).
As an intermediate step here, the purple tide marks and any mistakes were cleaned up with the same “yellow” base coat color (see basecoating step #1).
Here, I also took the bold choice of deciding where my blue-turquoise skin variation would go: on the extremities and head.

This served a few different compositional purposes: The limbs would be darker which adds value contrast with the lighter skin, the limbs and head frame the model itself, adding a focal point, and the dark blue hue contrasts fairly well temperature-wise with the yellow of the skin, although it is still a cooler yellow.
4. Continue adding color depth
With my composition concept in-mind, I blocked in more blue tones to contrast with the warm yellow tone of the skin.
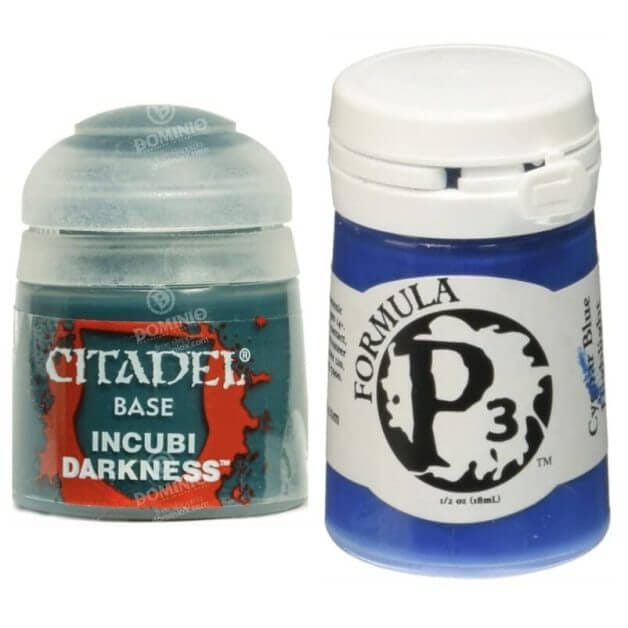
I used Games Workshop (GW) Incubi Darkness (wonderful color) + P3 Cygnar blue base + a bit of black.
Finally, I went to some of those recessed areas like the neck webbing, the groin webbing, and really anywhere where I think skin would be thin or irritated.
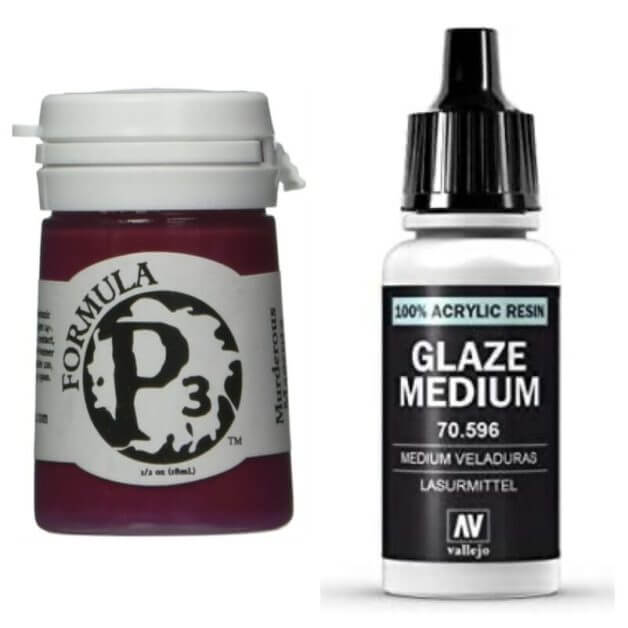
I painted a nice thin glaze of a warm color: Murderous magenta (P3) + Glaze medium (VGC).
MORE: HOW TO USE LAYERING AND GLAZING (AND OTHER COLOR BLENDING TECHNIQUES)
This served to give the skin visual interest and break up the monochromatic nature of this dude’s skin, and it helped to cover up some more of my impatient initial sins with the purple wash.

At this point, the model seems to be in the “ass” stage of painting.
No element is done, and it still looks like a very rough sketch. Additionally, with a fairly continuous design, in general, the model had no hard edges to slap distinct black lines or edge highlights on.
Although the skin had some nice value variation (dark to lights) and hue variation (reds purples and yellows), it still seemed a bit boring because the reds and purples were mainly shading the skin, rather than adding to the visual interest of the skin itself.
5. Refine structural elements on the model
So the next goal is to begin to refine various elements: The limbs and how the transition happens to the dark color, adding variation to surface, and general cleanliness.
I proceeded to do exactly that. I tightened up lines with some tones similar to my base yellow colors, and put some more careful magenta glazes here and there.
Looking at the model, it seemed like another color was necessary on the skin. Since it was beginning to look sickly, I picked a nice desaturated green (P3 Gnarls Green).
I mixed some glaze medium with this green and glazed it over mid tone between highlight and base tone transitions.
Additionally I mixed a few drops of this green into my basetone mixture, added some ivory to highlight, and generally matched values of my basetone and highlights (same brightness of color), and applied it in appropriate places to highlight and cover.
This added some visual interest and helped tie some of the skin elements together.
The idea here is that the skin had subtly shifting hues across the surface, and although one is greener and the other more yellow, if you were to look at it in black and white, ideally the transition would be identical for both colors.
The cycle of green glaze-> magenta glaze-> yellow base+ highlights-> yellow green base + highlights continued until I was mostly satisfied and, frankly, sick of looking at the model for the day (sometimes it’s like that haha).

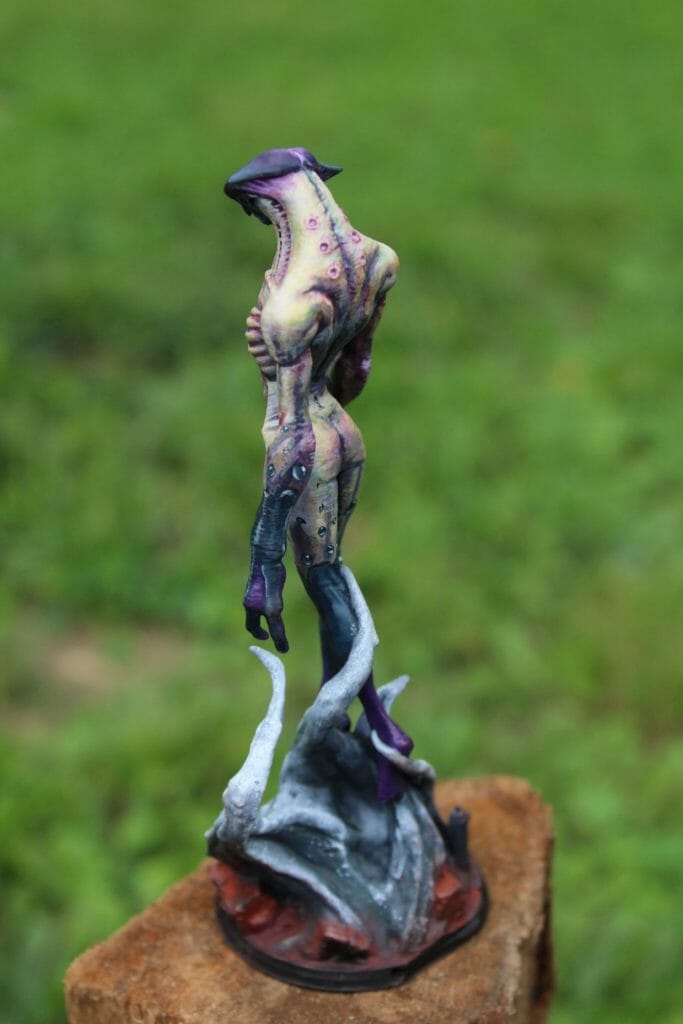
6. Refine interesting elements, e.g., texturing
I have heavily worked on the yellowish skin, but haven’t really considered the darker limbs.
Because the model is generally one texture, I wanted to pivot to make the dark part of the skin look like it wasn’t just a different color of skin. I went bold, made a “hard” line between the dark and light areas and painted some little bubbles coming from his limbs into his main body area, as if whatever was causing his limbs to be dark could move on its own.

I even painted a test bubble to see if it “could” look like a bubble if I did good enough specifying it’s lighting (circled area in the photo above).
Additionally, in the photo, you can see all of the color variations in surface hue. While you could zoom in and see many different colors, the overall hue is pale yellow, and hopefully these other colors only served to enhance the visual interest of the otherwise uniform skin color.
Note that nothing is particularly “smooth”. Most of the paint feels more painterly or more sketchy.
There are a few reasons for that. The first is that I am painting for fun. This is not a competition piece and I don’t feel the need to spend 400 hours creating painstakingly smooth blends. The more pragmatic reason is that I keep a poor list of colors that I use because most are mixed in situ (or directly on the surface I’m painting).
Although I do use a wet pallet, things still dry. Attempting to recreate a specifically hued midtone will be a slightly, but noticeably different color. To that extent, when something looks “good enough”, I am reluctant to go back and mess with it, especially if the hue is just right.
7. Focus on the extremities (head, hands and feet)
At this point I am fairly satisfied with the skin color and now turn to focus on the extremities and the head.
The idea of the head is a purplish glow emanating from those 3 cracks in his head.

I know from experience that pure purple looks really bad if you just add white to lighten it.
So, I mixed Hexed lichen (VGC) + Murderous Magenta (P3) as my “purple” since it was a bit warmer. To brighten this warm-purplish mixture, I added a little white paint. I used this as a highlight for the purple elements on the model, focusing on the hands, feet, and head.
8. Paint object source lighting (OSL)
To create the object source lighting (OSL) glowy effect, I have to paint a little more carefully.
Often with OSL, I am tempted to just glaze in the effect over white for the cast light, but sometimes that looks silly.
Here’s what I did to paint the OSL on the model:
- Start with a base of dark turquoise around the slit on the model’s head
- Transition toward the inside of the slit from the dark turquoise to…
- dark purple
- purple
- magenta + purple
- magenta + purple + white
The “dark turquoise” starts on the areas farthest from the slits on the head, and the “magenta + purple + white” located toward the areas closest to the glowing slits.
With this gradient, I hoped to achieve a glow from inside the model, rather than just cast across the surface.

I ended up loving how this looked, so I decided that the limbs would look cool if they also had the same type of transition from dark turquoise to purple+magenta.
Because I didn’t want it to look like everything was glowing, distracting from the bust area, I did not push the value of the purple on the extremities quite as high as the head. Once again, I feel like the symmetric placement of similar tones on the head and 4 limbs helps to frame the model’s focal point.
9. Painting freehand bubbles
The last few things to attend: tidying up the head, painting the base, and those dang bubbles.
For these dang bubbles, I pulled out my rarely-used W&N Series 7 size #000 brush. In general, it’s a pain to use because it has such a small belly, paint dries so fast. But, dang if it can’t make tiny lines!
My normal workhorse brush is the Winsor & Newton Series 7 size 1, but it’s a bit old. Although it still holds a tip, it isn’t quite as sharp as it used to be.

RELATED: BEST BRUSHES FOR PAINTING MINIATURES
I approached the painting the bubbles similarly to I would gems: start with the darkest color on the top of the shape, highlight downward with crescent shapes, then finish with a final highlight of a small circle on the top, and a thin crescent on the bottom. Here’s a good site for how to paint gems.
In general it looked good, and so with my regular brush I applied the same colors to the dark turquoise areas on the arms with pretty boring highlights: I was stretched pretty thin as far as this project went, and was getting more and more worried about ruining it.
The bubbles looked okay, but I think my fear of using a pure white highlight left something to be desired in the “visual interest” department.
Time for a confession too…. I really wanted the bubbles to look like they were floating up from the limbs….like a lava lamp.
The effect, if executed properly, would result in his arms looking like they were filled with turbulent liquid and have the appropriate highlights. This effect is only partially executed because I didn’t know exactly what I was going to do, and originally had a transition from the yellow of the skin to the dark of the limbs via a gradient, which made it hard to establish a stark transition from the color on the hands to the color on the arms.
So, on that note, if you see some weird stuff where the turquoise meets the yellow anywhere, it’s because I didn’t commit hard enough.
Sorry y’all.
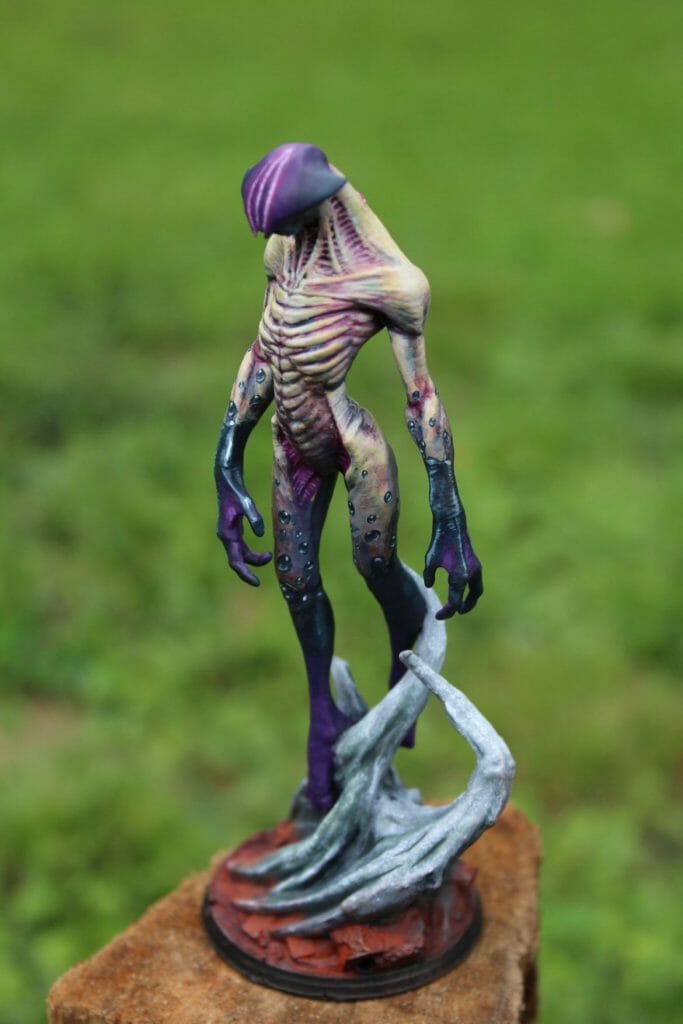
10. Final touches
The final steps to complete include reinforcing those turquoise highlights (with a white + base color, aka, mostly white), general cleanup, and painting the base.
The first two don’t really need explanation.
Instead, I will describe my relationship with basing miniatures: it sucks.
I rarely think far enough ahead to think of an appropriate base. For this one I considered making it look like the base was some smoky nonsense with a purple glow (similar to the head) within the center/point where it touches the ground, but I didn’t want to distract from the model.

My Painting Brain Trust™, suggested that I do a neutral gray for the smoky bits with some green glazes to contrast with the purple. I liked the idea, and, using my favorite paintbrush, the sponge brush, went about that.
Finally, I smacked everywhere else on the base with “rust” colored pigment (probably a compositional mistake), and ta-da, I call it done.
Luckily for me, my wife has an excellent Nikon and it happened to be a perfectly overcast day for photos. Snapped some excellent (if I say so myself) photos and I called it a wrap.
Conclusion
This model was so much fun to paint, even if I am a coward who is too afraid to commit fully to certain decisions. Whenever I finish a project, I always reflect on what I practiced and what I learned.
In this case, here are the main 13 lessons for painting a resin 3D printed miniature:
- A way to get a beautiful purple (magenta+purple)
- Practice painting Bubbles
- Painting pale skin
- Glazing different hues for visual interest
- Using LOTS of colors but still communicating the one you intend to communicate
- Focal point and framing of a model
- Nontraditional OSL techniques (for me at least) with a “difficult” color
- Playing with a wonderful blue-turquoise (not really what I learned, but more what I practiced)
- Painting freely and not letting myself be railroaded by any idea
- Let the model paint itself!
- Having fun (mostly!)
- Not stressing about “smooth blends”
- Playing with value+saturation vs Hue+value, and the idea that different colors have different brightness, which we can adjust in a number of ways, not just “mixing in white and black”
Can’t wait to 3D print my next fun project to paint!
This article was written by Cory Dolbashian, a miniature painter, 3D printing enthusiast, and physicist specializing in experimental magneto-optics. He also has a strong background in data analysis and automation, which has facilitated successful experimental data acquisition in his work.

Tangible Day on YouTube (Miniatures and More!)

Great miniatures you have created. I will also try to create my favorite cartoon miniature today.
Very neat-o