In miniature photography, adding an LED ring light to my studio has improved the quality of my images. For a long time, I ignored this aspect of the hobby until I realized that I wanted professional looking photos of my work. Of course, that meant learning all about how to make great looking miniature photos. If you’re photographing tabletop wargame miniatures, historical dioramas, or enjoy toy photography, then consider adding an LED ring light to your studio.
In this article, I share my miniature photography experience using the Yesker LED front ring light. I’ve worked with this ring light for a long time and discovered a few of its good and bad sides. Check out what I’ve learned from using this LED ring light for hobby model photography.
In a Hurry? Here are 3 Other Editor’s Top Picks for Miniature Photography Lights 🥇
A ring light allows you to take photographs with your camera aligned parallel with the light source. This reduces harsh shadows and ugly reflections on the subject. Good LED lighting systems also allow you to adjust brightness and color temperature. Both the color and brightness of a light have a significant effect on how your final image appears. Although post-processing is great for improving image quality, it can’t fix photos taken in bad lighting.
For more tips about how to edit your photos, check out this quick guide for image editing article.
Why is Light Important for Photography?
A camera is a device that captures images (source). A camera captures images by collecting ambient light from the environment. Whether that light comes through a pinhole in a box (e.g., see pinhole camera), or through a lens, a camera must capture the light to create form, i.e., the photograph.
Without light, a camera is useless.
In miniature photography, the direction, brightness, and quality of light that you use will determine your final result. To create professional images, you will need to know how to operate your camera and understand how light affects everything.
Here I review a few topics that may help you understand why the LED ring light I review below helped me so much.
RELATED: MORE ABOUT GOOD LIGHTING IN MINIATURE PHOTOGRAPHY
Of course, remember that every artist, including photographers, have an eye for a particular “look”. So, what I find beautiful, you may not be as keen to see. In other words, you’ll have your personal aesthetic preference and you’ll gravitate in that direction. Suffice it to say, take the principles here and shape them for your needs.
5 Quick Tips for Taking Better Miniature Photos
Here are five things you can do to improve the quality of your photos of tabletop miniatures:
1. Use natural lighting or daylight lamps
Lights effect how your subject appears to your eyes and camera. It is the single most important variable you need to consider in photography. For best results, natural sunlight is the ideal kind of light source. But, artificial lamps that have a diffuse (soft) and bright light that has a color neutral temperature (~5000 Kelvin) are almost as good.
2. Lower your perspective
When you’re taking photos of miniatures, the most engaging images are those you create when you’re at the “eye level of your subject”. That means getting low to the ground or tabletop height of your model. Pretend you’re “in their world”, and use your camera to capture that immersive feeling of what it’s like to be small. This also means the worst images you can make of miniatures are usually from your normal standing height.
3. Improve your composition
Composition refers to where your subject is located within the image frame. Is the model your photographing located in the dead-center of your photo, or off to the side? It is usually a good idea to off-set your subject to the side of the image frame using the “rule-of-thirds“.
Another tip is to try and “fill your frame” with your model subject. Get closer with your camera and fill up as much of the photo with your subject. You don’t want a lot of dead, negative space, unless that’s your intention. Remember that none of these “tips” are hard rules for making great photos. Use your artistic license to make images the way you like them.
4. Avoid blur
Taking photos of miniatures is best done with a stabilized camera, e.g., not handheld. By using a tripod, for example, you can avoid the blurry photos that often occur due to shaky hands. You can find affordable tripods for cameras and smartphones online. Some photo light box studios come in kits with useful tripod systems. Another benefit of using a tripod is that you free both your hands. This allows you to take a series of images without the constant re-calibration of your camera.
5. Edit your photos
Every professional looking image requires some level of editing. Post-processing or editing your photos involves cropping out parts of the image, correcting white balance, or digitally-removing artifacts and dust that got into the captured picture. My favorite and recommended piece of photo editing software is Lightroom, but you can find free image editing software online. Try Snapseed for free from Apple or Google.
Miniature Photography is Best Done with a Continuous Lighting System
There are two kinds of lighting systems for studio photography: flash or constant light systems. A flash is quick, bright, and inexpensive. A constant lighting system is a bit of a mixed bag when it comes to brightness and light quality. They can also be more expensive than flash systems.
For miniature photography, constant LED lights are best, because they give your more control. Constant or continuous ambient lights are “always on”. This allows you to tweak your camera to create the best photo possible of your miniature subject. In other words, with constant lights, you can methodically adjust your camera’s settings to make the image you want.
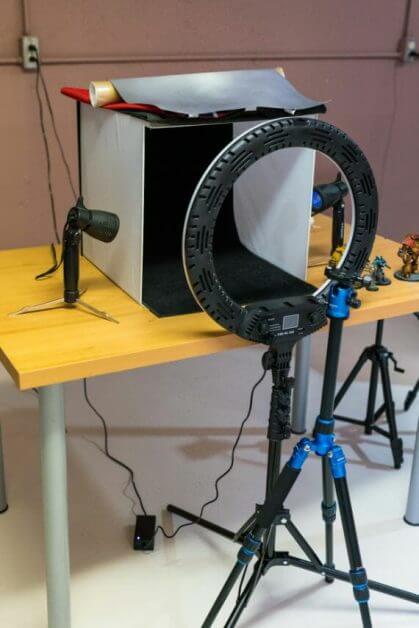
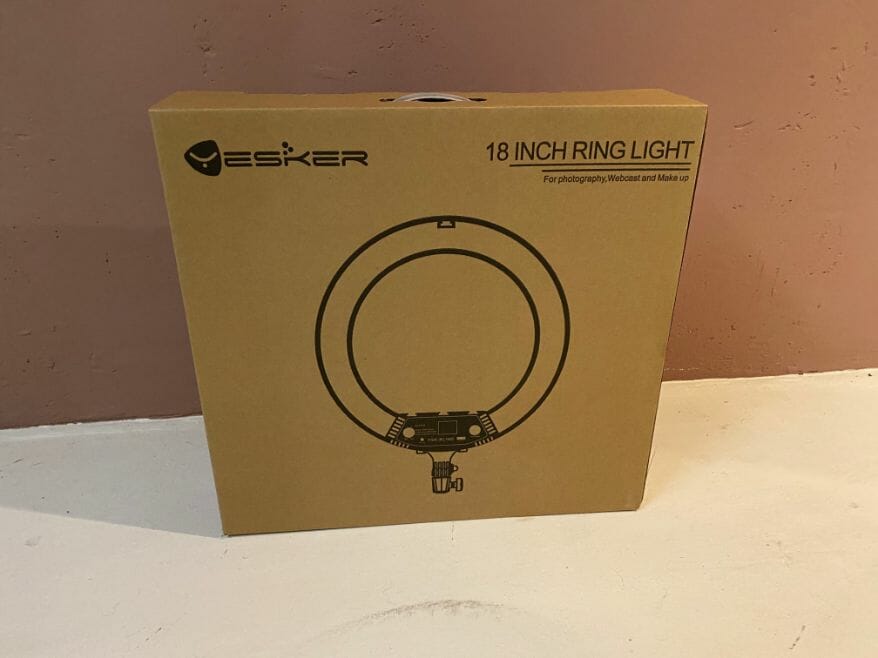
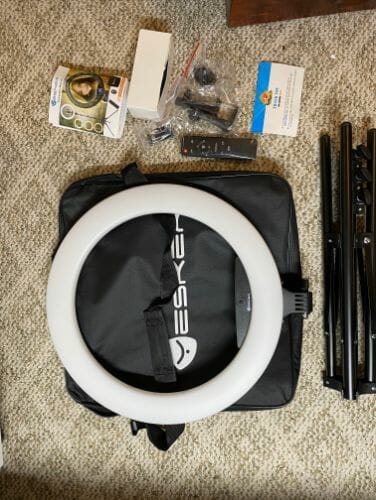
Full Review of the Yesker Ring Light (Unboxing)
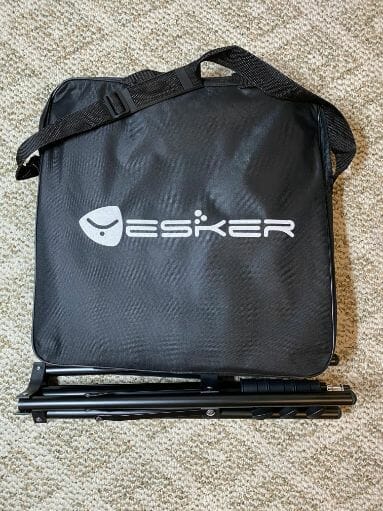
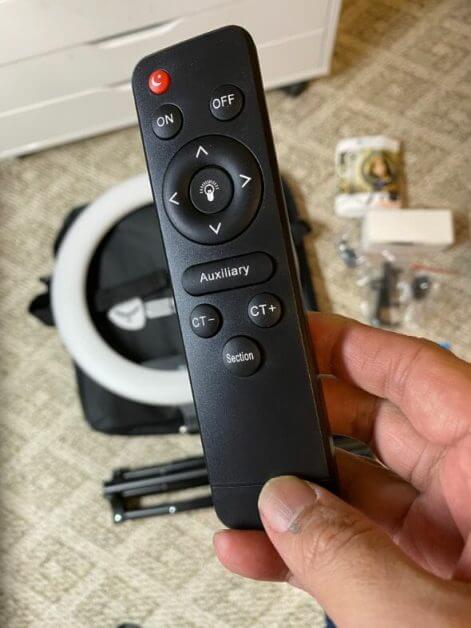
The Yesker Ring Light arrived 2-3 days after I ordered it on Amazon. The package was neat and contained everything I expected based on the description online. Inside the box, you have a handy carrying bag, a tripod stand for the ring light, a smartphone holder, and a remote control. The remote features buttons that control the ring light’s various functions, e.g., brightness, color temperature.
The remote control is handy especially if you’re a vlogging or taking selfies. You don’t need to get up to manipulate the back panel of the ring light from your position. You can use the remote to make lighting adjustments while you film.
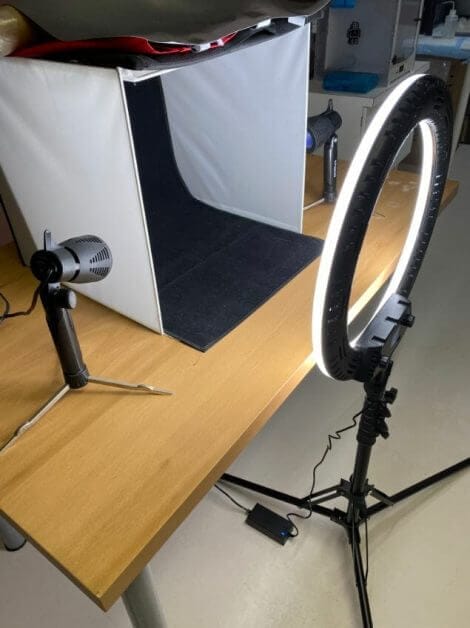
My first impressions of the light were very good. The entire setup is lightweight and portable. The brightness settings at 10% (it goes from 1-100%) is already super bright for photographing miniatures. Using the back panel controls, you can also adjust the color temperature of the light between 3200-5500 Kelvin (warm to cool lighting). Examples of these features are show in the photos below.
Yesker Ring Light
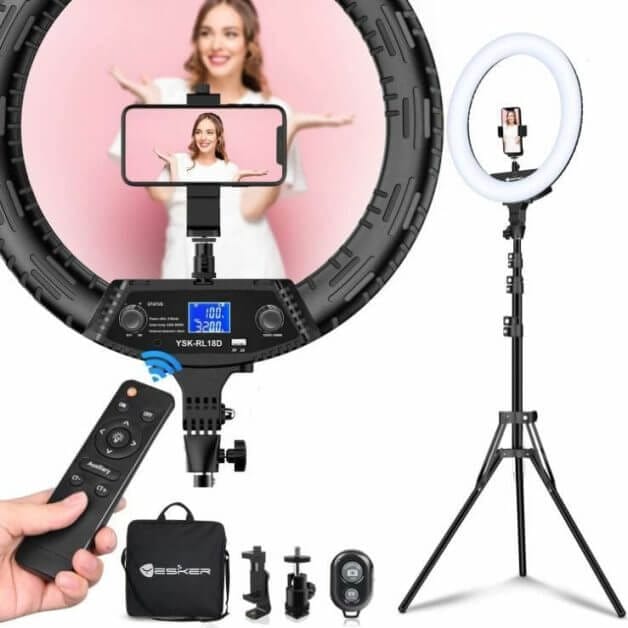
The Yesker Ring light is a large 18″ diameter ring light that fulfills a lot of needs. This including portrait photography, live streaming video, and product photography. The included smartphone holder and tripod stand allow you take photos with your smartphone or a regular camera. Note that the included tripod has the standard screw threads you’ll need for attaching a ball-head. But, the stand itself may not be sturdy enough to hold a full-frame professional DSLR camera.
Two knobs on the back of the ring light panel allow you to adjust brightness and color temperature. A easy to see LED readout shows you the setting you’re currently using. At the lowest brightness setting (10-100%), you’ll have plenty of lighting for photographing miniatures. The adjustable color temperature will allow you to change the color of the light from warm (3200K) to cool (5500K). An included remote control also allows you to make both of these lighting changes wirelessly.
Adjustable Color Temperature: A Powerful Feature for Miniature Photography
To show you how color temperature affects the look of a model, here are a few pictures taken with the ring light set at warm or cool color temperatures. The Yesker ring light allows you to adjust the color temperature of the light between warm and cool (3200-5500K).


With any good quality ring light (see below for the review), you can adjust the color temperature of the LEDs to suit your needs. Changing the look of your photograph with color temperature is a great way to play around with your miniature photography.
Use different ambient color temperature to evoke different narratives in your miniature scene. Warm lighting may, for example, create a nostalgic or calm scene. Cool lighting may add a sense of melancholic drama or urgency.
What About Smartphone Photography?
Using a good ring light placed in front of the model can immediately improve your smartphone miniature photography. Because you’re shooting straight-on at the model (the light surrounds your camera), the miniature will be well lit in your photo. With a high >95 CRI ring light, you will be able to capture the widest color spectrum with your camera. The final result is a miniature photograph with excellent color contrast and detail.
RELATED: SMARTPHONE VS DEDICATED CAMERA FOR MINIATURE PHOTOGRAPHY

In general, a ring light is an excellent way to help you take better miniature photos with your smartphone camera. The good lighting condition helps the smartphone’s small camera sensor capture the most detail and color possible. This ring light is awesome!
Final Thoughts
I found this ring light to be a perfect companion for any painter and hobbyist looking to level up their miniature photography.
Yesker LED Ring Light for Miniature Photography
Pros
- Bright, diffuse (soft) light
- Ring light for easy front facing lighting setup
- 3200-5500 color temperature adjustable
- Includes stand, smartphone holder, and remote
- Lightweight, portable
Cons
- Relatively large footprint
- May not need all the features
If you’re hoping to improve your miniature photos, a ring light can help (along with a good eye and few other photographic tips). The key to getting better any taking better pictures of your tabletop models, e.g., Warhammer 40k, Age of Sigmar, RPGs, DnD, is practice.
This also means that for any hobby, the essential ingredient is time. I’m always experimenting with different things, constantly trying to find ways to do things better or simply different. I hope you enjoyed this article review. This isn’t the only ring lighting option for photography, but it is the one I have the most experience with. For more examples of my photography work, see the gallery, and let me know what you think?
Happy photography!

Tangible Day on YouTube (Miniatures and More!)
