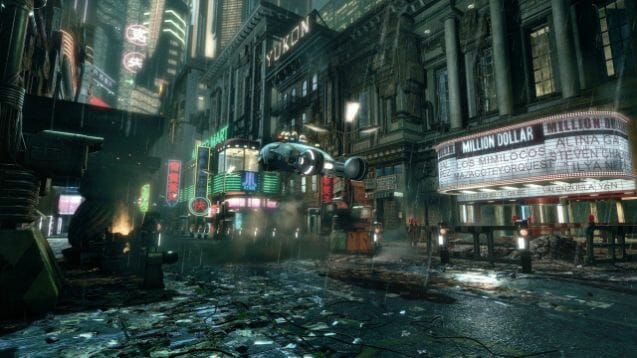
Are you looking for ways to paint Infinity miniatures? Infinity is a tabletop skirmish game set in a sci-fi universe. Infinity, a game by Corvus Belli, pits fictional nations and conglomerates against one another in urban battlefields. It is a brutal game where high-tech weaponry, combined arms mechanized and cyber warfare come together to resolve geopolitical differences. Humans and aliens inhabit the Infinity universe and the winner gets to write the history books. It’s a common genre, but compelling it’s mix of cool aesthetic, reminiscent of Ridley Scott’s Blade Runner. I love the models in this game!
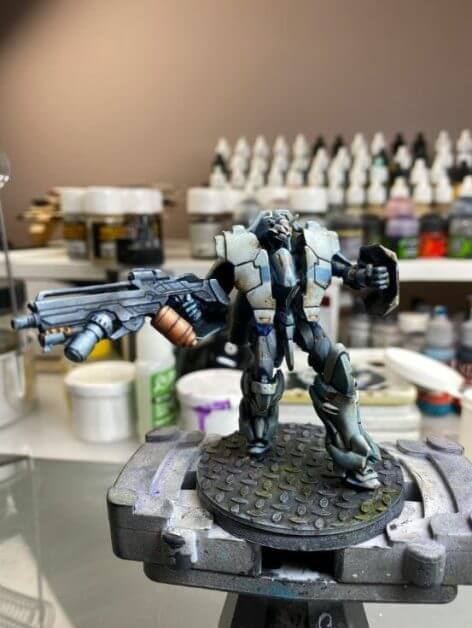
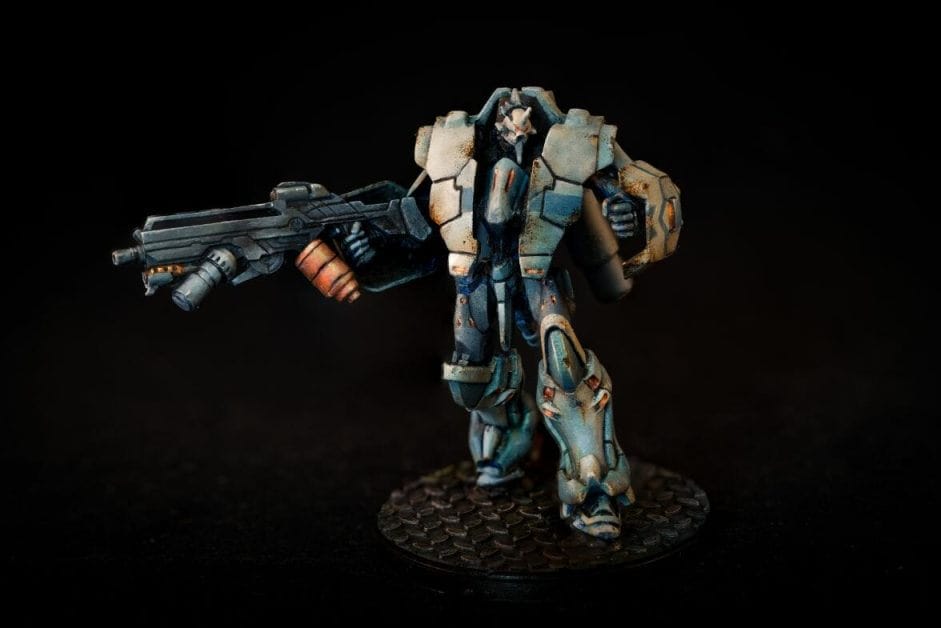
In this article, I show you the basic steps for how I painted the Panoceania “Jotum” TAG Infinity Miniature from Corvus Belli using oil paints.
Key Points
- Painting Infinity figures is a great way to gain experience with a variety of miniature painting techniques
- Learning how to paint smooth gradients for shading, highlighting with oil paints works great for non-metallic metal (NMM) styling
- For an overview about oil painting miniatures and models, you can check out this article.
- Here you’ll learn the basic painting workflow for painting a Tactical Armored Gear (TAG) for the Panoceania faction
RELATED: BEST OIL PAINTS FOR PAINTING MINIATURES AND MODELS
What is an Infinity Miniatures T.A.G.?
In the Infinity miniature game, “TAG” stands for Tactical Armored Gear. These are the giant robot mechs in the miniature skirmish game. They are the tanks, the heavy hitters (with some exception) with specialized abilities that can dominate the battlefield in their unique way.
Without getting into the granularity of Infinity gameplay, TAGs do not operate alone. In fact, most TAGs have limitations that become most obvious when they lose support on the battlefield. To succeed in a game of Infinity, a player needs to understand how to combine the unique abilities of their army to achieve victory. Although a TAG model is merely a single operational piece in a tactical game of Infinity, it is the most distinctive feature and a big miniature that stands out from the rest of the combat group.

How to Paint the Infinity “Jotum” TAG Miniature?
The process of painting any miniature is superficially the same across any scale model. If you understand the basics of color and contrast, and how these play together on a 3D sculpt, then you can successfully paint any miniature with any medium. For this project, I decided to challenge myself by using oil paints, a non-conventional medium to the typical acrylic model paints most hobbyists and scale modelers use.
RELATED: HOW TO PAINT RPG MINIATURES WITH OIL PAINT
Step #1 – Prime the model
I prime all my models with Vallejo Surface Primer. I start with a gray color, because it helps me see details immediately. Black primer is better for speed painting, but the dark tone hides all the fun details that make a sculpt interesting. I don’t prime with white, because white is scary and boring.
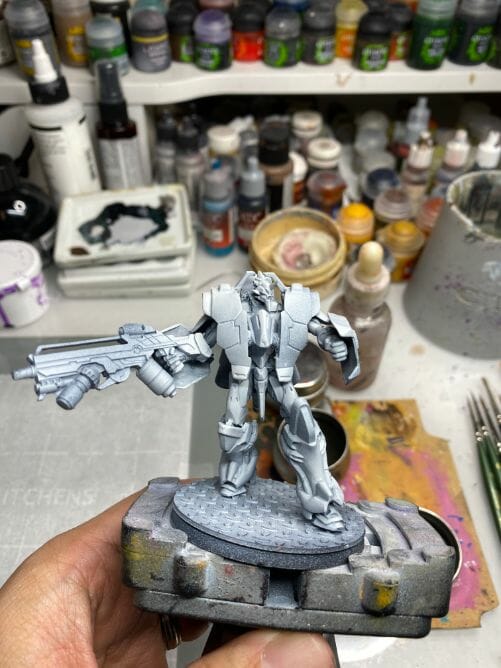
Priming is best done with a spray application, either with an airbrush or a spray can. Here are the best primers I recommend for painting miniatures and models. In this case, a simple 1-2 coats of Vallejo primer with my inexpensive, but amazing Badger airbrush worked great!
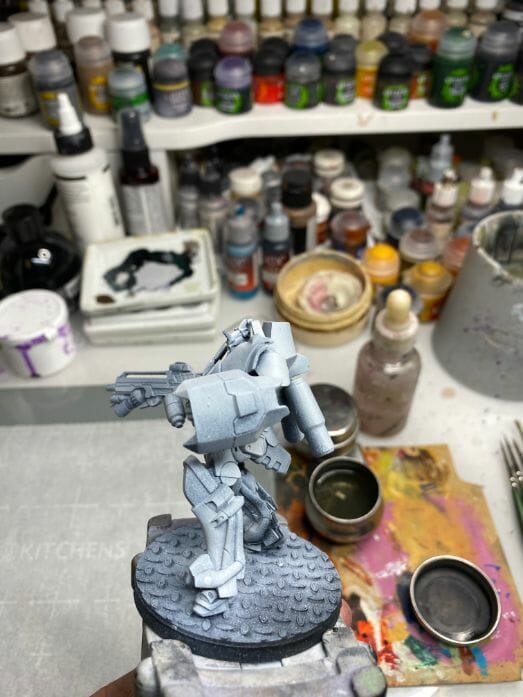
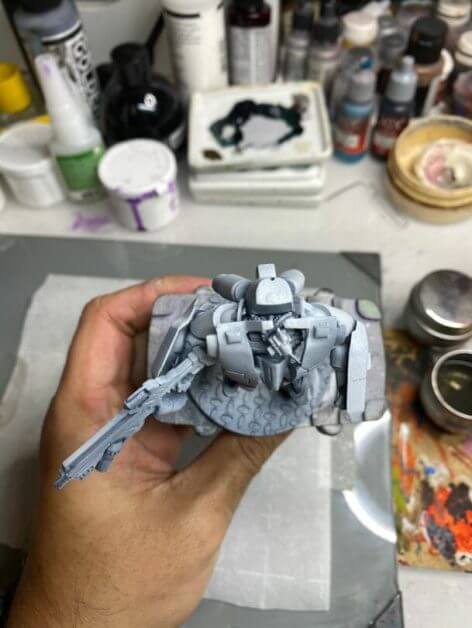
Make sure you prime every surface on a model before you paint because it’ll be hard to touch up later if you miss a spot. Spraying a primer helps cover all the crevices quickly and easily. You won’t need to use zenithal highlighting when painting with oil paints, because you’ll be covering all the primer anyway with opaque layers of paint.
Step #2 – Lay out your oil paint colors
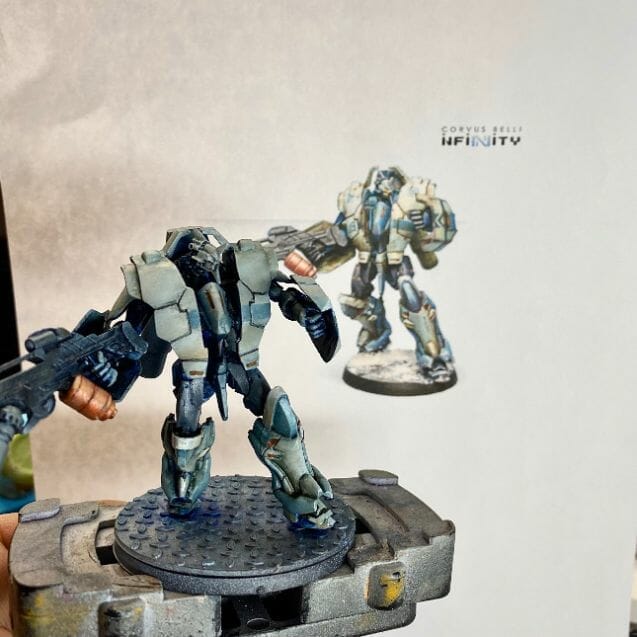
There are times when I want to use a unique color scheme (also see: 5 ways to choose an army color scheme), playing around with army concepts and ideas. But, in this case, I have a whole collection of other Panoceania models that follow the studio art. So, for this TAG model, I decided to follow through and stick with the official artwork as closely as possible.
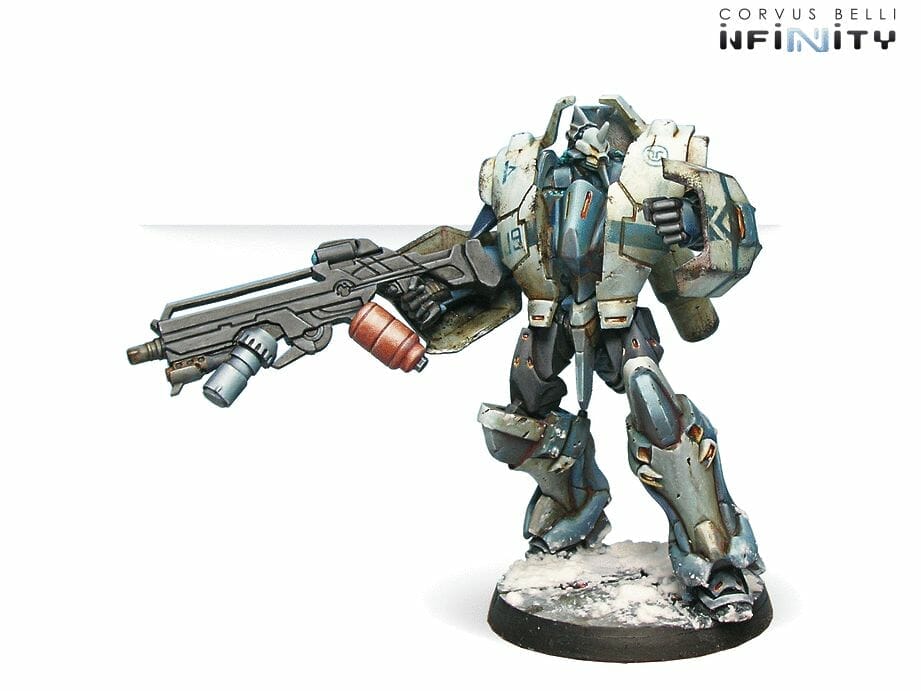
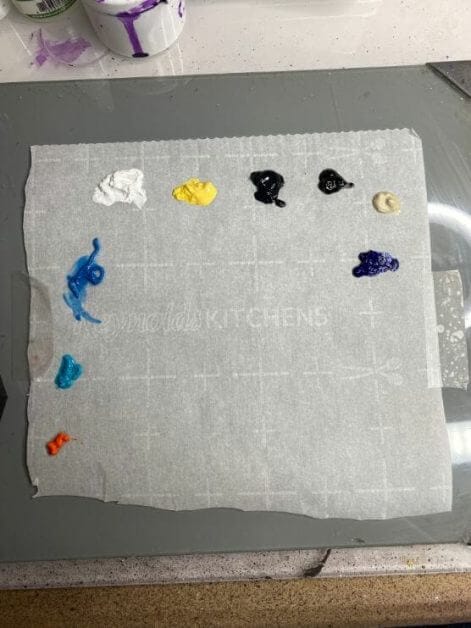
For this project, I referenced the studio art for the Jotum and tried to closely match the paint scheme with my oil paints. I took a sheet of parchment paper and placed the oil colors down. A lot of mixing will happen, but oil paints makes this fun and easy because the medium dries slowly. You won’t need a wet palette to do any of your model painting! A bit of mineral spirits works great to thin oil paint (just don’t use too much).
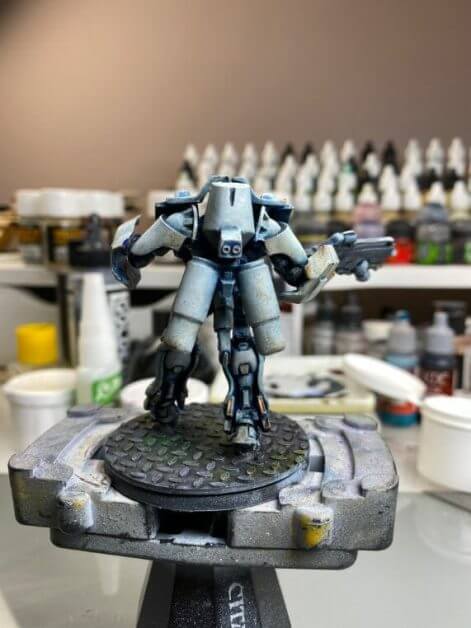
Step #3 – Pre-glaze the model
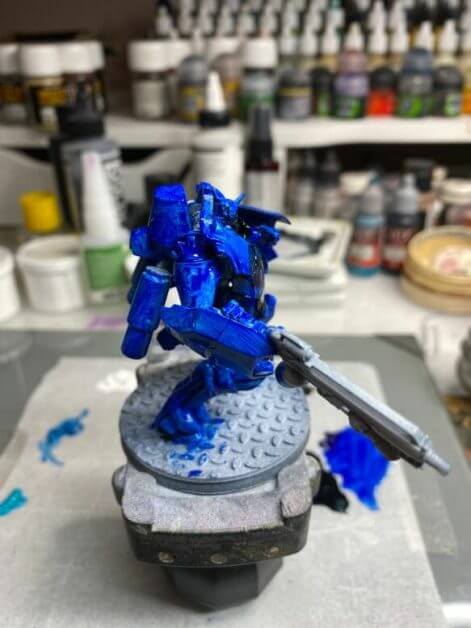
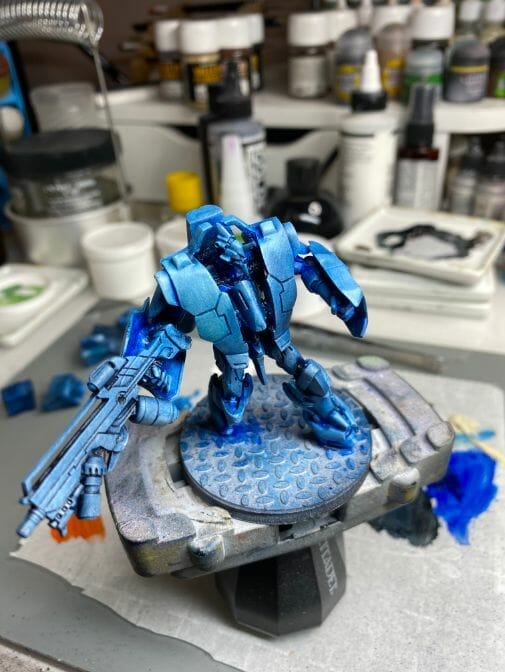
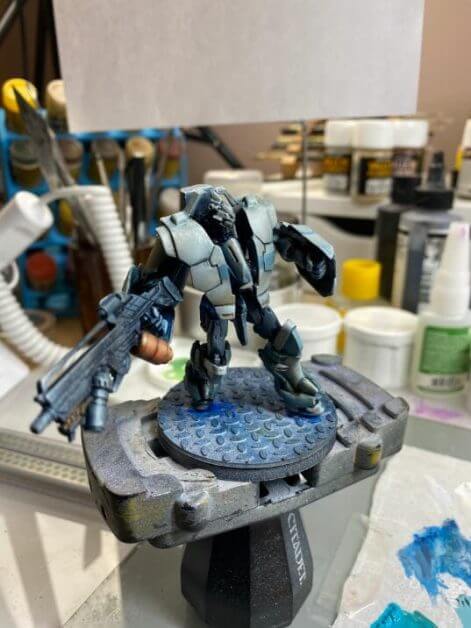
Laying down a first coat of oil paint helps subsequent layers “stick”. The first layer of oil paint, also termed a “pre-glaze” or conditioning oil paint layer, also works to stain the model in the darkest shade. It helps govern the overall “feel” of the model as you add to it’s palette. In this case, I thinned my Ultramarine oil paint with a bit of mineral spirits, almost to the consistency of a thick acrylic wash. Then, I applied this mixture over the entire model.
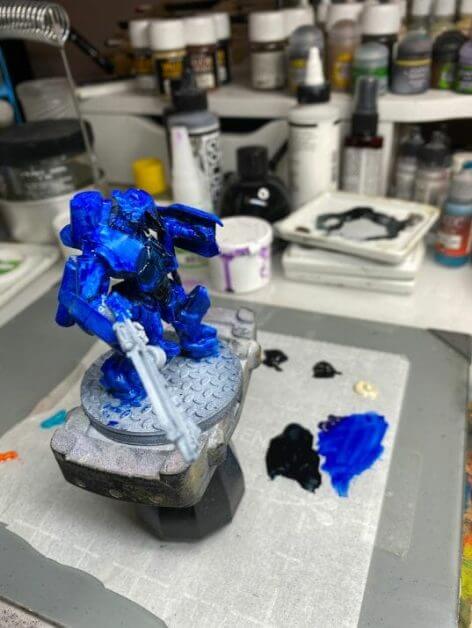
Step #4 – Add other colors to your pre-glaze oil paint, if you want
As I learn the best process for oil painting miniatures, I find that you can play around with colors without fear of making irreversible mistakes. Everything is temporary with oil paints until it dries/cures (which can take days). Have fun with the oil paint medium. For this model, I thought the blue undertone was too vibrant and bright, so I slapped on some black oil paint.
As you can see in the photos, it really looks sloppy. Colors are haphazardly placed in thick streaky layers. But, it’s oil paint, so that’s okay! For the black, I used Ivory black oil paint, which is a warmer-toned color than lamp black oil paint. Did this matter? Probably, not.

Step #5 – Blend and mix the oil paint on the model
Using a big brush, I felt the need to push the pigments around and mix them. The blending happened naturally, as oil paints don’t dry. In essence, painting any miniature with oil paints is borderline chaos in the early stages. Here, you’re trying to figure out where colors and values should go. I’m experimenting and playing, which is an amazing experience you don’t get with normal acrylic model paints.
As you’ll see, the earliest coats of oil paint work in your favor by staining the model with a darkened shade that helps define the rest of the piece. Remember, you actually can’t make any mistakes with oil paints until you’re completely done. This entire time I’m oil painting, there is a creative liberty that only matches my imagination (though I keep in mind the studio art color scheme I want to reproduce… at some point).
Step #6 – Wipe off the excess pre-glazed oil paint
After you make a mess, e.g., a controlled mess with a purpose, you should clean it up. Using cosmetic make up sponges, I wipe off the excess oil paints from the pre-glazing steps. Cosmetic sponges work great because they don’t leave behind tiny fibers or bits of dirt that tissue paper or cotton-tipped buds might do. They are also soft and won’t scratch your model. I buy them in affordable packs of 100 or more.
When you’re finished wiping off the excess oil paint, you’ll notice that the pigments stain the surface of the model. In the crevices and recesses of the model, heavier pigment deposits darken nicely. You can use the natural contrast to help guide you when you add more color the model. Also, because this is oil paints, you can even pull these darker pigments into your subsequent colors and blend them in. Keep reading to see how this works!
Step #7 – Apply undertones to increase color contrast
On this model, I wanted to counterbalance the blue tones with something warm. If you’re working on a different model, then consider how you can add color contrast (e.g., using color temperature cool versus warm) to add interest to the piece. Contrast in value and color help bring a model to life!
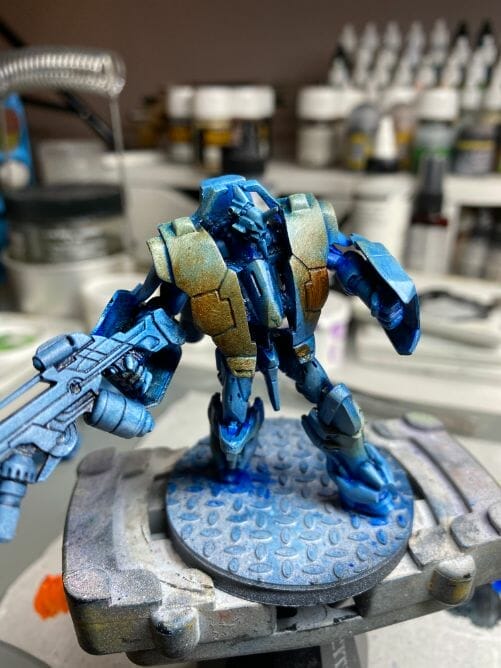
On this Infinity TAG, I wanted something that added warmth to what would be an otherwise cold feeling miniature. A applied a layer of Burnt Sienna oil paint to the lower half of the torso armor. Using a soft, clean brush, I blended this into the surface of the model. I also added this warm tone to other parts of the model, as you can see in the photo.
Remember that you can increase color contrast at any time while you’re painting with oils. Just blend them into the main colors you’re already working with on the model. If you’re working with acrylic paints, you would want to glaze on the contrasting accents when you’re closer to complete.
Step #8 – Fill in the armor panel lines with black paint
I thinned a little oil black paint with mineral spirits and applied this mixture directly on top of all the armored panel lines. As you see in the photos below, this is a messy job, but the idea is to cover the panel lines with the black pigment. You’ll wipe it off later with cosmetic sponges.
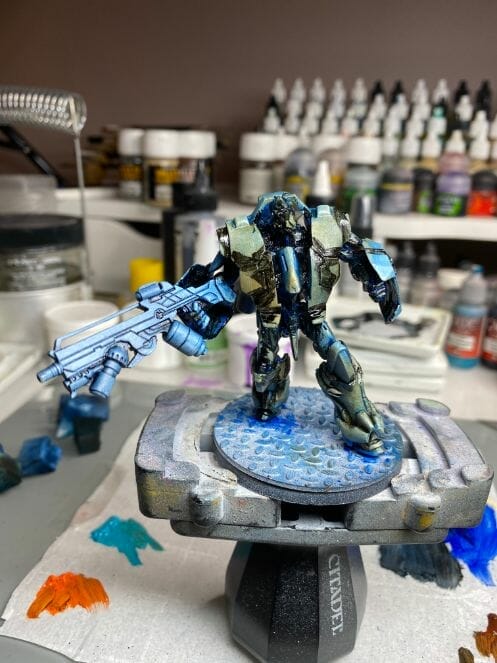
Allow the black oil paint to settle and the mineral spirit solvent to evaporate. This may take 5-15 minutes. Let the dark pigments stain inside the crevices of the panel lines. You’ll clean this all up later.
Step #9 – Clean up the panel lines
Wipe off the excess black oil paint over the panel lines with a clean cosmetic sponge. Use a gentle touch as you wipe off the oil paint. You don’t want to disturb the black paint that’s resting within the lines themselves.
After you’re cleaning up the excess black oil paint, you should allow the model to rest. Let the oil paint dry a little. It’ll be easier to work on the next steps if the oil isn’t too slippery and thick. It may take 30 minutes or a few hours, depending on how thick your paint is.
There is a fine-balance between how much or little mineral spirit solvent you should use in your oil painting. The more mineral spirits you use in your oil paint, the faster it will dry. But, don’t use too much mineral spirits otherwise you’ll dissolve away underlying paint!
Step #10 – Start applying the main colors
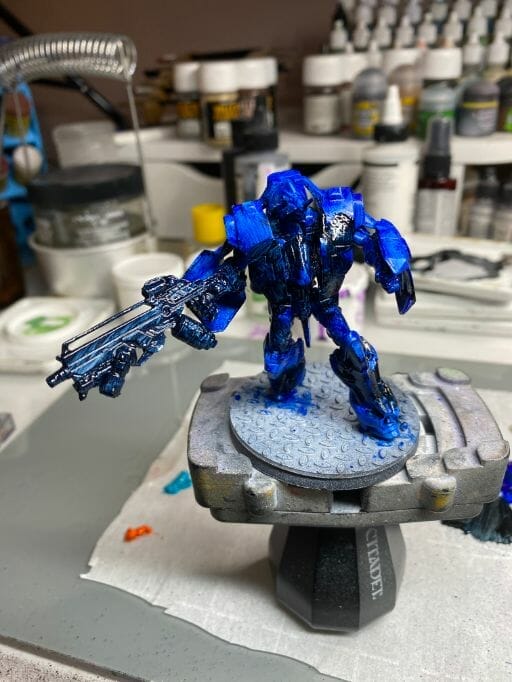
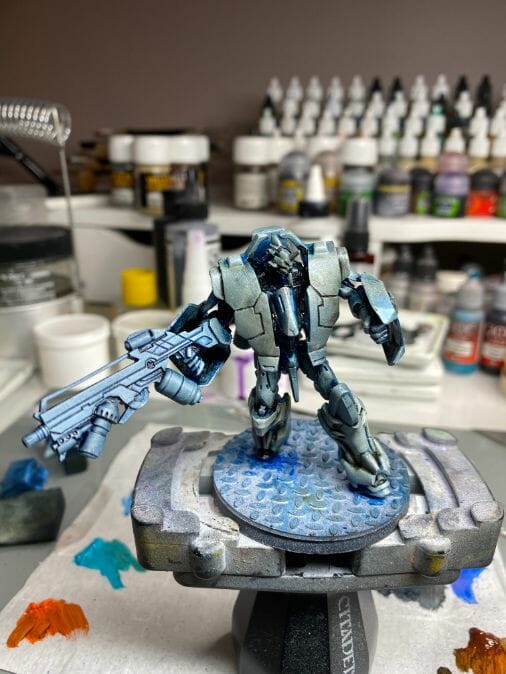
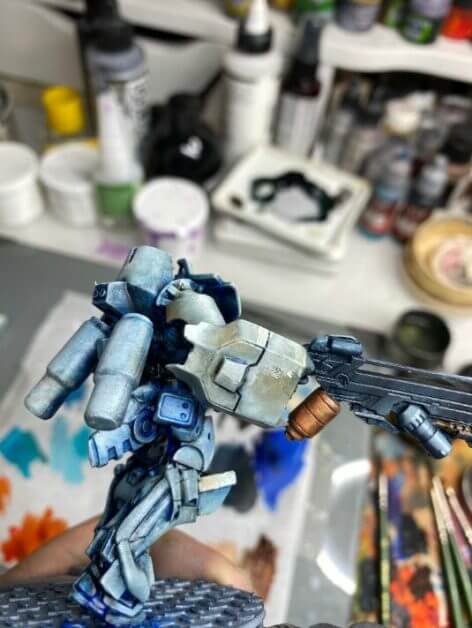
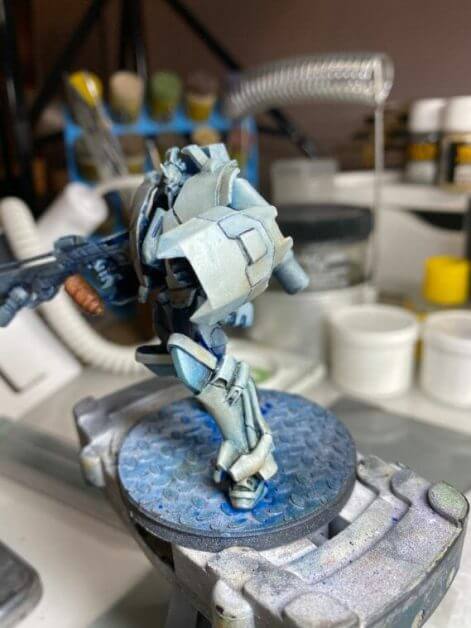
After the previous few steps, you may need to wait for a while for the oils you used to dry a little. When the oil paint becomes “tacky” or sticky, this is the best time to layer in new oil colors. In this case, I started working on the main white color. I used Titanium White oil paint thinned with mineral spirits into a thickened gel consistency.
Titanium white is my preferred white oil paint, since it has a strong rich pigment and covers well. As I apply it over the armor panels, I’m careful to avoid getting it into the panel lines I painted earlier. I also try and keep the white oil on the raised surfaces.
I use a size #2 synthetic brush (pointed round) for most of this work. When I apply the white paint, I add some to the model in a fairly controlled fashion. Then, I’ll clean my brush by wiping it on a clean paper towel (without mineral spirits). This removes most of the pigment.
Then, I’ll use the same brush and blend the white paint into the model. The benefit of using oil paints is that it will naturally blend and mix colors together on the same working surface. You can see in the photos how the white paint mixes a little with the underlying color tones. This wet-in-wet blending with oil paint is very satisfying because it’s so easy.
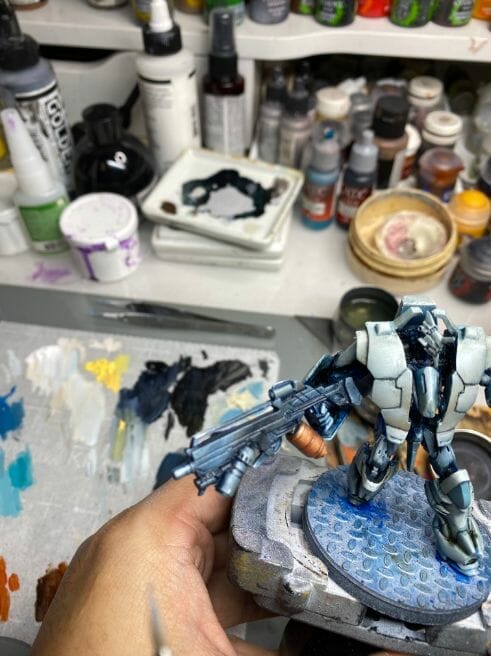
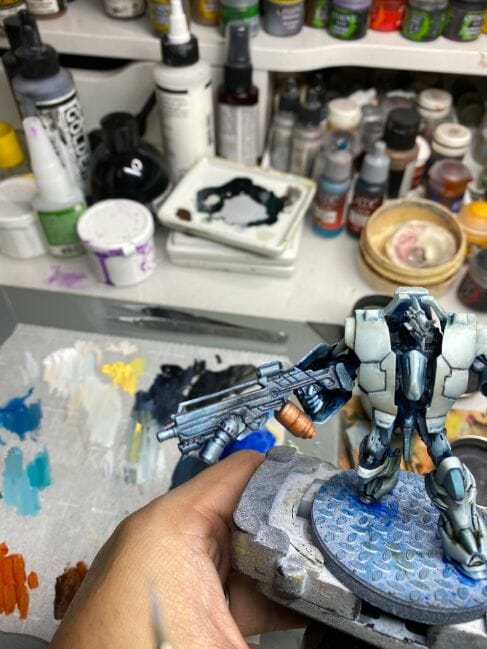
I also work on adding the main blocks of color on other elements of the model. I darken the weapon with Payne’s Gray, and add some Terra Rosa to the canister under the receiver (e.g., I blend in a bit of yellow to work up the NMM effect). On the leg, you’ll see how I worked in some light blue oil paint as well.
Remember to avoid using mineral spirits at these later steps. Too much mineral spirits will erase and dissolve underlying layers. Work slowly. Allow the oil paint to dry if you’re having trouble, waiting until the paint gets a “sticky” feeling. This is when the pigments are easiest to work with when you’re blending.
Step #11 – Blending highlights
As an example of how easy it is to blend oil paints on the miniatures, take a look at the barrel of the rifle. Here, I applied a bit of white paint and used a clean brush to blend it into the base layer of Payne’s Gray. The two colors easily smoothed out and blended together into a nice gradient. Painting this color gradient on the figure’s weapon almost appears like it was airbrushed on.
Work in more colors by applying the paint, then blending it together with a clean brush. The process is cyclical and repetitive at this point, but thoroughly enjoyable.
I like using my highlight colors first, placing where I think the light should go. This way I can see where other colors and shades should go. It’s sort of using the highlight paint as a reference. I’m pulling the model “toward” the viewer by adding highlights.
Blending takes practice. With oil paints, the easiest way to blend the paint is to use a flat brush with soft bristles. Use the tips of the bristles to gently touch and dab at the edge of the color you want to blend. Slowly feather the pigments into the surface. The transition will smooth out into a pleasant looking gradient.
You can keep adding colors on top of one another to strengthen the values or shift the tone/hue. When I’m done adding highlights, I will go to the shadow colors. Do you recall the warm color I added to balance out the blue tones? Burnt Sienna oil paint. I bring this warm hue back into the model by blending it into the model’s surface, using the same method I did with the Titanium white. Notice the subtle warm color in the armor plates in the photos.
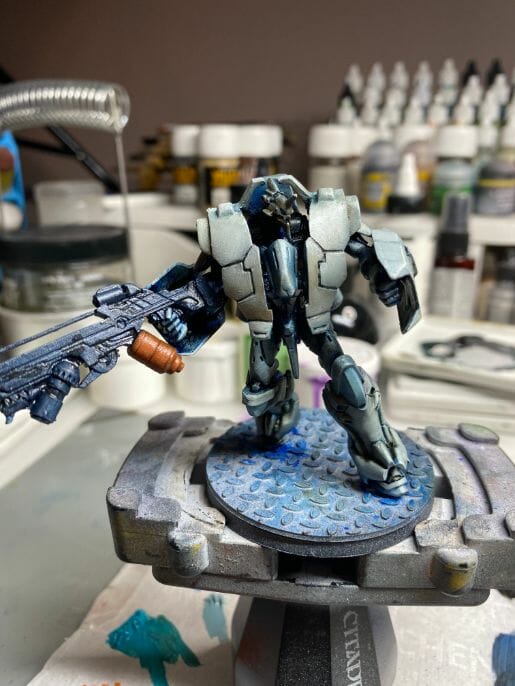
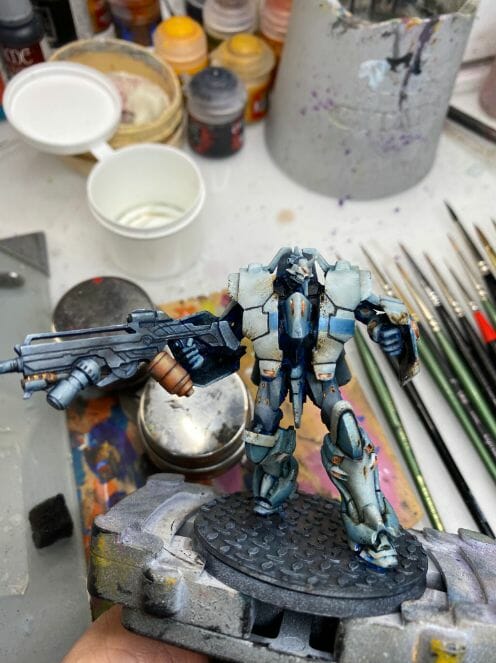
Step #12 – Freehanding designs with oil paint
In the reference studio art, there are bands of color freehanded onto the armor panels. To freehand the blue blocks of color, I waited a few hours for the underlying oil paint to dry. This let me layer in new colors on top without the natural blending/mixing I was doing earlier. Freehanding is another skill that takes practice and patience.
Freehanding with oil paints isn’t any different than painting with acrylic paint. In fact, I would say it is more liberating because you’re not in a rush to apply the paint to the model. The color won’t dry on your brush, so you can take your time applying the paint. Additionally, if you make a mistake with oil, you can make adjustments without trying to repaint over the area. Just push the oil paint pigments to the correct location. As before, avoid using excess mineral spirits, which will unnecessarily mess up your hard work.
In this step, I also added the orange/reddish glow effects the different parts of the model. All I did here was paint the light source areas with darkish-red paint, then applied a dab of Cadmium yellow (an opaque yellow oil paint). With a tiny brush, I blended the edges of this together, which created the object source lighting (OSL) in the lights in the armor. It’s not a strong OSL effect, but it does the job of creating points of interest on the model.
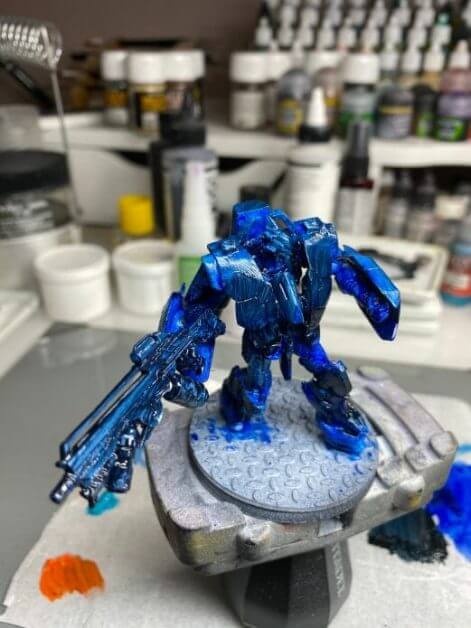
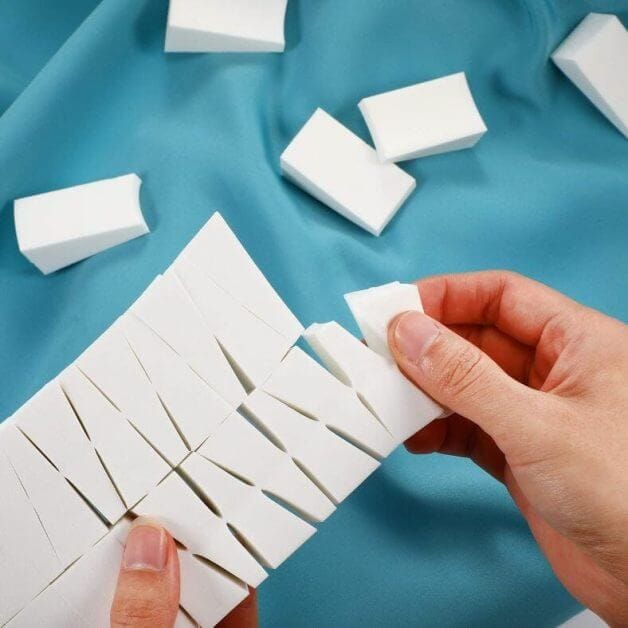
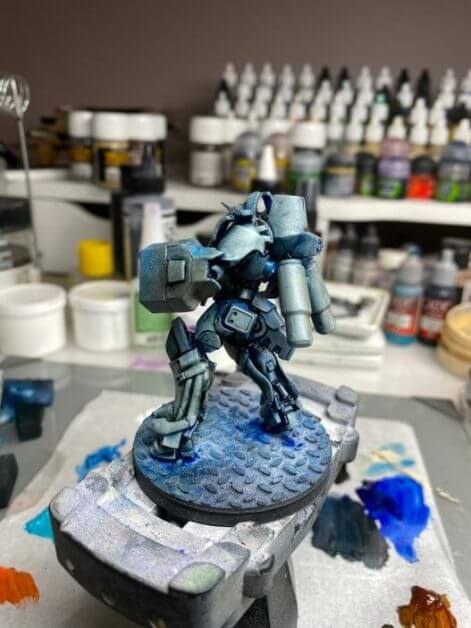
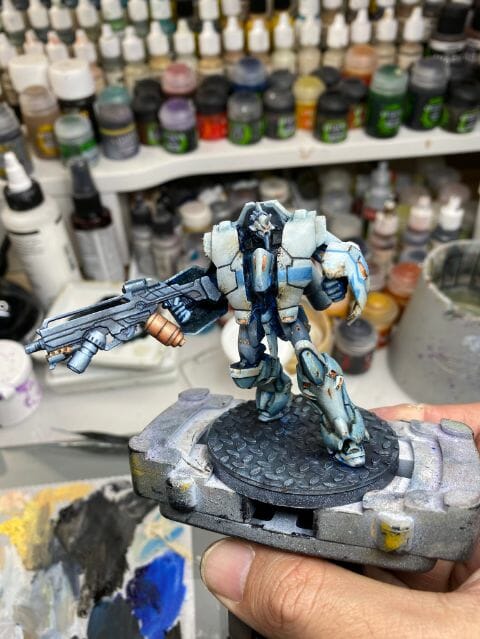
Step #13 – Battle damage and weathering
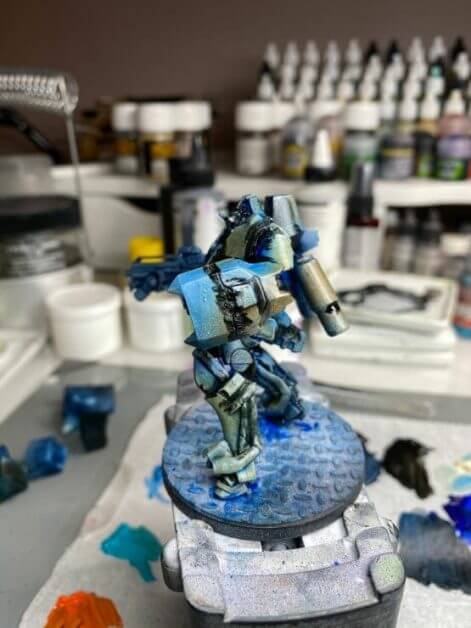
Using a trick I learned from military scale modelers, I added the battle damage and weathering effects with the “sponge-dab” method. Taking a piece of blister-pack foam (or the discarded pluck foam I saved from an army transport foam tray), I tore off an edge. This created a jagged sponge, which I dipped in a bit of black oil paint mixed with raw sienna (the rusty red-brown color). Read more about the sponge dab method for weathering here.
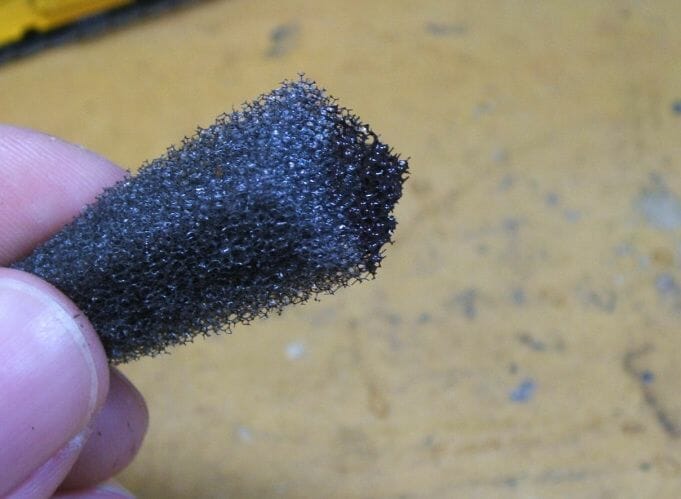
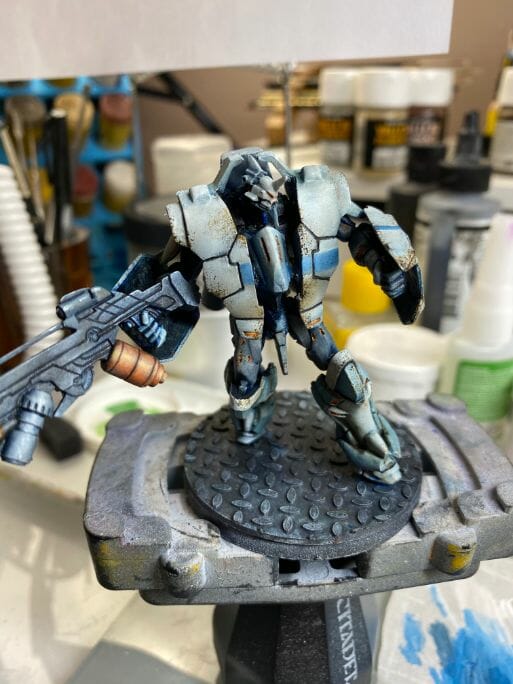
Dabbing the sponge along the armored plates left bits of paint that looked like “chips” or flakes of paint had worn off. The rusty color added some weathering effect to the model as well. I applied the sponge dabbing around the entire model, using my imagination of where wear-and-tear would occur realistically on this figure. It has been through a rough combat tour it seems….
The great thing about using oil paints for this process is that you can smudge some of the paint to add realistic looking streaks. And, if you wanted to start over, you could “erase” part of your work with a clean brush. All you need to do it rub the paint out with the bristles. I did this in a few spots that didn’t look right to me.
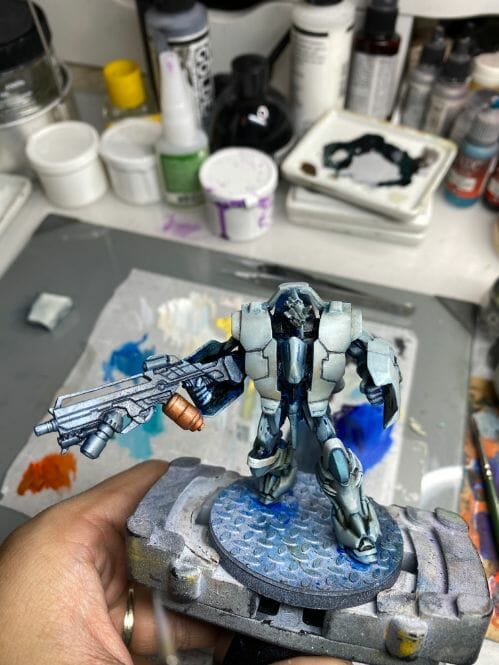
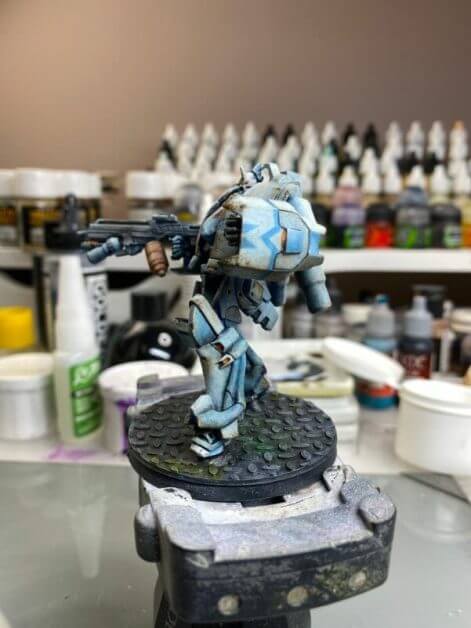
Step #14 – Clean up the edges
For a neat and clean paint job, allow your paint to dry. This may take a few hours. Then, go back around the model and clean up any edges, applying paint if necessary. This means adding edge highlights, or darkening your shadows. Pay special attention to panel lines, or dark ridges in the model. For example, on the rifle, darken the lines and panels to help visually distinguish each element, i.e., the receiver from the canister, etc.
Make sure you pull up your highlights, too. For a model that you want to “pop” visually, you’ll need strong contrast. Sell the NMM effect on various parts of the model by pushing the shadows down, and tightening up your highlights. Add white specular highlights (those hot spots where light reflects strongly) for a shiny effect.
At this point, you can also finish painting the base of the model. Here, I used a 3D printed base. To paint the base, I painted the surface with a dark gray oil paint and washed it with a black oil paint wash (oil paint mixed with mineral spirits).
Then, I used a light gray oil paint and highlighted the textured surface of the base. When this dried a bit, I glazed on a few other random colors, e.g., green, purple, and yellow, to add some various interest to the base of the model. All of this was subtle and an experiment on my part. I liked how this turned out.
Step #15 – Varnish the model
Allow your model to dry before applying your varnish sealant. I use the same matte varnish for all my painted miniatures: Testors Dullcote. There are many other brands that work well. Testors Dullcote happens to give me the best results for my models.
For gaming miniatures that you may handle or transport, you’ll want to apply at least 2-3 coats of varnish. Another benefit of oil paint compared with acrylic paint is that when completely dry, oil paint is more durable and resilient to damage.
RELATED: BEST MATTE VARNISH FOR TABLETOP MINIATURES
When you’re done take a few photos!
Summary Steps for Oil Painting the Infinity Game “Jotum” Miniature
- Prime the model
- Lay out your oil paint colors
- Pre-glaze the model
- Add other colors to your pre-glaze oil paint, if you want
- Blend and mix the oil paint on the model
- Wipe off the excess pre-glazed oil paint
- Apply undertones to increase color contrast
- Fill in the armor panel lines with black paint
- Clean up the panel lines
- Start applying the main colors
- Blending highlights
- Freehanding designs with oil paint
- Battle damage and weathering
- Clean up the edges
- Varnish the model
Final Thoughts
Painting this Infinity miniature took about 5-8 hours, and a few days to completely dry before I varnished the model. I’m not certain I would have been able to paint this model faster with conventional model acrylic paints. But, I’m certain that I might have had more trouble with some of the value gradients and color transitions without using the wet-in-wet oil blending process.
I hope this article gave you some new ideas and inspired you to work on your models in different ways. A lot of the work that went into this miniature took experimentation, trial and error.
There are certainly areas that aren’t painted so well, that don’t show up well in photos. In any case, I’m still learning to push the envelope on different techniques. Overall, I think this Panoceania Infinity TAG model came out well for my standards.
Thank you for visiting. Happy painting!
Tangible Day on YouTube (Miniatures and More!)


Pingback: Oil Painting Tutorial for Infinity Game Miniature (Photo Guide) - Toy Newz