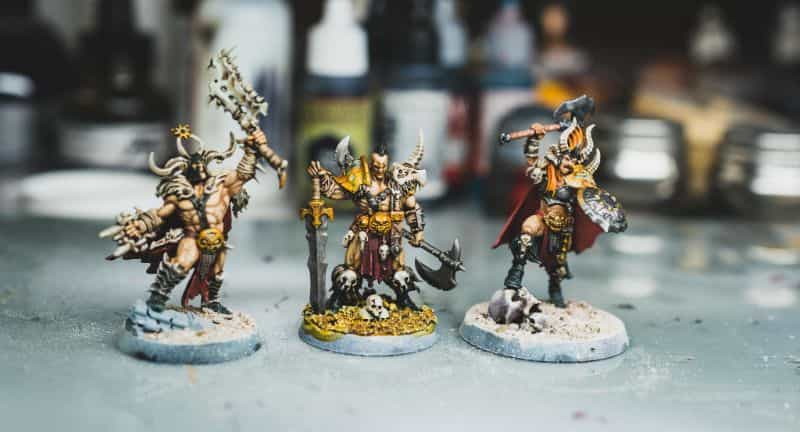
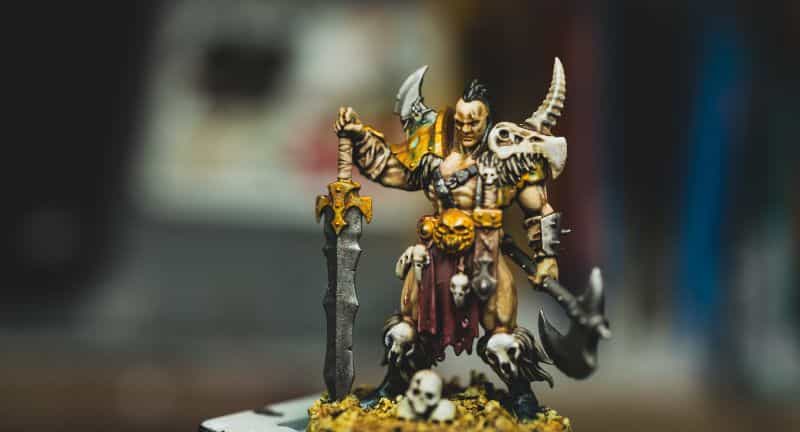
Good light is the key to any great miniature photography. If you want better photos of your miniatures, then you need to learn how to find and use light. For miniature painters, scale modelers, or other hobbyists looking to share their work on social media, taking great photos is part of the fun. The simplest way to improve your photography is using good light on your models.
In this article, I provide a simple guide about properly lighting your miniatures for great photography.
Key Points
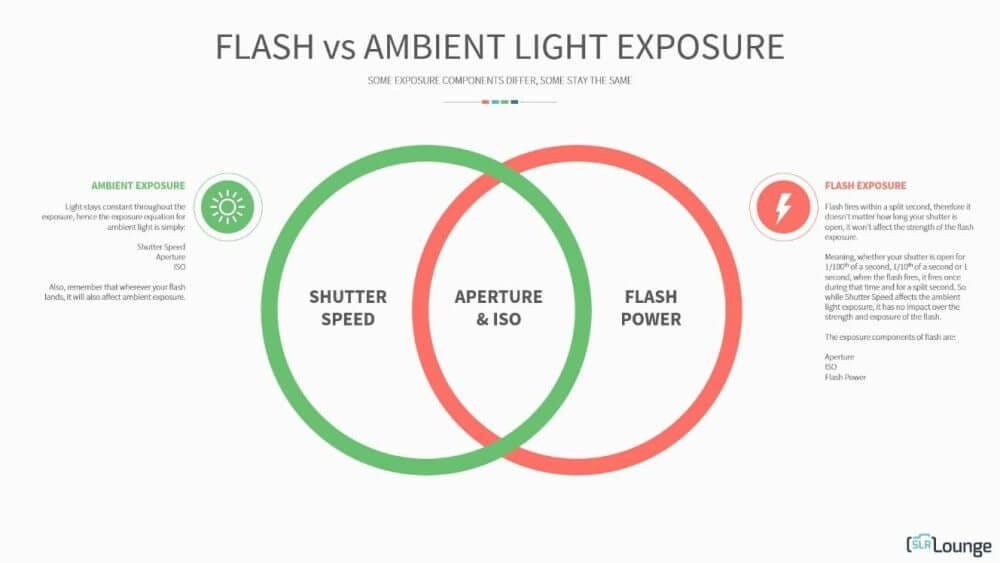
- Continuous ambient or constant lights are easier to use than a flash in miniature photography
- Consider the brightness, color temperature, number of sources, and direction of light
- For best results, use LEDs with a high color rendering index (CRI >90-95) that let you adjust brightness and color temperature
- Front facing “ring lights” will produce the most consistent looking photos for all types and scales of miniatures
Photography is Drawing with Light
The word “photography” comes from the ancient Greek language and means “drawing with light”. In essence, photography is an art form that could not exist without light. After light emanates from a source and bounces off physical objects, a camera’s sensor (or the retina in our eyes) capture the reflected light. A computer or our brains processes the information to create a “picture”.
You need great light to make great photographs. Photography relies on the quality of the environmental light. For an accurate representation of a subject, the quality and the brightness of the light must reveal form, color, and reflectivity.
In fact, there are many ways to ascribe the quality of light that it would take up an entire article by itself. For more about the qualities of light, check out this fun article.
RELATED: HOW TO TAKE BETTER PICTURES OF MINIATURES
Must-Know Features of Great Photography Lighting
Here are 5 must-know features of good lighting for photographing miniature and models:
- Brightness
- Soft or Hard Light
- Color
- Single or Multiple Source
- Light Direction
1. Brightness
The brightness level of your light is an obvious factor to consider in photography. When your light(s) are bright, your camera has to work less to understand the information it reads on the sensor. In dim light, for example, you or your camera must interpret or improve the reduced information by increasing the digital gain or ISO.
ISO is a camera setting that will internally brighten a photo to compensate for the low light in the environment. As ISO increases on your camera, the brighter your digital image. But, at the same time, the photo will become more “grainy” or “noisy” as your ISO increases beyond a certain point.
The best light brightness for photographing miniatures is a level where your camera’s ISO doesn’t have to compensate. The ideal ISO for almost all cameras is 100. So, when your lighting allows you to keep your ISO at or close to 100, this means your light is bright enough. Above an ISO of 1600 (depending on the camera), your images will take on a grainy look.
So, for the best photos of your models, keeping your ISO low as possible will produce the best results. Use good lighting that is bright enough to keep your camera’s ISO low.
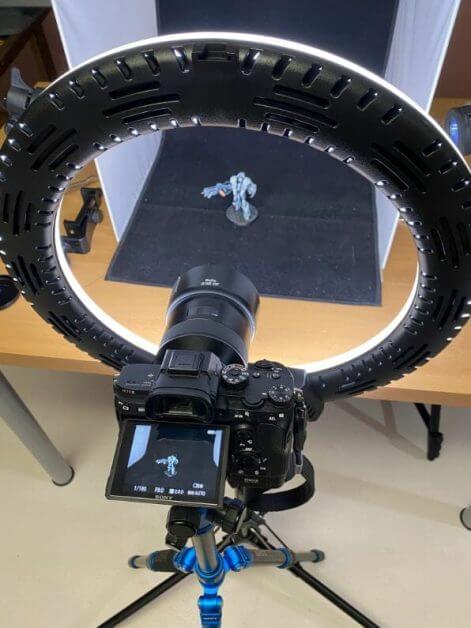
From a technical standpoint, almost all ring lights are bright enough for taking great photographs if you’re using a tripod. A tripod allows you to keep your camera’s shutter open longer, which allows more light “units” into your camera. I use a simple, affordable tripod for all my miniature photography.
2. Soft or Hard Light
You could also describe the quality of light as “hard” or “soft”. Hard light is harsh and creates shadows with sharp delineated edges. Soft light is diffuse and spread out. The ideal light for most miniature photography is a soft light, since this maintains all the natural details and textures on a model.
To achieve the ideal soft light for miniature photography, your lighting system should have some type of diffuser. This could be a piece of translucent cloth or plastic covering. Often, ring lights come with a white plastic covering that is partially transparent. The diffuser cover scatters the hard light from the LEDs and casts a spread out illumination, or soft light.
I’ll note here that there may be times when you want to use a hard light in an artistic form to cast distinct shadows. Using sharp edged shadows and strong directional lighting if often useful for adding drama to an image. For example, maybe you want to accentuate a part of your miniature. Use a hard, directional light without diffusion to light up that area of the model.
2. Color
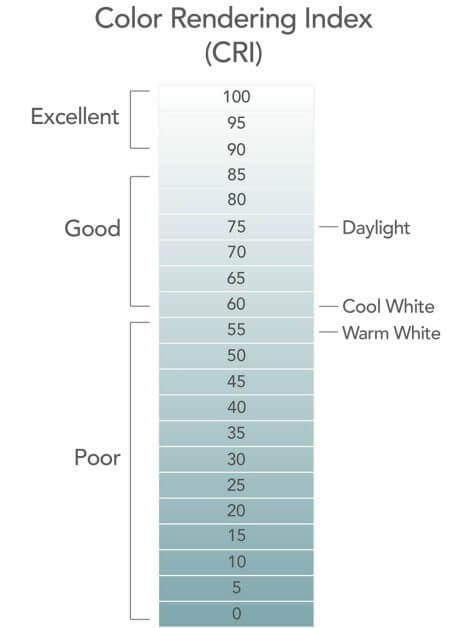
The color of the light you use to photograph your models is also a quality you should consider. Lighting color is described using Kelvin temperature units (cold to hot). A color temperature of around 5,000 Kelvin is the quality of natural daylight. Daylight neutral is the color temperature most to use when color accuracy is important.
An important measure of color in the quality of any artificial light is the Color Rendering Index (CRI). The CRI is particularly important for LEDs (light emitting diodes) lighting systems. LEDs have variable amounts of color wavelengths within the light output. In general, a higher CRI in a lighting system is better for accurate color reproduction in digital photography.
For best results, a CRI above 90 is recommend in any artificial lighting system for studio photography. Even better are lights that have a CRI of 95 or higher. When you’re looking for the best light for photographing miniatures and scale models, choose a light with a high CRI rating.
4. Single or Multi-Source
You can have one or more light sources for photographing models. For most new photographers, I would recommend starting with as few lighting sources as possible. In fact, if you can use a single light source, you’ll have an easier time overall when photographing anything.
With a single light source, you’ll have an easier time controlling the image exposure (i.e., brightness), the color, and the composition of your subject in the frame. You can also control the form that shadows take around your model.
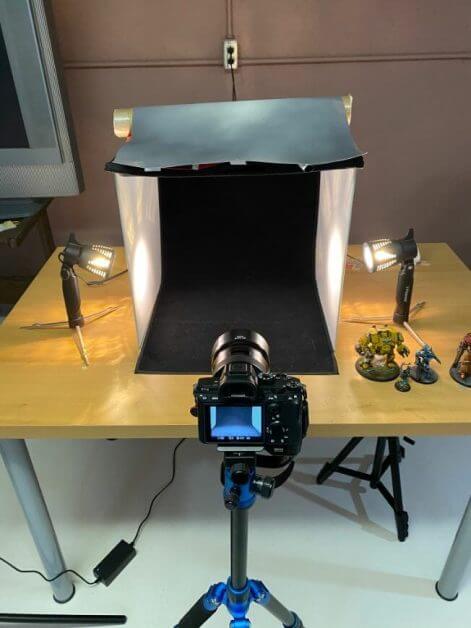
For the portable photo light booth I used for many years, I worked with two light sources (i.e., they were included in the kit). But, I discovered after a while that these dual side lights created oddly shaped shadows on my miniatures and were hard to remove.
Moreover, using two lights on either side of the model also meant that some part in front of the miniature was always a tad too dark (or looked off). You can see a few examples showing a comparison between a single ring light versus a dual side lighting system.
What about using three or more lights? The problem with using too many light sources is that you’ll start lighting up parts of your scene you may want to keep out of the image.
For example, if you want the blackest, darkest background in your photos, then you’ll only want your model lit by your lights. Here are some tips for creating black backgrounds in miniature photography. Another problem with more than a single light is that you’ll have to manage the different color temperatures that may come into play.
Even if you use the same lights, the colors from those lights bouncing off different parts of the environment will ultimately affect the white balance of your image. You can learn more here about photography white balance.
5. Light Direction
The direction of the light emanating from a source will affect the overall appearance of your miniature. Depending on the direction the light shines, your model will be fully lit from the front, the sides, or all around. There are entire technical manuals in art and photography that explain how light facing and directionality determines the final look of a model.

For simplicity, all you need to know is that for most miniature photography, you want the direction of light to fill and brighten the most interesting parts of your model. This is usually the “front” of the piece. This is also the area we want to avoid casting hard shadows that may block the viewer’s ability to see important details on the painted model.
The advantage of using a ring light is that it is simple and easy to place the light source in front of the model and in the same direction as the camera lens (as you’ll see below). A limitation of using separate lights placed on the side of a model is the harsh, unwanted shadows you’re likely to cast across the miniature or on the backdrop.
As miniature photography involves a subject that doesn’t move, it is easy to experiment with your light source direction.
Flash or Not? Best Artificial Lighting System for Miniature Photography
The best light is natural sunlight. But, for controlled environment photography, you’ll want to use artificial lighting systems. This will allow you to control everything about how your image will appear. Nevermind the fact that you can shoot indoors, in bad weather, or simply in a room without windows, e.g., basement or attic.
There are two kinds of lights you can use to help you capture images of your miniatures and models.
Flash Systems
Flash lighting systems come in many forms, e.g., flash guns, remote flashes, strobes. Flashes function as they are named, they flash. The light comes on, then immediately turn off.
Flashes are usually very bright, powerful, and often less expensive than good constant lighting (see below). But, flashes are much harder to control and will often produce poor images if setup incorrectly. You can place flash systems anywhere around the subject. In fact, there may be more than one flash working together with others (e.g., in a master/slave configuration).
Constant, Continuous Light
Continuous ambient or constant lighting systems are great for miniature photography. Constant lighting systems come in many types and kinds, e.g., conventional, high watt studio bulbs, powerful LEDs. Continuous lighting systems function as the name suggests–the lights are always “on”.
Although brighter and more powerful continuous lighting systems are very expensive compared to flashes of similar brightness output, constant lighting gives you a lot more control.
For example, constant lights are less fussy about timing. You don’t need to worry about matching your flash timing with your shutter speed. Instead, with constant lights, you can methodically make all your adjustments in the camera for the kind of image you want to create.
For miniature photography, the best light is the constant ambient lighting system.
Do You Need a Photo Light Box to Photograph Miniatures?
No, but a photo lightbox or photobooth can help you control the lighting conditions around your model. It also provides you with the infrastructure to hold different backdrops, e.g., colored gradients, solid tones, or even matte paintings or patterns.
Some photo light boxes are even portable, which makes them easy to store or travel with wherever you need to photograph your models. I reviewed 5 of the best light boxes for miniature and models (of different sizes and features). A photo light box merely helps you control how the light behaves within the context of your miniature.
Here are expert tips for how to setup a typical photography studio.
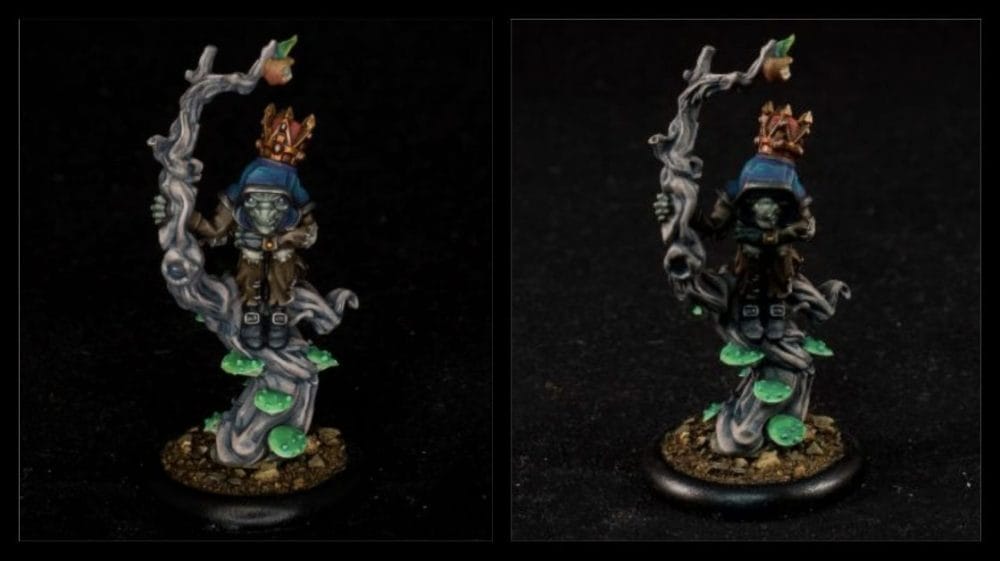
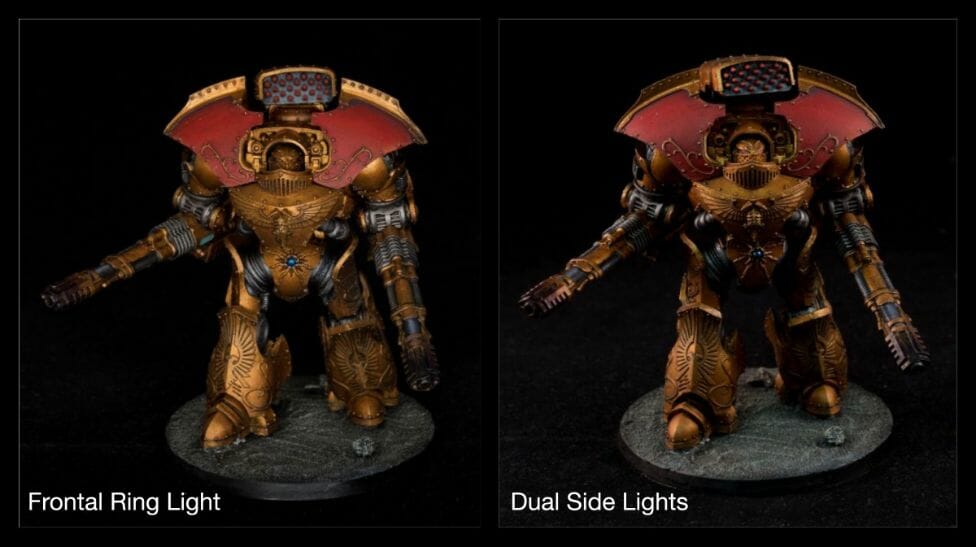
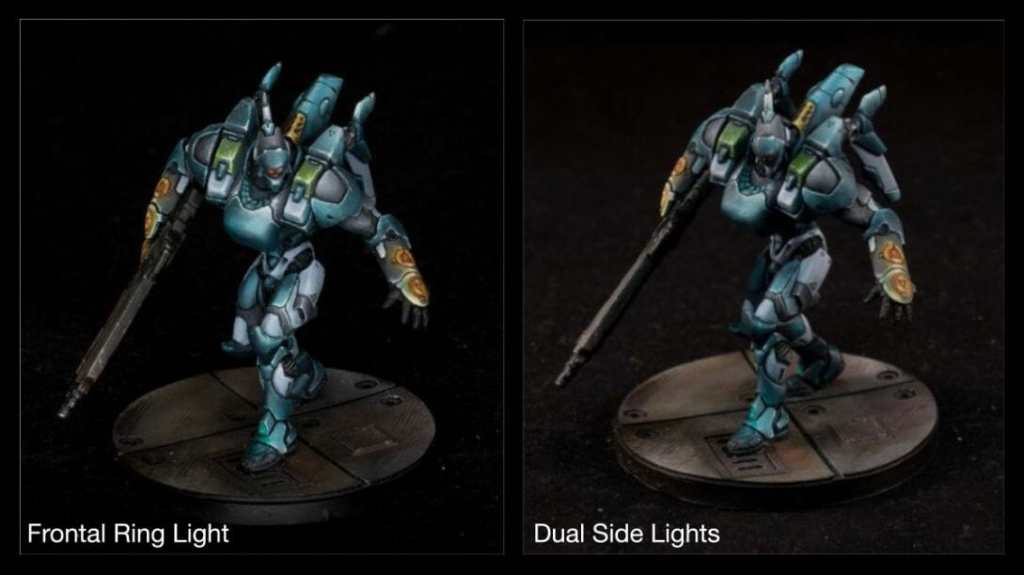
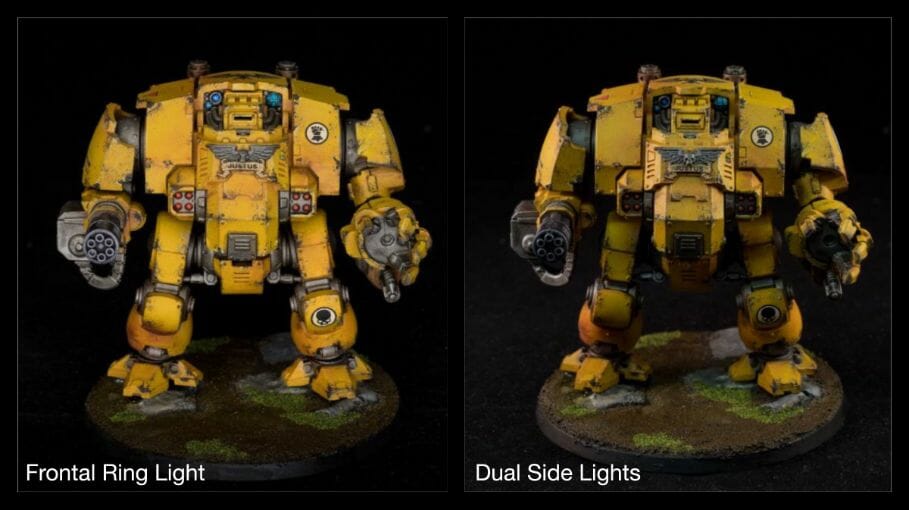
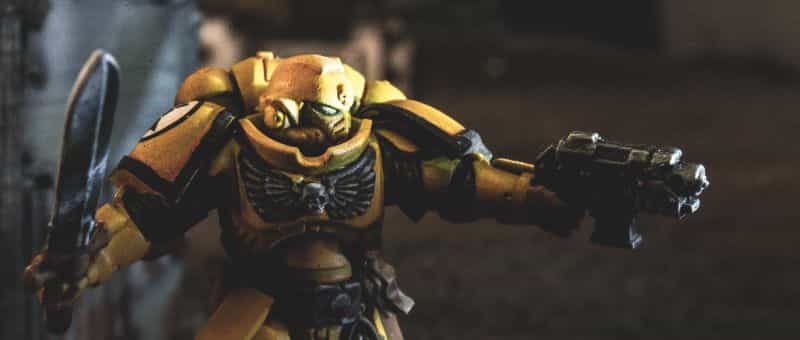
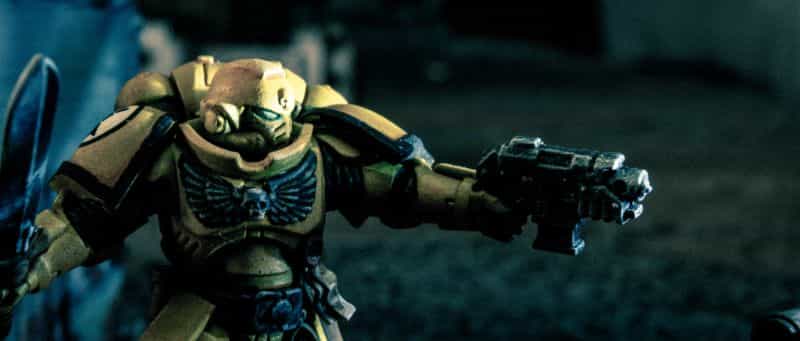
Light Direction: Comparison Between Dual Side Lights Vs. Front Light
A quick comparison between the dual side placed lights and the single frontal ring light shows marked differences in the miniature’s appearance in the captured photo. I captured the following two images with the same camera settings in the same photo light box. Note the only exception was that I adjusted the shutter speed to compensate for the difference in the ambient light brightness. To avoid blur, I placed the camera on a tripod.

The dual side lighting condition resulted in a miniature with good illumination on most surfaces, revealing good details on these areas. However, below the model, you can see dark shadows that hide a lot of the model. You may also notice there is a warm hue across the model. This is due to the warm color temperature of the lights.
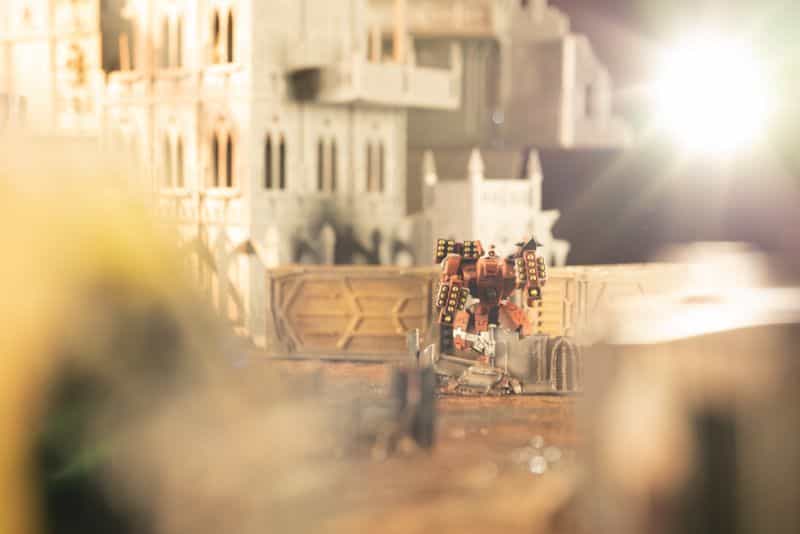
In the image captured with the front ring light, you can see more detail in more surfaces of the model. The light also produce better contrast that helps you see the different details in the model. The color gradients and paint blending in the armor panels also seem more natural and pleasing to the eye.
Finally, the colors on the model are more accurate, which is due to the ring light’s more neutral color temperature and high >95 CRI rating.
Which do you prefer?
Frontal Lighting: Is a Ring Light Worth the Cost?
High quality LED ring lights with the features you’ll want, e.g., high CRI, brightness, and color adjustability, cost a bit of money. Are LED ring lights worth the upgrade from whatever lighting you’re using? Here’s what I think with examples.
Sure, you could place regular lights in front of the model to reproduce the direction of the light. But, you may not be able to easily improve the other features of great photography lighting: brightness, soft/diffuse lighting, or color.
Here are a few examples of a ring light compared with a side lighting setup. I’m not sure that place regular lights in a different location would help. A ring light has all the best characteristics that make photographing a miniature easier and produces great pictures.
Ring Light Versus Conventional Photo Lights
To show you the difference between the conventional photo lights that come with a photo light box and a ring light, take a look at the images below. Most lights that come with commercially available light boxes are situated on either side (or above) the light box. The model subject is lit from every side, except the front.
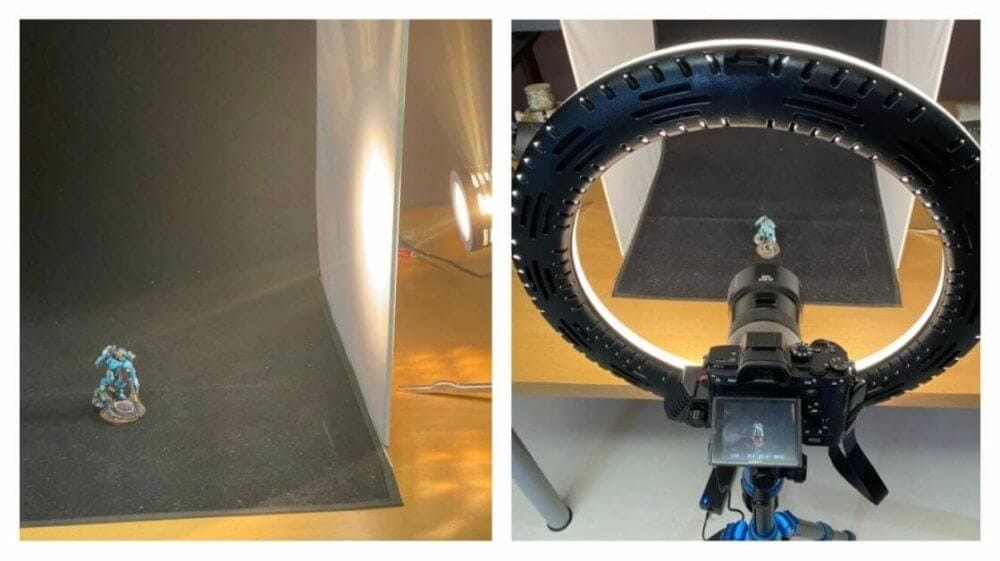
With a ring light, you can place the light directly in front of the model. This lights up the same surfaces that your camera lens is pointing at and helps remove unwanted shadows from the key details you’d like to photographically capture. This particular ring light I’m using is the Yesker Ring Light, which I highly-recommend and review here.
The Effect of Color Temperature
To show you how color temperature affects the look of a model, here are a few pictures taken with the ring light set at warm or cool color temperature settings. The Yesker ring light allows you to adjust the color temperature of the light between warm and cool (3200-5500K).
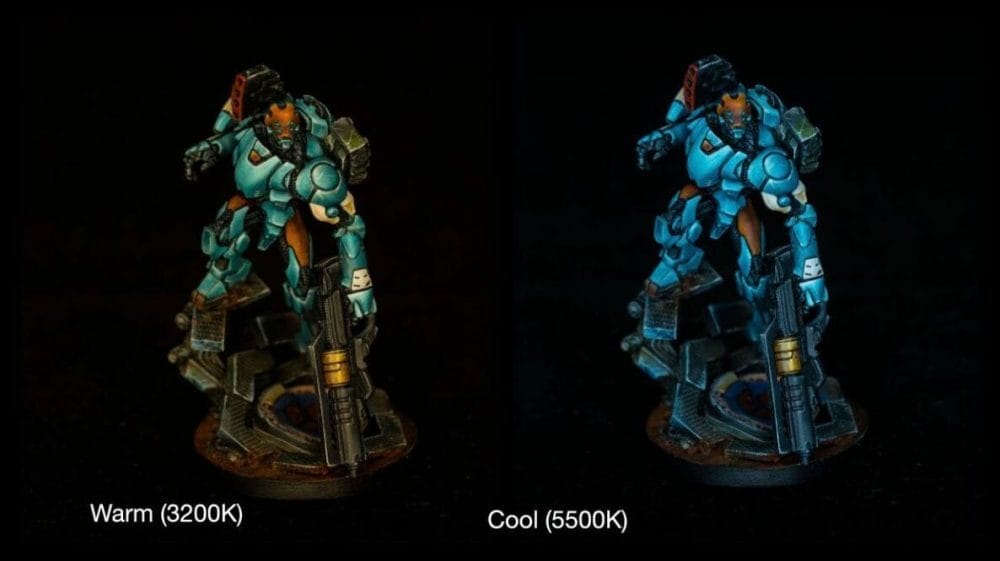
With any good quality ring light (see below for the review), you can adjust the color temperature of the LEDs to suit your needs. Changing the look of your photograph with color temperature is a great way to play around with your miniature photography.
Use different ambient color temperatures to evoke a narrative in your miniature scene. Warm lighting may, for example, create a nostalgic or calm scene. Cool lighting may add a sense of melancholic drama or urgency.
In general, I often encourage people to experiment with different colored lighting to see how it affects the overall look of the models in photographs.
Final Thoughts
If you’re looking for ways to take better photos of your miniatures, consider the kind of light and how you place it in relation to your model(s). I take photos of my miniature painting for a lot of different reasons.
I’ll take pictures for recording my painting progress and to document what I did so I can learn from my mistakes. I also photograph my models to share online or for clients in miniature painting commissions.
Do you take photos of miniatures or scale models? Why do you photograph your miniatures or scale models?
If you’re looking for tips to improve your miniature photography, here are a lot more photography articles you may enjoy!


Tangible Day on YouTube (Miniatures and More!)
