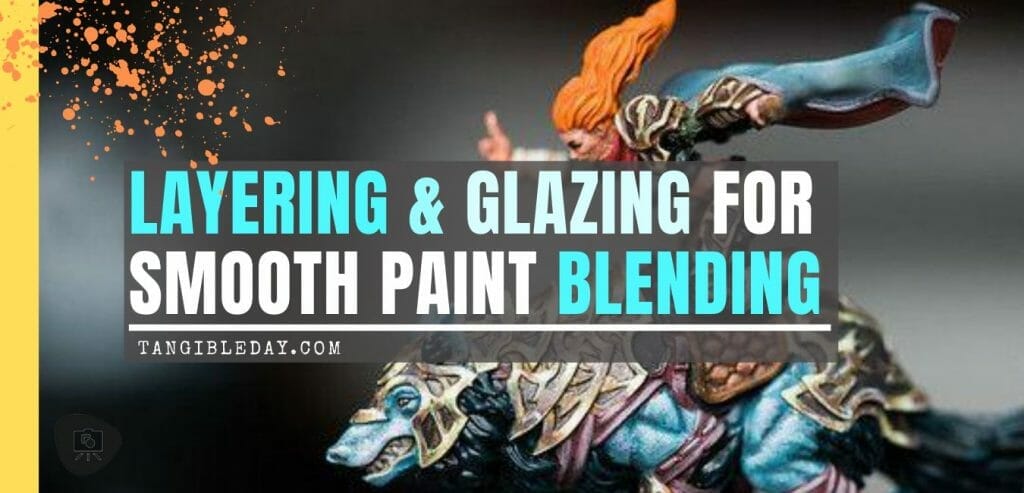
Are you looking for a way to smooth out your paint layers on miniatures? Miniature painting often requires that a painter blend multiple colors together to create transitions on a model’s surface. Although there are many color blending techniques, a tried and true approach is to combine paint “layering” with “glazing” to create smooth blends over small areas. The key is controlling the width and depth of the blended paint elements. This is especially important for non-metallic metal (NMM) painting on miniatures, because of how subtle changes in light and dark tones affect the overall faux metallic appearance.
In this article, I demonstrate how to do “layering and glazing” on miniatures to smooth out two colors on a model’s surface. My goal is to show you a simple way to take the basic paint layering technique to the next level by applying thin layer glazes.
Here you’ll learn how to do layering and glazing by:
- Painting the base coat layers for two blending colors
- Creating your own glaze with acrylic model paint
- Using your brush to apply a glaze to smoothly blend two different colors
RELATED: WHAT IS NON-METALLIC METAL (NMM)?
Here are 3 acrylic blending mediums I recommend for making your own (DIY) glazes with model hobby paint:
All of these mediums mix well with hobby acrylic paint. If you need a thinner glaze (e.g., lower viscosity), add a bit of water. A notable advantage of using a glazing acrylic medium as compared with water is the slow-drying properties of these additives. Glazing mediums give you time to work with your paint before it dries. This can be helpful if you’re a slow, methodical painter, or even if you’re more impulsive and prefer trying this out as you paint.
Read on below to use how I use these art mediums to create a glaze for painting a model surface.
| Image | Glaze | More Details |
|---|---|---|
 |
Golden Glaze Liquid Satin | Buy on Amazon Buy on BLICK ART |
 |
Liquitex Professional Glazing Fluid | Buy on Amazon Buy on BLICK ART |
 |
Liquitex Matte Varnish | Buy on Amazon Buy on BLICK ART |
You can make your own glazes with regular hobby model paint by mixing with water or clear acrylic polymers (shown above). The ultimate goal with a glaze is to use a color paint medium that is translucent that allows the underlying surface to show through. By glazing multiple layers of color, you can powerfully control the transition smoothness between colors and tones.
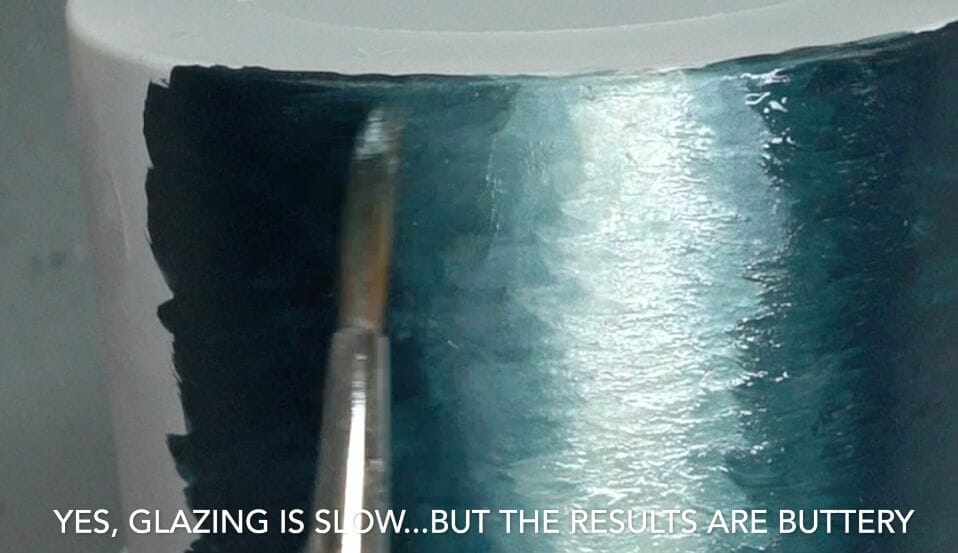
The glazing process is slow, but for miniature painting, glazing is technique used widely by professionals. It will be up to you to experiment and try out the glazing technique for yourself. If you’re looking for other advanced blending techniques for painting miniatures, check out this paint blending technique overview.
Is “layering and glazing” important for blending paint on miniatures?
Not really. Of course, it all depends on the artistic refinement you’re looking for on the model. If you’re only aiming for a table top quality paint job, then blending paint is secondary to finishing the project quickly. For a more professional look and executing special effects like non-metallic metal finishes, layering and glazing (as well as other blending techniques) will become more important.
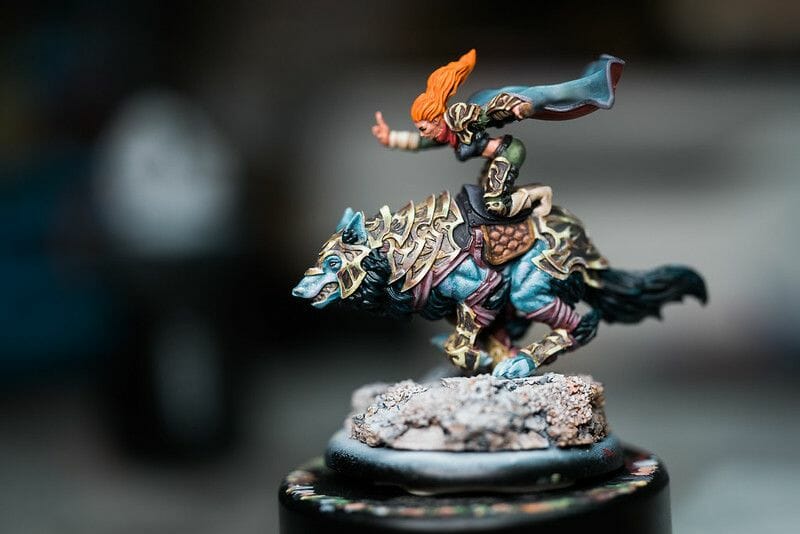
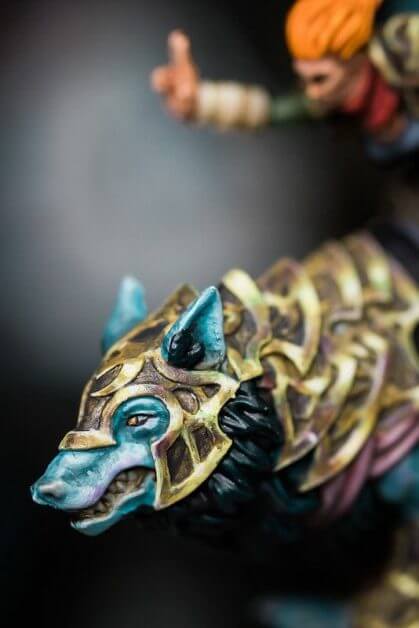
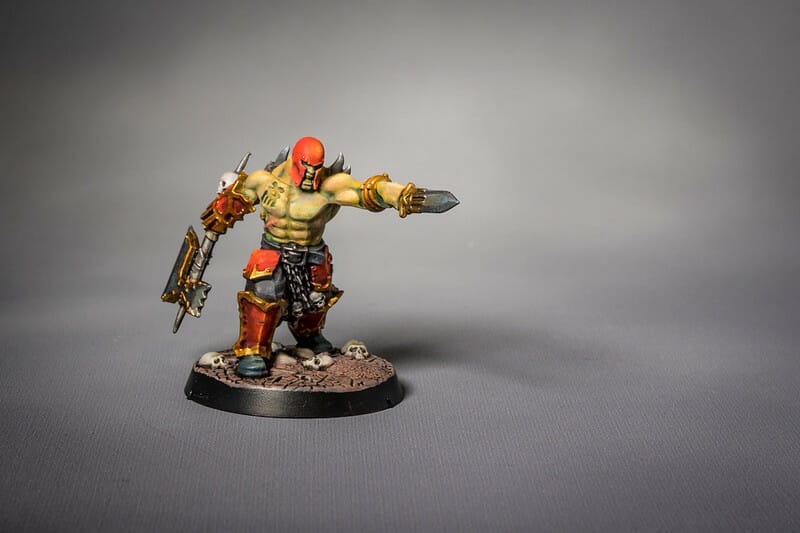
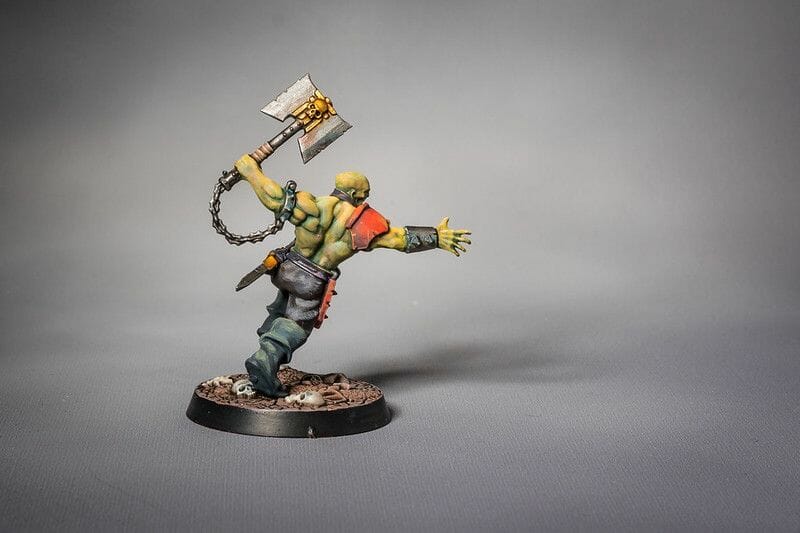
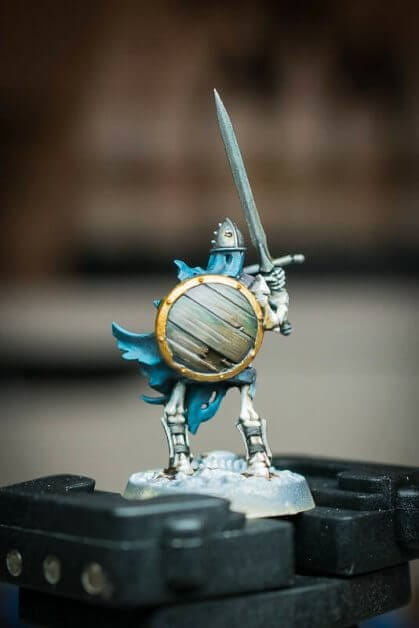
You can see how the gold NMM surface appears reflective in the zoomed out image. However, you’ll see how rough the layers appear even with glazing to smooth out the transitions. But, realistically, no one gets this close to a miniature to inspect your blending smoothness.
For the most part, you should use glazing over layered colors only enough to “sell the effect” at a normal viewing distance. Certainly, if you want super smooth blends you can continuing the glazing process over and over until you’re satisfied.
For non-metallic metal miniature painting, glazing over gradient layers of basecoat paint is a great way to help you control what colors blend together. Glazing also helps you add tints of other colors over your painted surfaces to add interest, improve the realism of a reflective surface, or add contrast and texture that doesn’t overwhelm the primary appearance of the model.
Here are the 9 steps for how to use layers and glazes to smoothly blend paint colors on a miniature:
- Start with a primed surface
- Basecoat your primary colors
- Mix your midtone color
- Apply the midtone “block” layer
- Mix another transition color tone (optional)
- Create a glaze with your original base colors
- Apply the glaze
- Repeat the glazing application
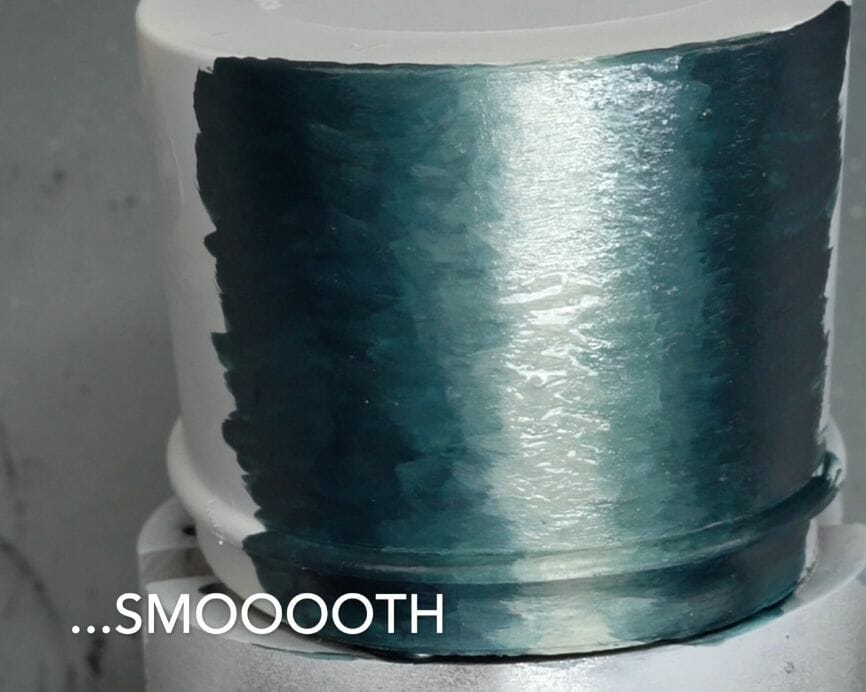
- Keep refining with glazes to create buttery smooth color blends
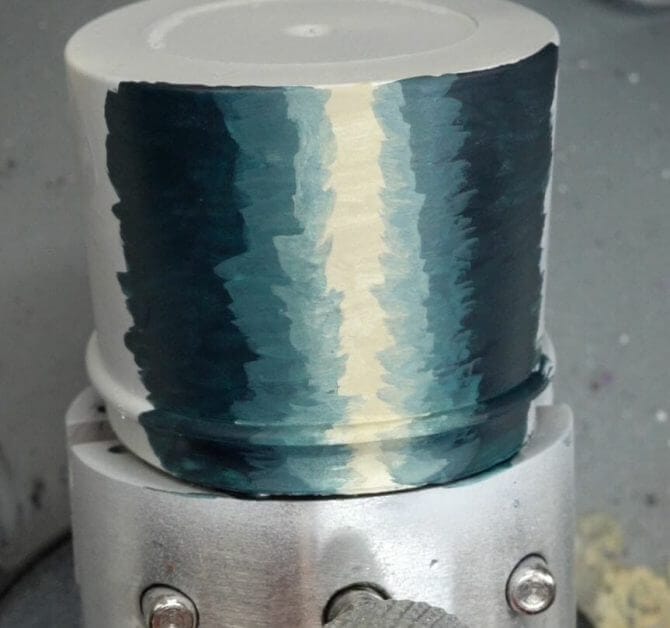
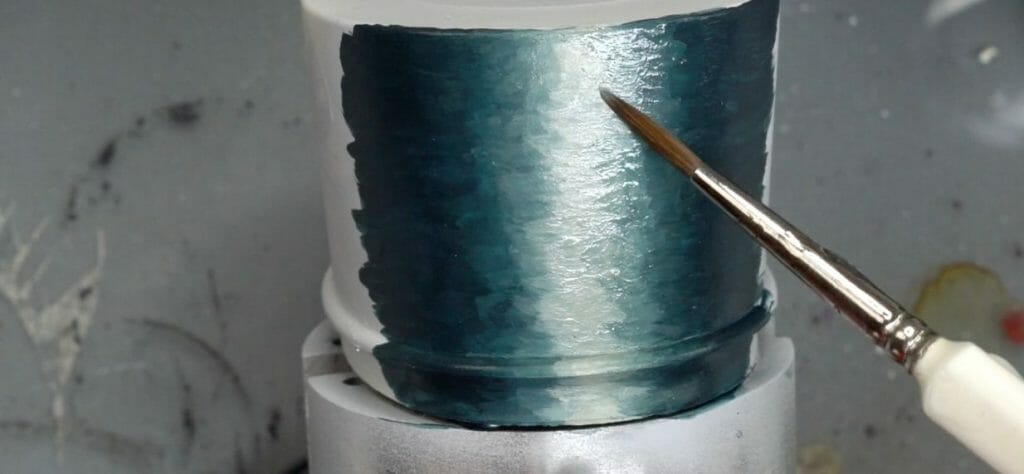
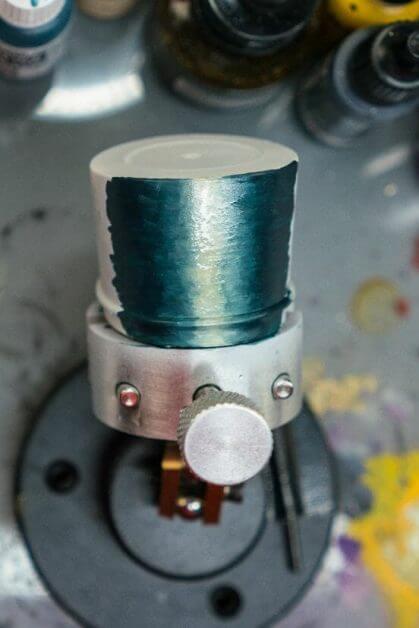
Using an old spray paint cap, I show you the basics of how to use base coat layers of opaque paint in combination with glazing to create a smooth blended transition between two colors.
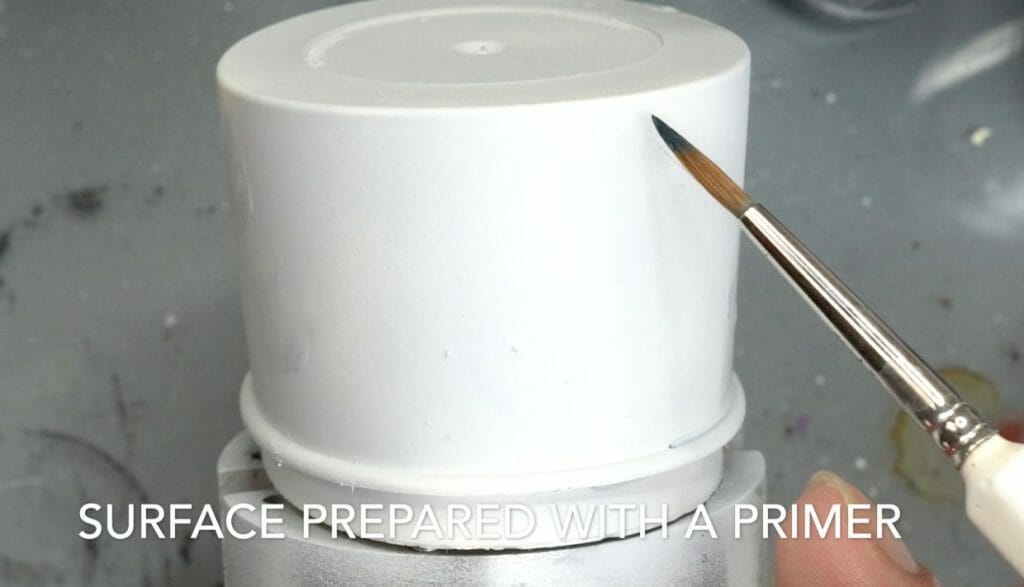
1. Start with a primed surface
Priming your model’s surface is important to allow paint to adhere properly. Priming also evens out any microscopic imperfections in the miniature’s surface that may interfere with your blending and glazing. For my recommendations on best primers for painting miniatures, check out this primer review article.
For this project, I used a Vallejo Surface Primer that I airbrushed onto the surface in one even coat.
2. Basecoat your primary colors
A good basecoat paint is any paint that can cover a surface in no more than 2-3 layers. Some paint brands and colors work better as basecoats than others. For example, darker, cool toned paints generally cover better than warmer, brighter colors. I don’t know why this is true, but if you’re having trouble with paint coverage, switch brands or consider a different color (if you are willing to change your color palette).
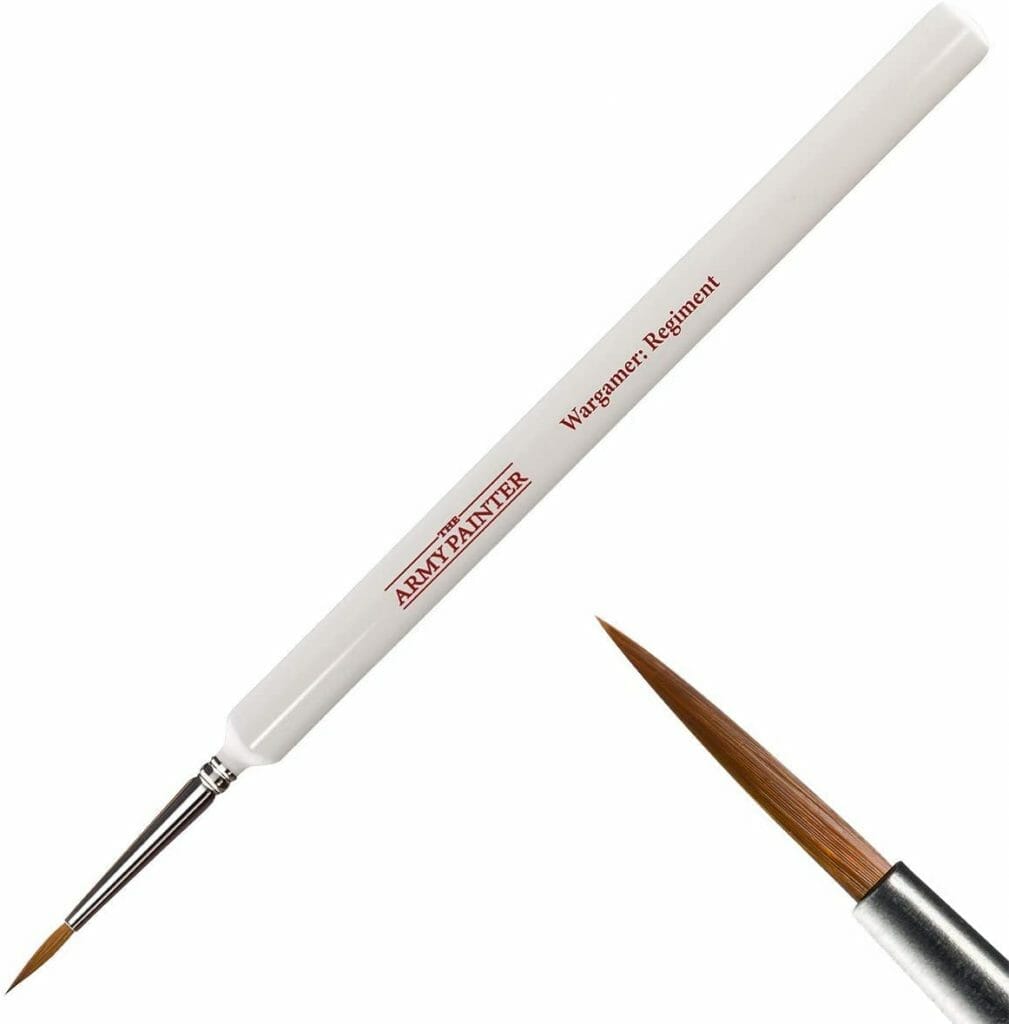
I used an Army Painter Regiment brush for this paint job. Any brush you have good control with should do the job.
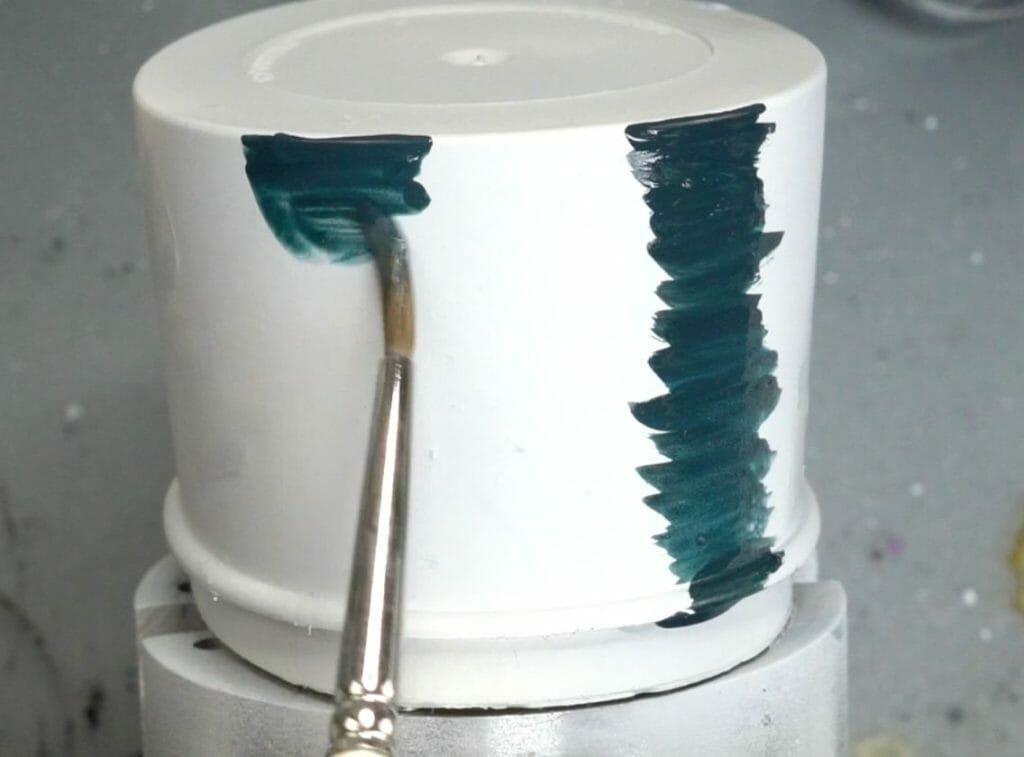
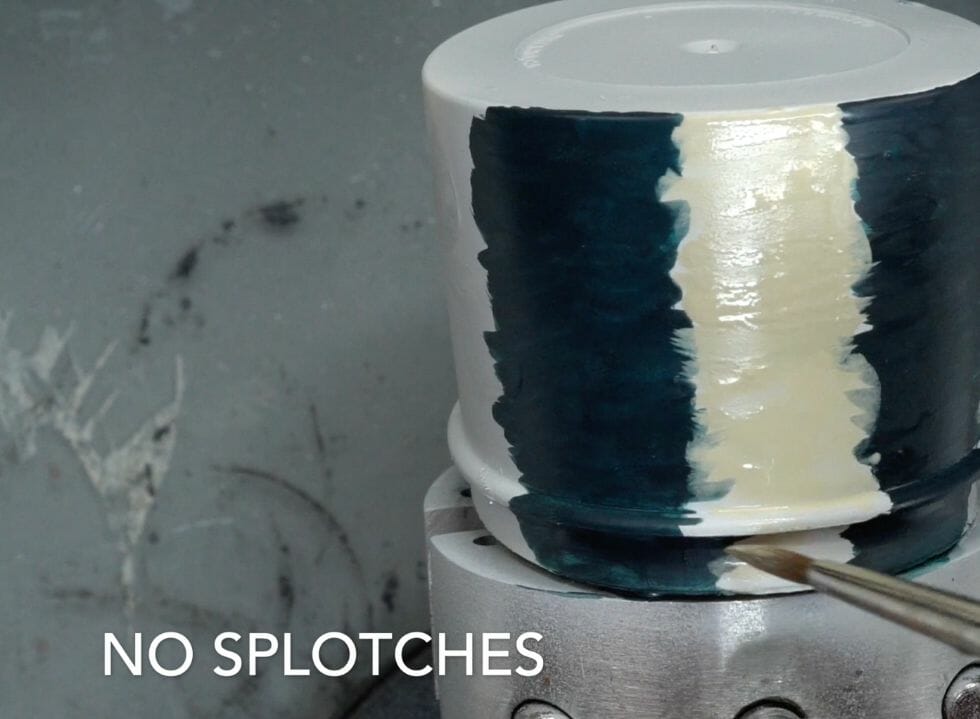
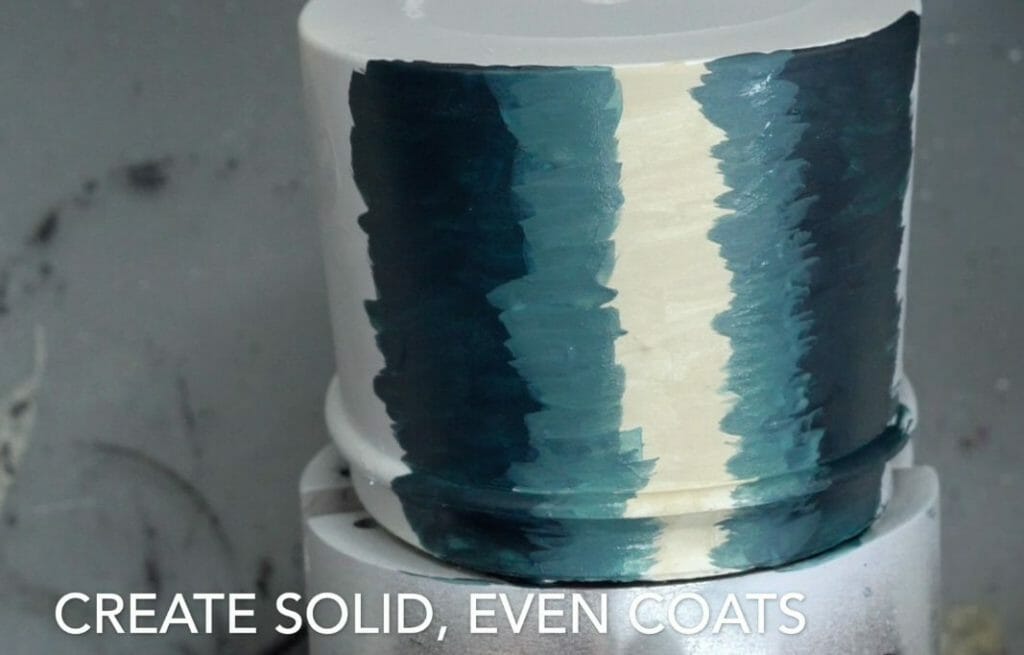
The goal with the basecoat is to “block-in” a region of the model’s surface with the color you want. You want an even, solid coat without splotchy appearance. The more even this coat of paint, the easier it will be to blend later.
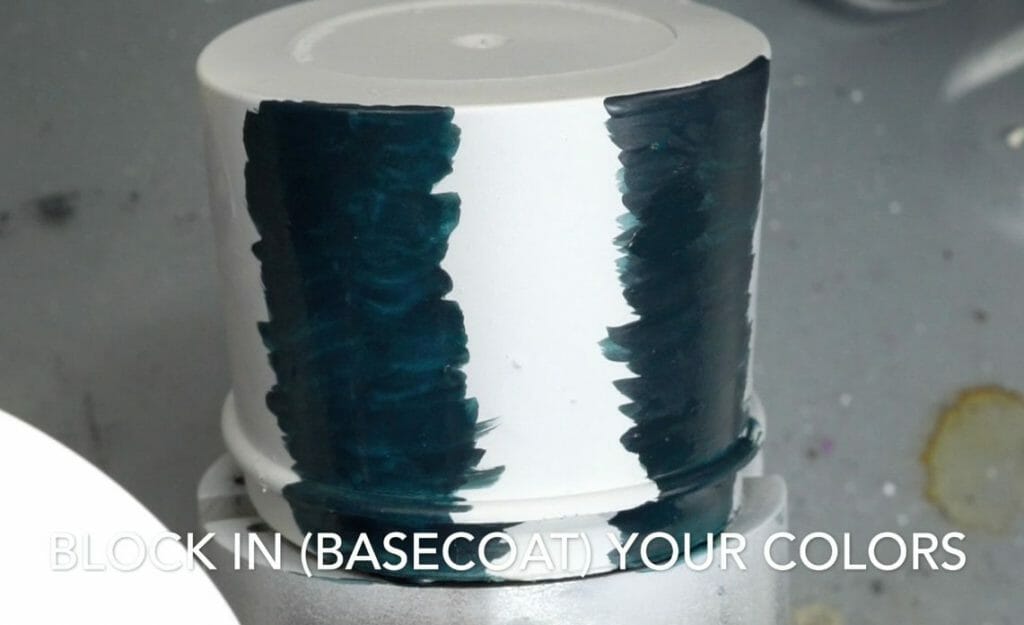
You’ll see that I started with the darker color. But, it doesn’t matter which colors you apply to your model first. All of your base coat layers will be opaque (i.e., you can’t see through them). The key is even, solid coverage with your basecoat paint.
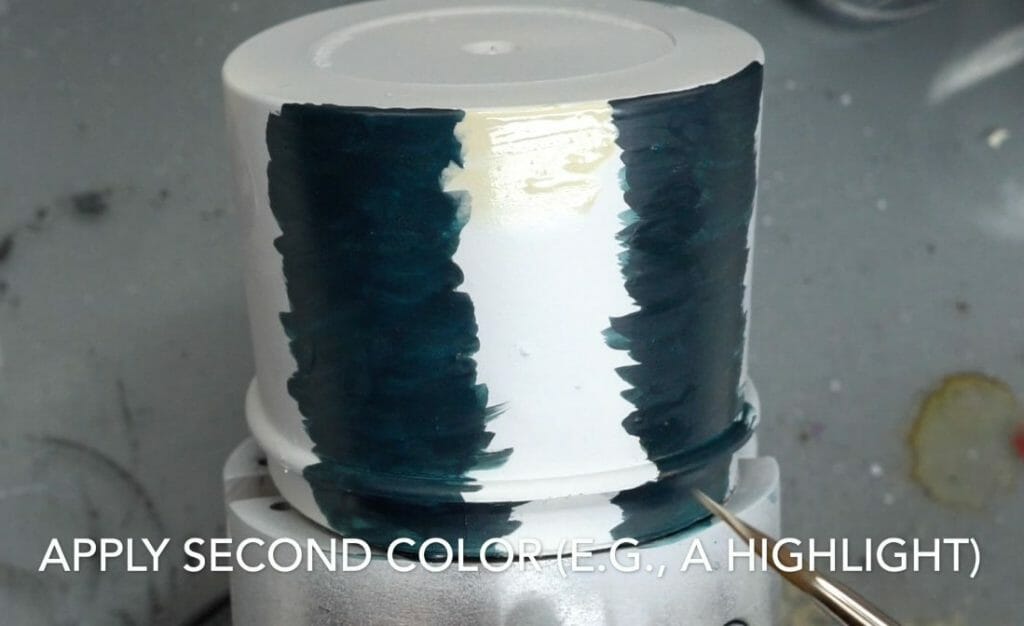
When you add your second color (in this case I used a highlight tone), make sure you paint right up and slightly over the previous color. This creates a transition zone (where two colors meet) that you will use as your demarcation, or point of reference, when you start glazing.

For NMM, the idea is to “sketch” paint the areas where light and shadows would fall if the surface was truly reflective. Knowing where to put your lights and darks is another skill you can learn elsewhere, or with practice studying and observing the behavior of light on true metallic surfaces.
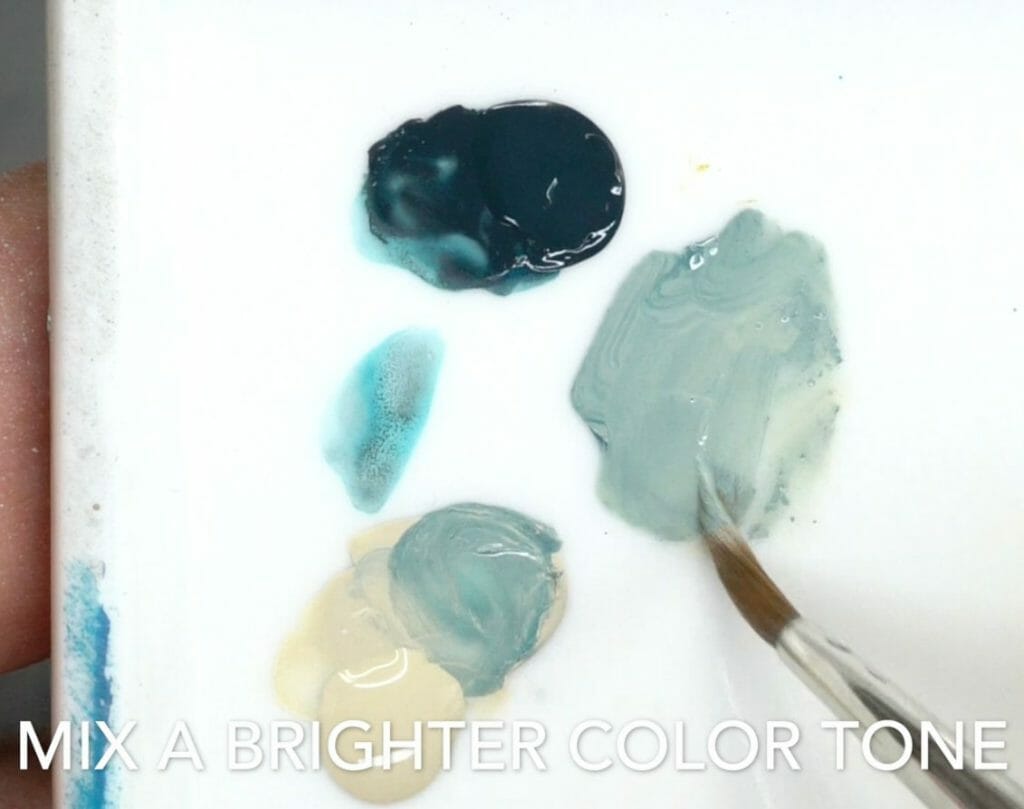
3. Mix your midtone color
To start the layering process, mix your two colors together into a midtone. The ratio doesn’t matter, as long as it’s somewhere close to the “middle” of the two original colors. I prefer using a dry palette because I have better control over the thickness of the paint. But, a wet palette could help, too, if you’re afraid paint will dry too fast.
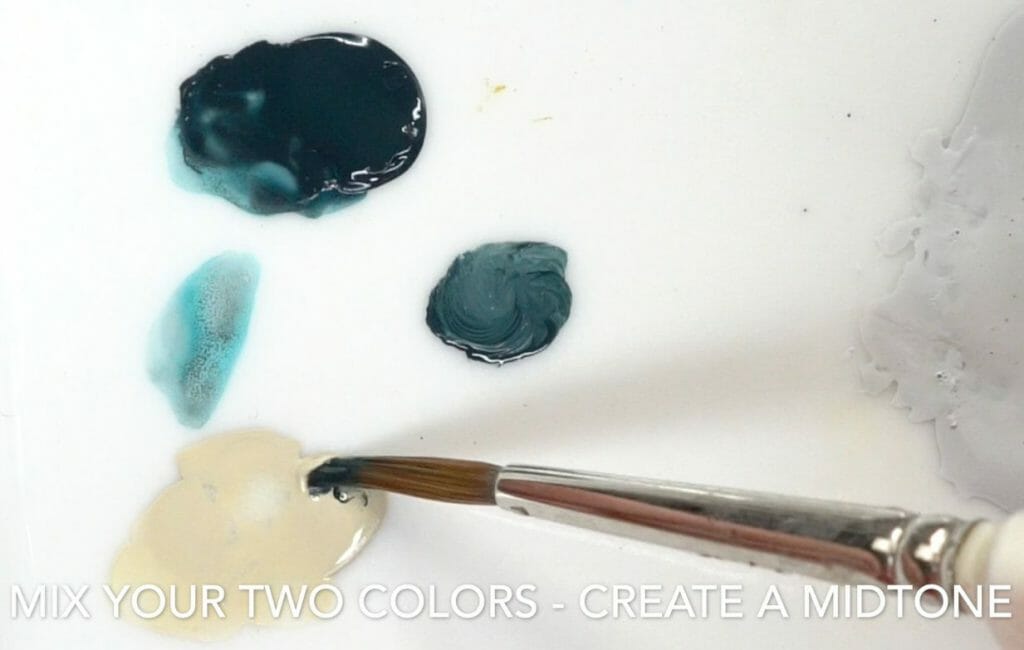
If you need to add water to help you mix the paint, then feel free to do so. Just don’t add too much water. You want this paint to stay as opaque as possible, which will help you base coat layer the transition in the next step.
4. Apply the midtone “block” layer
Make sure you apply the mid tone color in an even and solid coat. Apply the paint along the transition zone between the first two base coat colors. It will appear as a band or “block” region of paint that covers the meeting points of the prior colors.
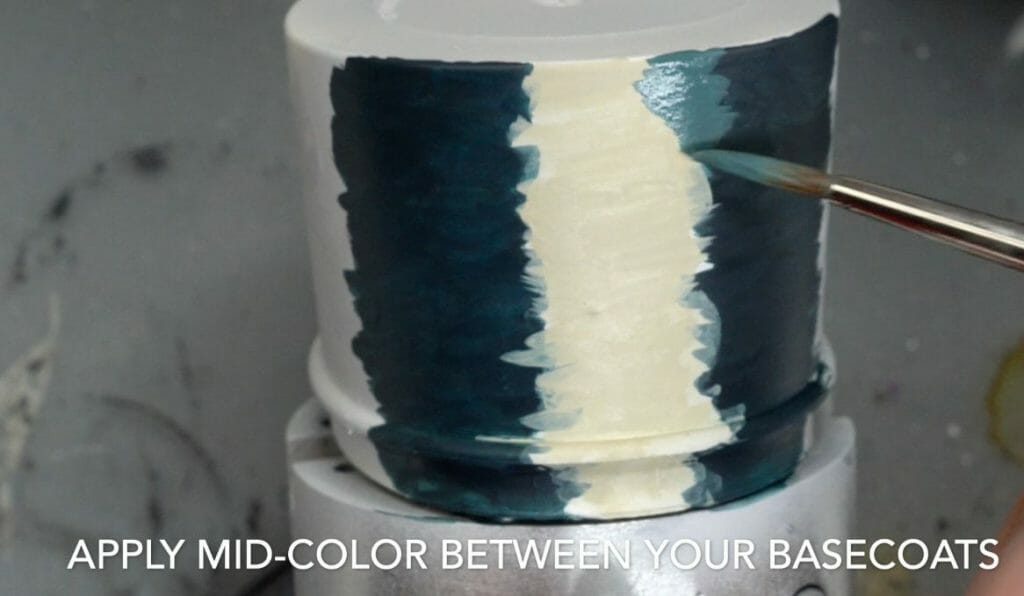
The midtone covers and start to “blur” the line between your original base coat colors. How thick you make this band will depend on how deep or shallow you want your blended transition to be in the end result. Of course, because we’re using opaque paints, you can always make adjustments on the fly. Merely go back to your base colors on your palette and narrow or thicken the midtone band as you see fit.
5. Mix another transition color tone (optional)
This step isn’t necessary as your subsequent glazing will help you create the blends between your three colors later (dark, mid, highlight). But, I personally like adding a fourth transition color to help guide my ability to see where my blends should appear.
To create another transition color, you can add your brighter (or darker) color to the midtone you mixed earlier in step #5.
To make the paint easier to use, you can add a bit of water (not too much). Thinning the paint helps the paint flow off your brush in a smoother fashion and helps you create that even solid basecoat you’re looking for.
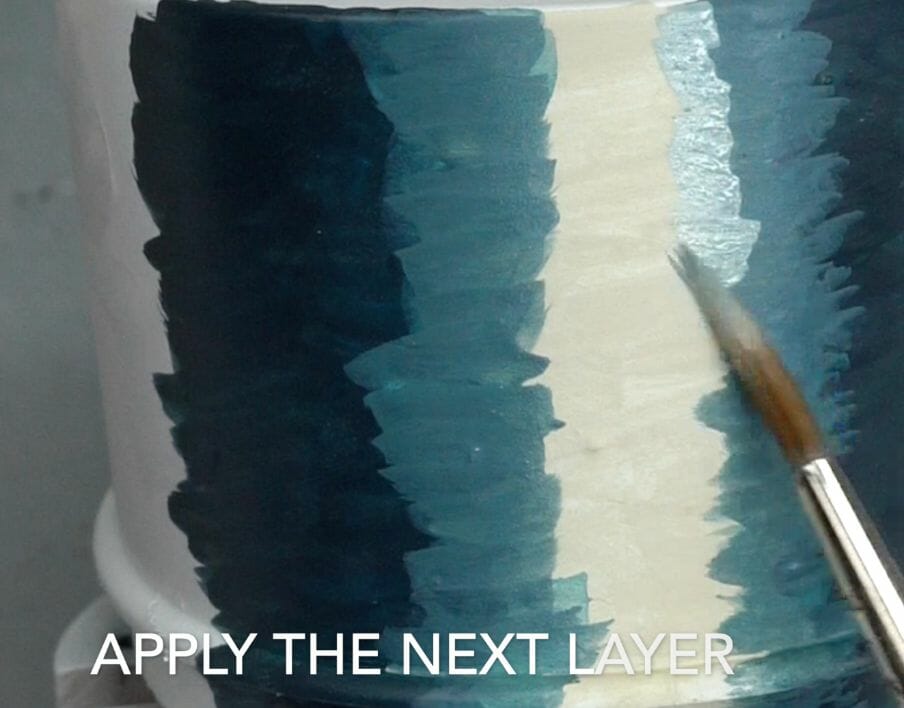
Apply the color along the transition zone. Again, you’re trying to blur/blend the line between the colors.
If you’re really meticulous, you can mix-up as many transition colors and apply them the same way. The more transition colors you layer at this point will further blur and blend your colors together. Remember to make sure each base coat layer dries before applying the next color on top.
Wet-blending is another blending technique, but won’t give you the same resolution control as layering and glazing. An advantage of layering and glazing is that it works well on very small surface areas. Whereas, wet-blending requires a larger area for better control and effect.
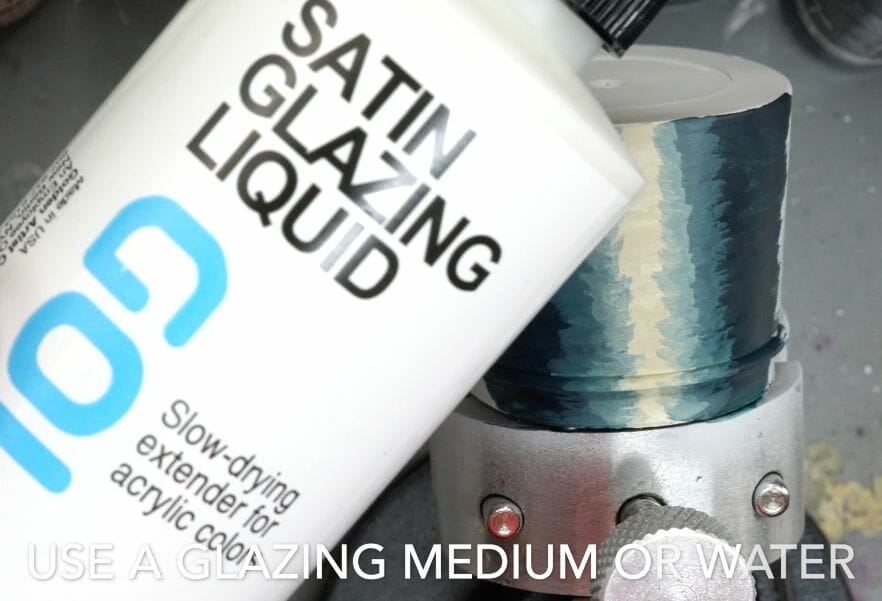
6. Create a glaze with your original base colors
Dispense some glazing liquid, such as Golden Satin Glazing Liquid, on your palette. Note that most specialized glazing mediums have a glossy effect. If you prefer a matte medium, you can use a matte varnish as a glazing additive. Or, simply use water (which I use in this article for glazing).
Alternatively, you can continue to glaze and remove the gloss with a matte varnish sealant when the paint job is complete. Here is my favorite matte varnishes for all my professional miniature work.
If you’re using a wet palette, make sure your paint doesn’t get too runny. You want to maintain consistent thickness of your paint for best results when you glaze a surface. Paint control is key, as you’ll see below.
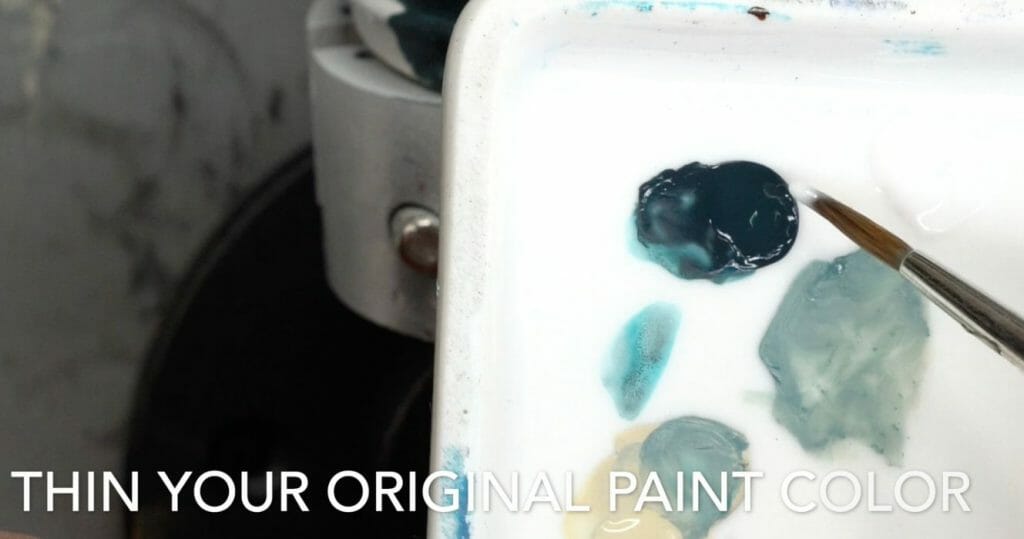
Thin your paints with the glazing medium (or water) until it is transparent. You actually can’t go too thin (it only makes glazing take longer), so don’t be timid with the thinning glaze medium. Do keep in mind, however, that you want to deposit paint in thin glaze layers to avoid filling in finer details on a model (if this is relevant to your piece).
Avoid creating a glaze “paste”. Thin your glaze with water (even if you added glaze medium), if you need the paint color to flow off your brush better.
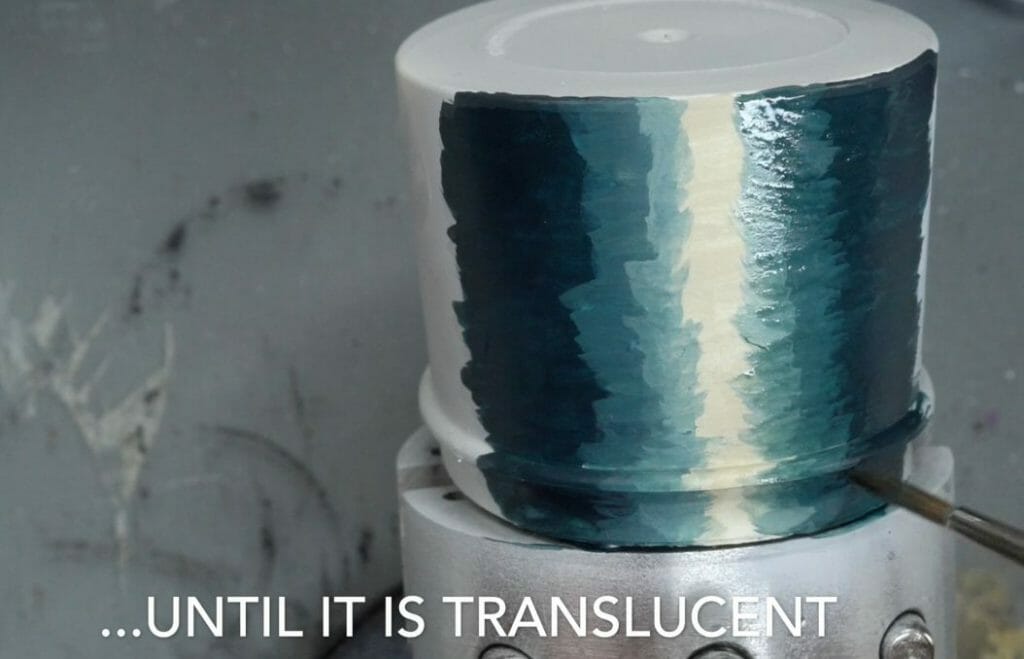
You’re looking for translucency where the color allows the underlying surface to show through.
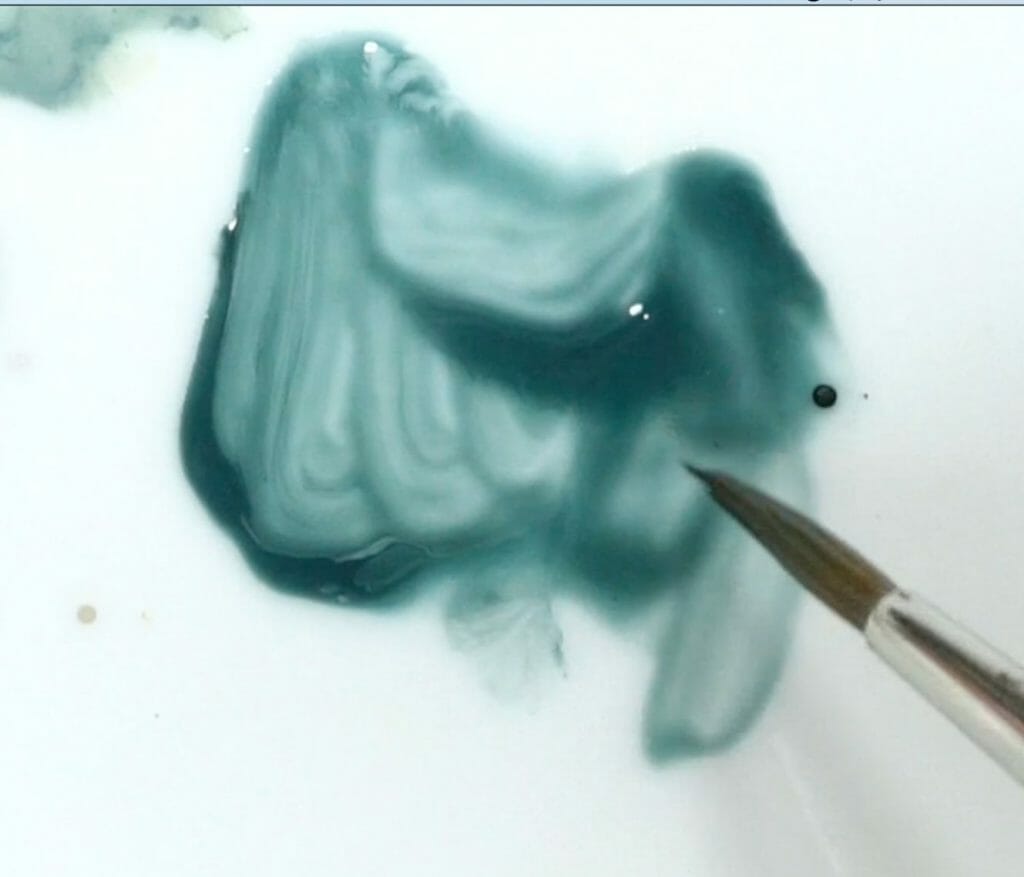
You’re looking for a fairly malleable mixture of paint pigment that is cleared enough to see through when applied in a thin layer.
Note that it is easier to use a darker colored glaze than a brighter tone. In other words, it is easier to make a model darker than it is to lighten it. In this case, I prefer to start with the darker color as a glaze. This way I can “push” or tamp down the “brighter” colors into the shadows. Then, as you’ll see below, I can bring the highlights back, slowly using glazes.
This is all personal preference. You can glaze from either direction: dark to light, or light to dark. The smooth blended result will appear the same.
7. Apply the glaze
I use the same brush that I applied my base coat colors. The best brush for glazing is the one you are most comfortable using. Make sure the brush as a good capacity to hold paint and the color flows off predictably from the bristles.
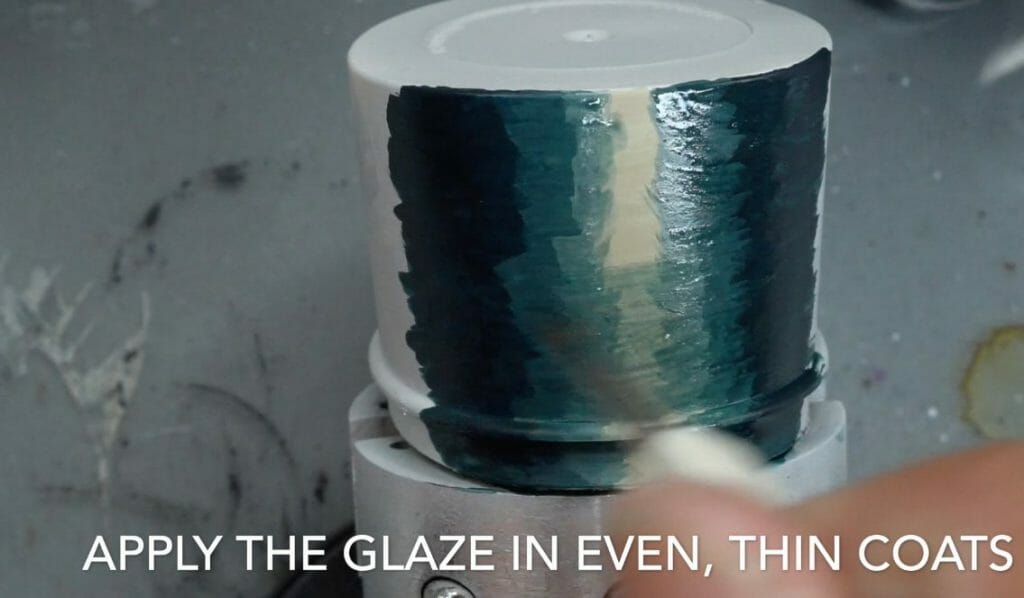
Apply the glaze in thin, even coats over the entire surface you want to smooth out. Make sure the coats are thin and even (I know I’m repeating myself). As you may notice, wet paint is darker than dry paint. So, be patient as you glaze if you think you put too much on. Your glaze will lighten up as it dries.
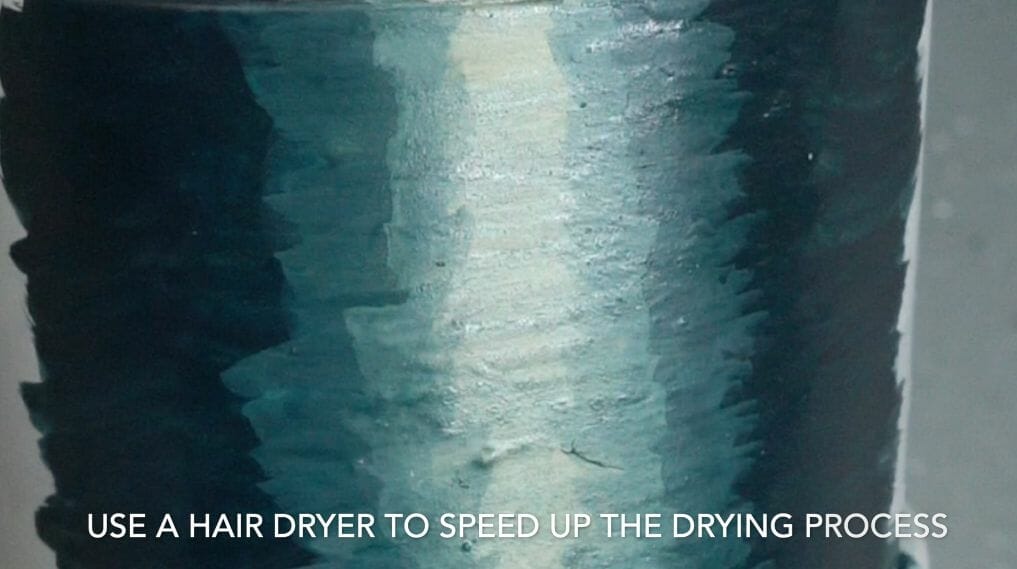
Use a hair dryer to speed up the drying process. Take not of your underlying layers. They all appear darker, but they are slowly blending together. As you add more glazes in selective areas, you’ll see the lines between the base coat layers blur.
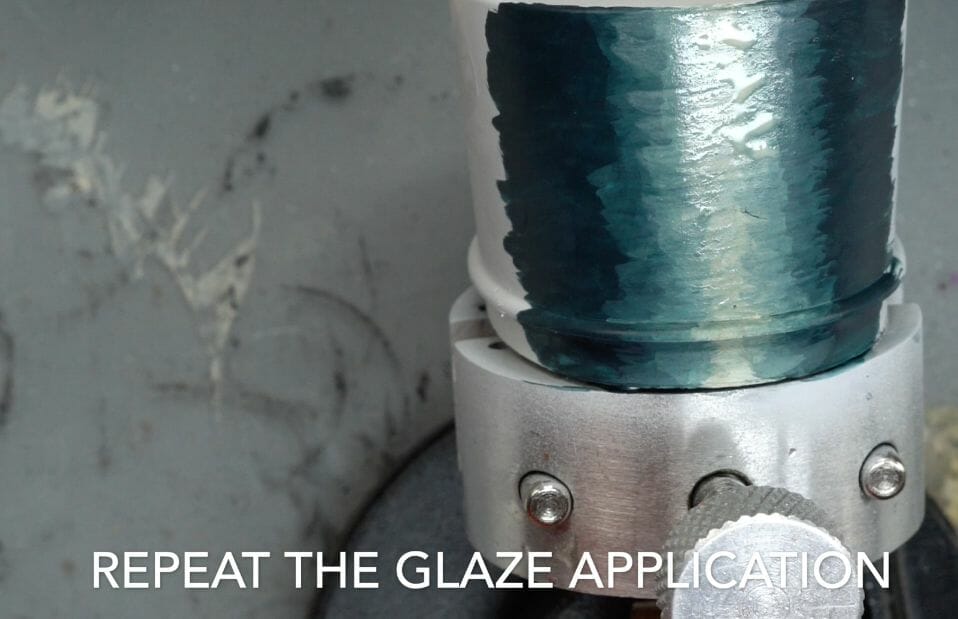
8. Repeat the glazing application
Selectively glaze over areas with your dark glaze color to “push” the brighter midtones down toward the shadow color. Use your brush to control where the glazing pigment deposits. For more about brush control when glazing, check out this in-depth glazing article or watch this video.
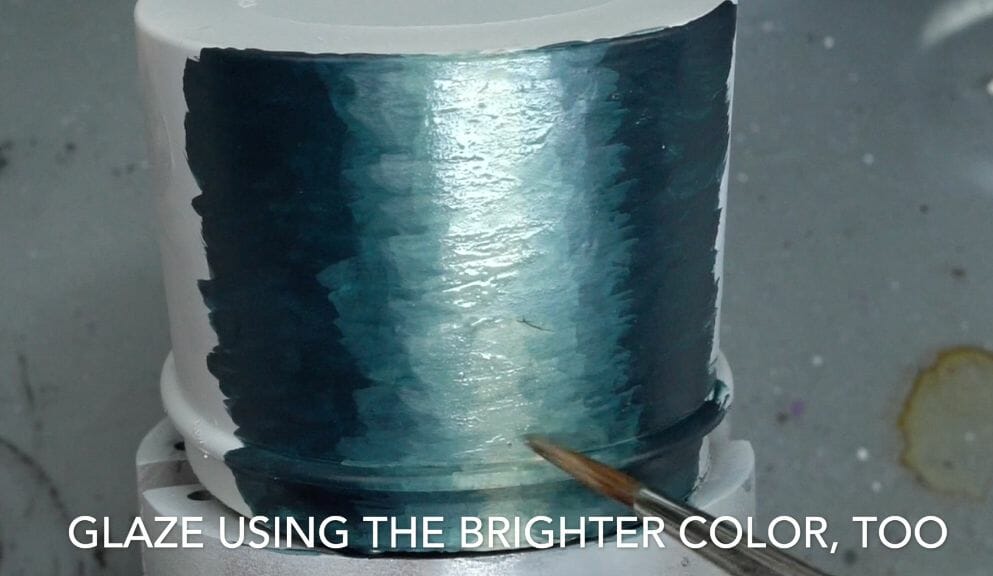
When you’re comfortable with the transitions at the darker end of your model’s surface, create a glaze with your highlight, second color. Apply this the same way in selective areas to blur and blend the transition zones between the underlying colors.

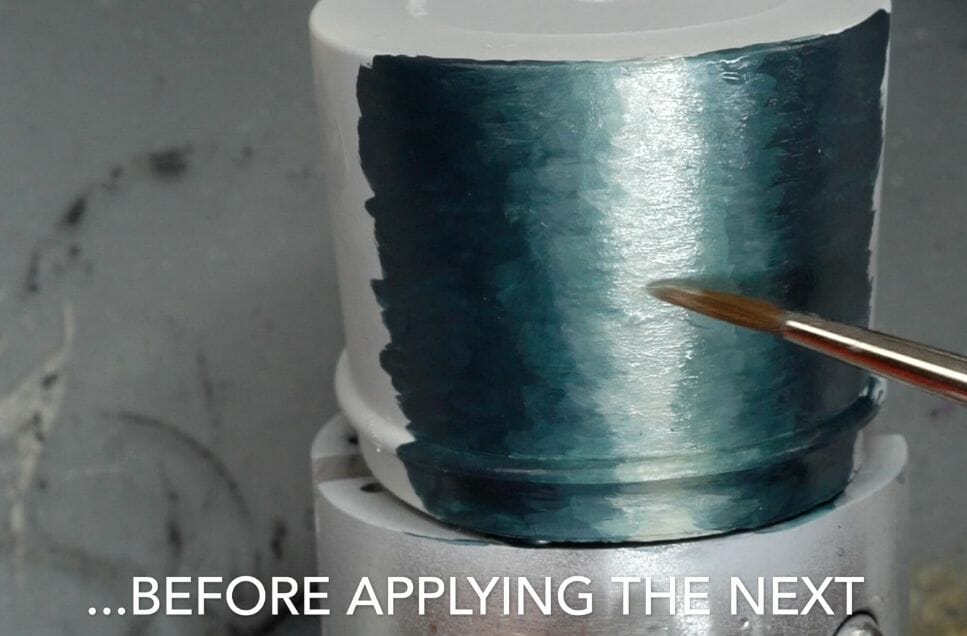
Remember to wait for each previous glaze layer to dry before applying the next.
9. Keep refining with glazes to create buttery smooth color blends
You can keep glazing to your heart’s content.
Because you’ve made your glaze with an acrylic polymer medium (e.g., Golden Glazing Liquid Medium), you have more time to play with your paint without it drying too quickly.
As you get closer to finishing your blending, make sure you pull your highlights back up to their brightest point. This is especially important if you’re painting NMM surfaces. The high contrast is what sells the faux reflective surface effect.
When you’re finished painting, make sure to seal your painted surface with an appropriate varnish.
A matte varnish will remove the glossy effect of using a glaze medium and help smooth out imperfections in your color blends. If you’re still not satisfied with your color blends, simply keep glazing or try adding a third accent color glaze in the darker, midtone region (I don’t do this here).
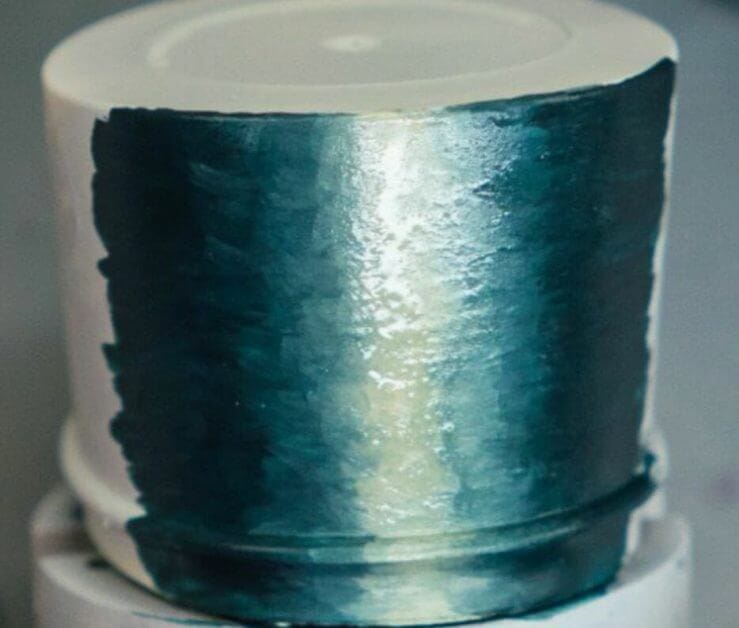
For this piece, I’m calling it done. It has the reflective quality I’m looking for. Although I haven’t varnished it in this image (below), you can tell how we’ve gone from two colors, to a more blended smooth surface using glazes.
Here’s the video showing you the entire technique of “layering and glazing” to blend acrylic paint over a model surface:
Conclusion
What else can you use layering and glazing for?
In addition to non-metallic metal (NMM) painting effects, you can use glazes to paint skin tones and other surfaces where subtle tints of color are needed. For skin, or other organic surfaces, adding other colors on top of the “flesh tone” makes skin appear more realistic and interesting for the viewer.

Layering and glazing is a key technique for many of my miniature painting projects. I don’t often use it over the entire model. But, when I’m looking to add a few special effects or want to use a unique style, e.g., NMM, then I’ll turn to using opaque base coat layers blended together with glazes.
I hope you found this article helpful! Thank you for reading.
Happy paint blending, layering, and glazing!

Tangible Day on YouTube (Miniatures and More!)

Pingback: Warning: These Jaw-Dropping Chalk Pastel Artists Will Make You Question Reality!