3D printing miniatures has come a long way. Resin 3D printers are able to produce miniature sculpts that are indistinguishable from plastic model kits. Resin 3D prints have almost no artifacts with even, smooth surfaces that make them ideal for painting. As someone who paints miniatures, as well as 3D prints, I’m always looking for fun projects to work on and share how I did them.
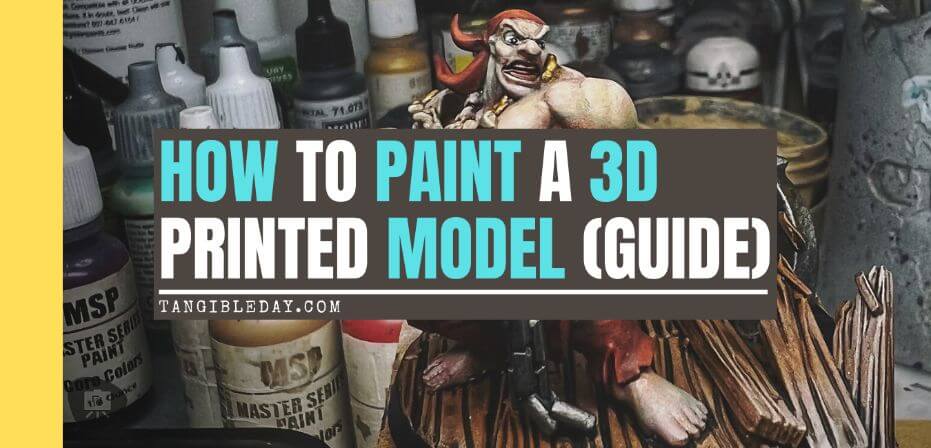
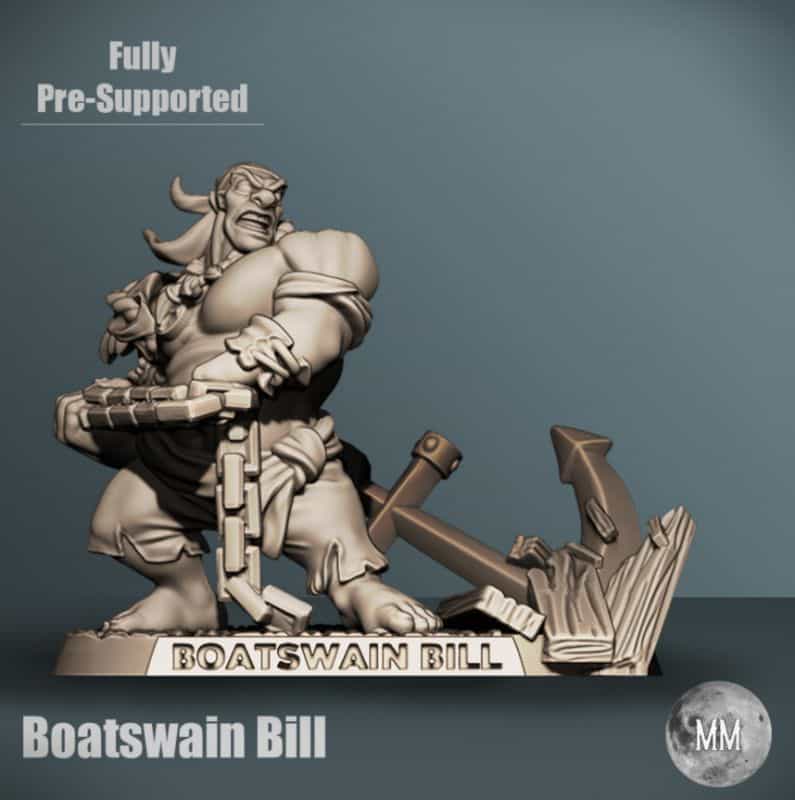
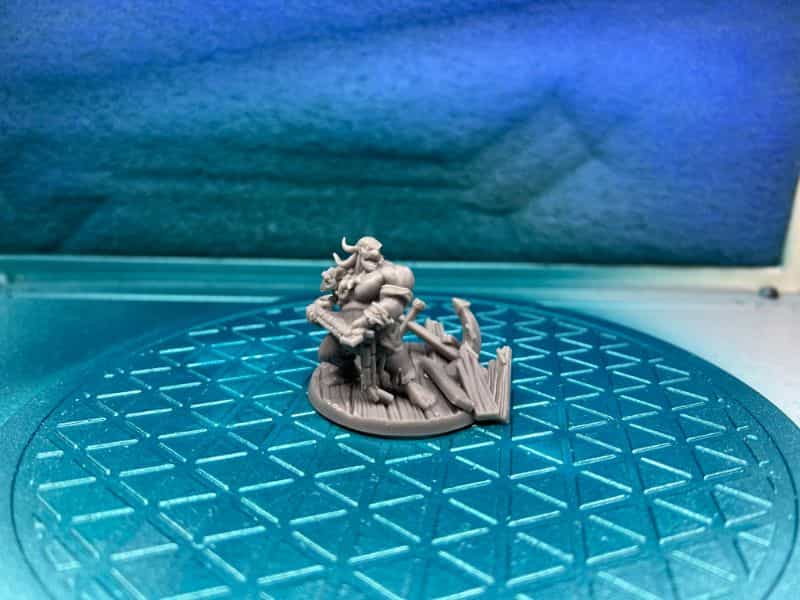
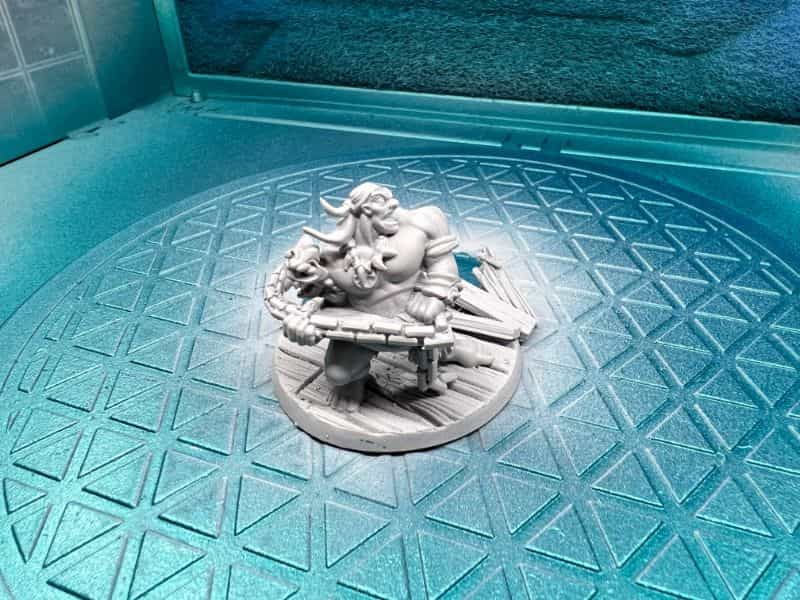
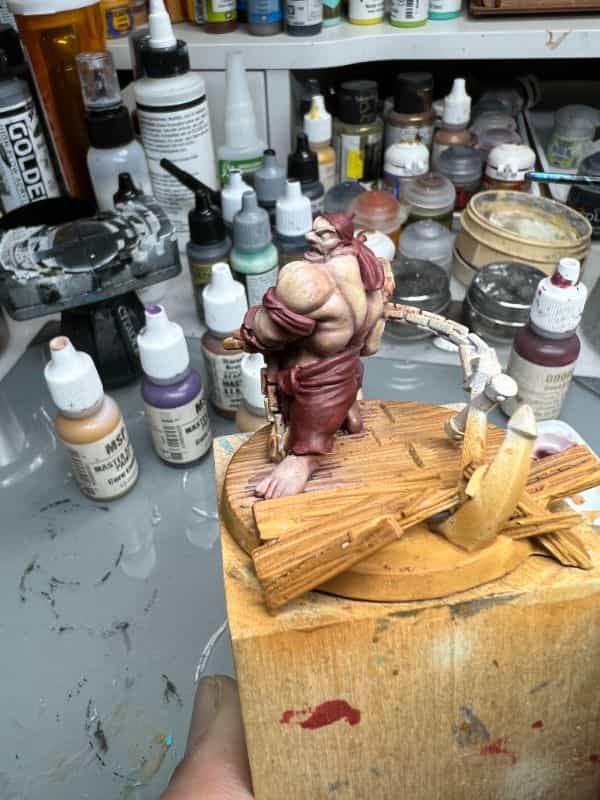
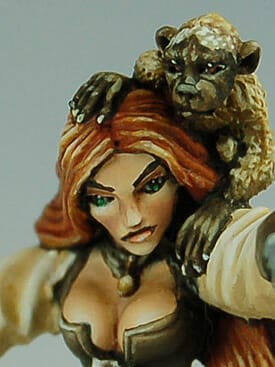
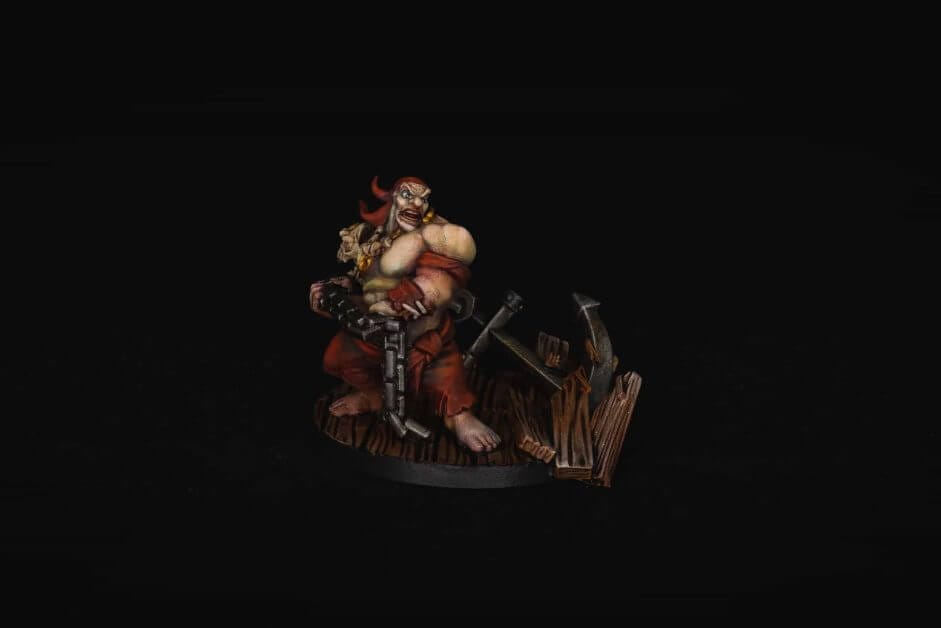
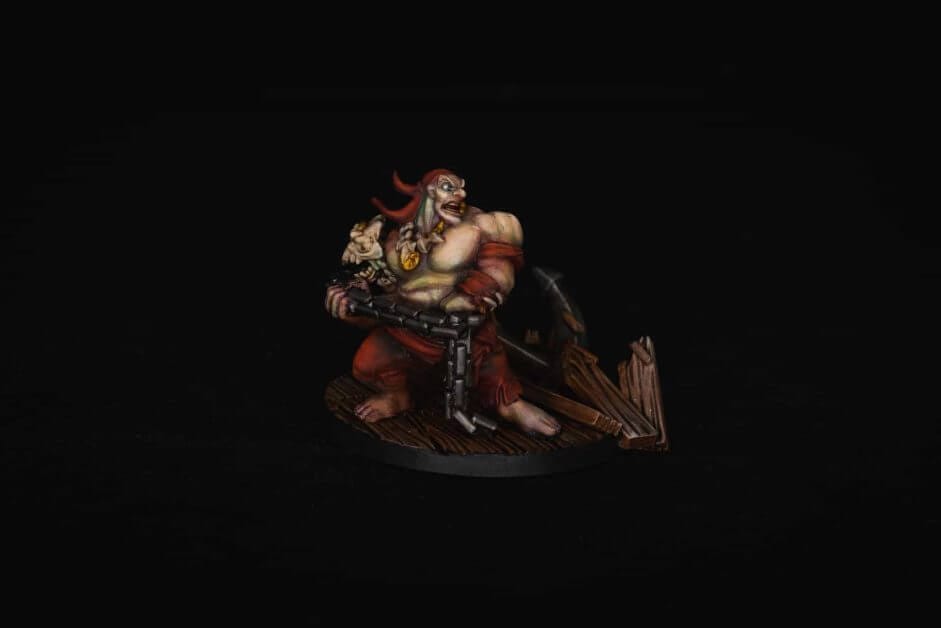
In this article, I show you how I painted this resin 3D printed miniature from myminifactory. This lovely sculpt is “Boatswain Bill” from Moonlight Minis (3D sculptor/artist: Christine Van Patten).
READ MORE: HOW TO PAINT 3D PRINTED RESIN MODELS

Continue reading below to see the tutorial of how I painted Boatswain Bill. Along the way I share tips and tricks for getting great results without fancy tools or techniques!
A Quick Note About the Feasibility of 3D Printing High Quality Miniatures
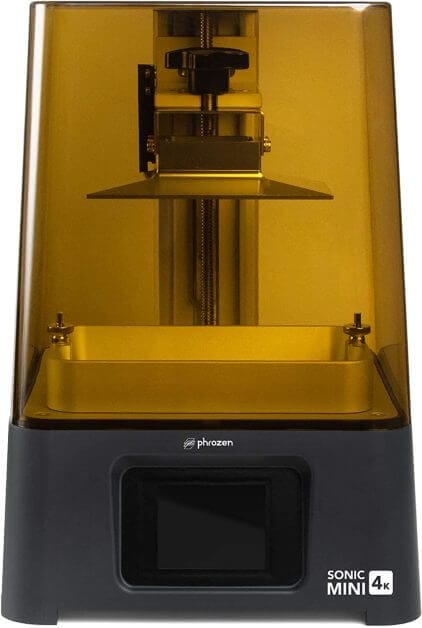
You don’t need an expensive 3D printer anymore to produce high quality miniatures that look amazing up close. Of course, there are several types of 3D printers for making resin miniatures. The Phrozen Sonic Mini 4k and other high-resolution resin 3D printers are awesome for printing miniatures for mini painters and gamers.
If you’re wondering if 3D printing is right for you, check out a few other 3D printing articles for miniature painters.
Painting a Resin 3D Printed Miniature (10 Steps): “Boatswain Bill” from Moonlight Minis
1. Process the 3D printed miniature
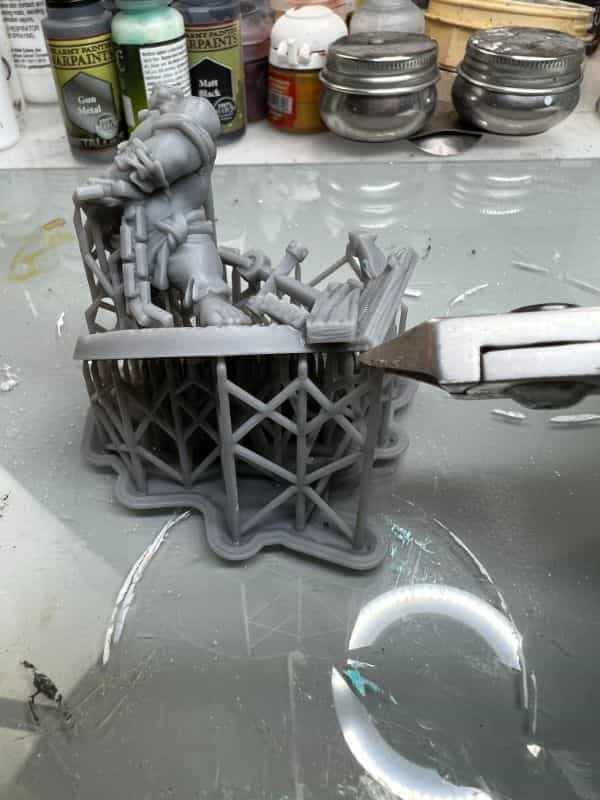
After you’ve printed your 3D model on your printer, you will probably have to go through the normal post-processing steps. This means for resin 3D prints, cleaning up uncured resin in washes of isopropyl alcohol (i.e., rubbing alcohol; or water if your resin is water-washable), removing the scaffolding supports, and curing the resin miniature under ultraviolet (UV) light.
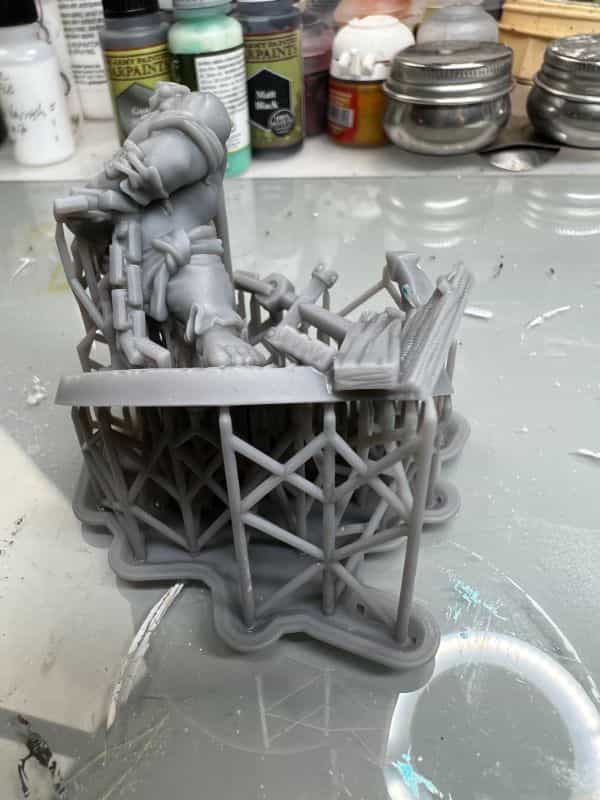
I use generic wire clippers and a hobby knife to remove and clean up the support material that the 3D printer uses to make the miniature. It’s a pretty straight forward process that is similar to working with plastic model kits that have parts that come on sprues.
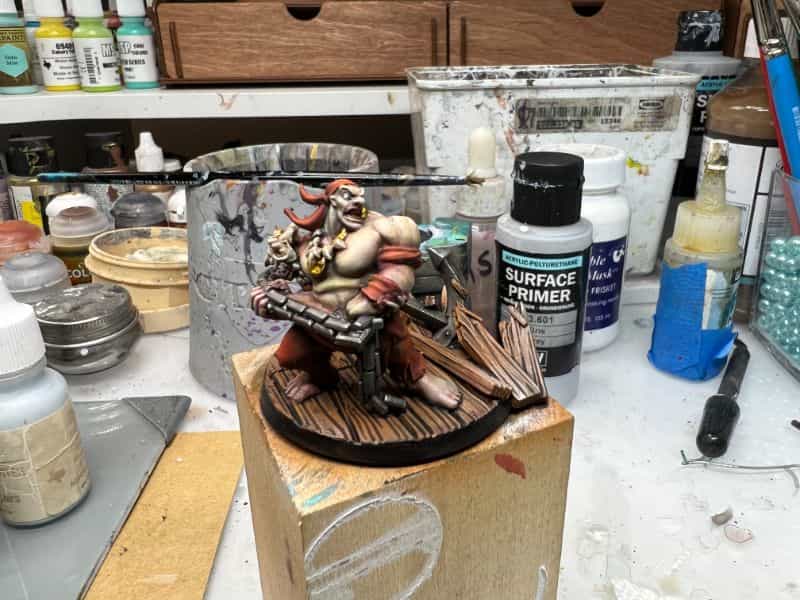
2. Prime the model in preparation for paint
You should always prime a model, even 3D printed minis, before you apply paint. Primer acts like a bridge between the model’s surface and your paint job. It helps make the surface of your miniature smooth, and makes paint stick much better to your model.
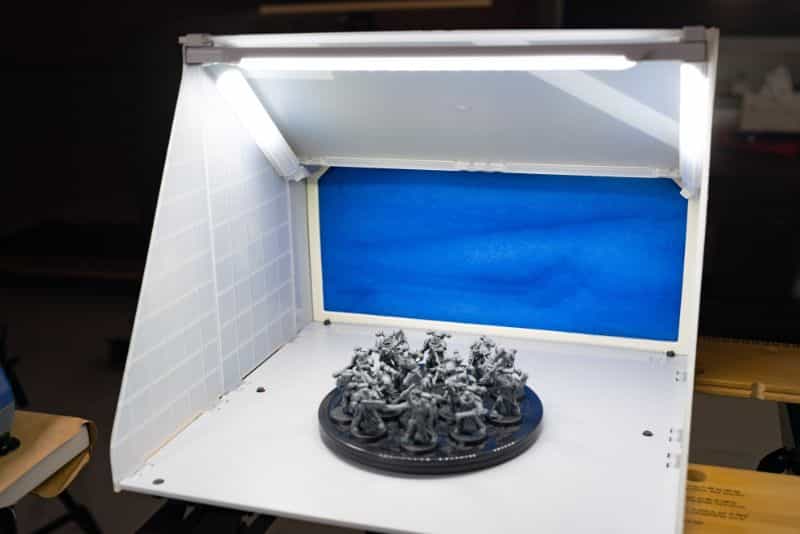
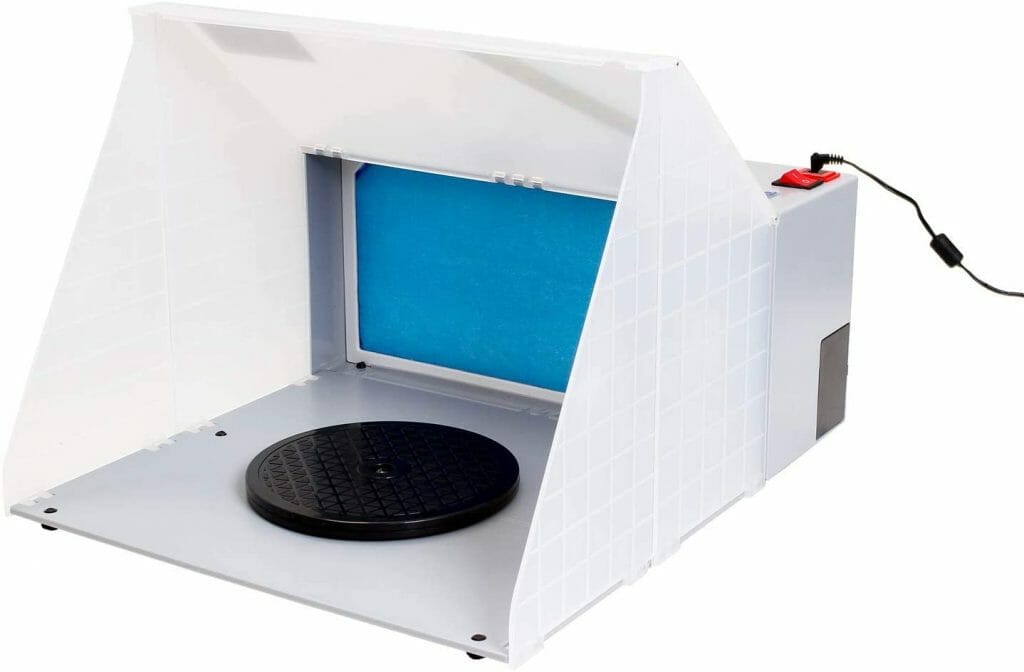
To apply primer to this 3D printed miniature, I placed it in my airbrush spray booth. A spray booth is an awesome tool for any hobbyist looking to spray acrylic paints or primers on their models. You can even use them indoors without a window to exhaust the fan, if you’re setup properly with filters.
I use a Vallejo Surface Primer, thinned with a few drops of water, in my airbrush to start the priming job on the 3D printed model. Boatswain Bill will be primed in a light gray color to start the painting.
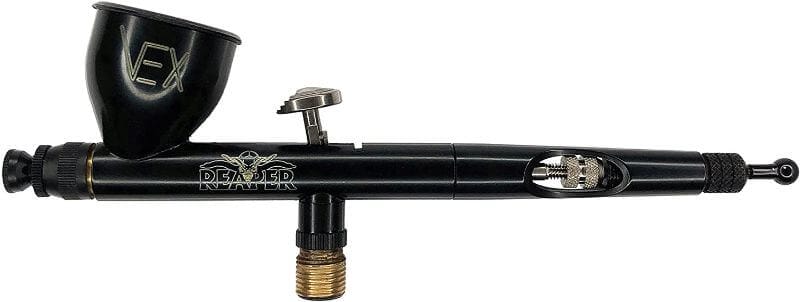
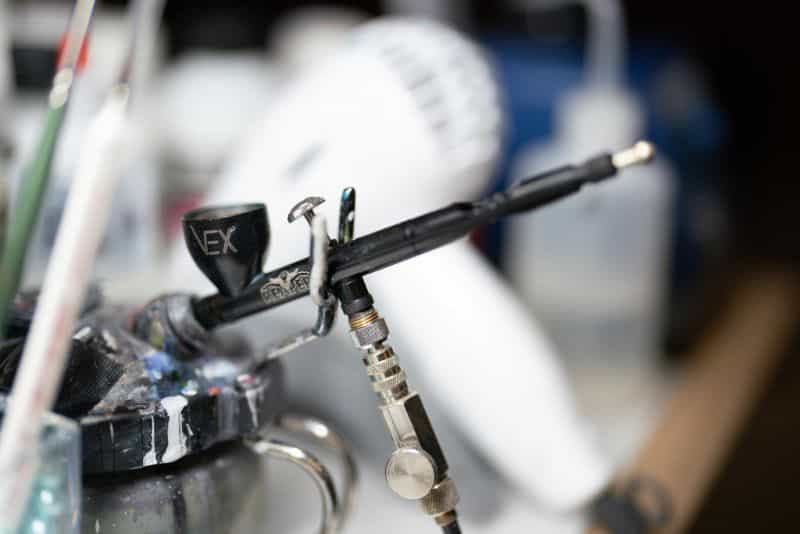
Overview of the Reaper VEX Airbrush for Painting Miniatures:
As a quick overview of the airbrush I used for priming (and painting), the Vex airbrush has a swappable needle system that doesn’t require you to change out the nozzle size. This makes the Vex airbrush more versatile and quicker to use for different projects. The price is on-par with similar airbrushes designed for miniature painting. I love mine!
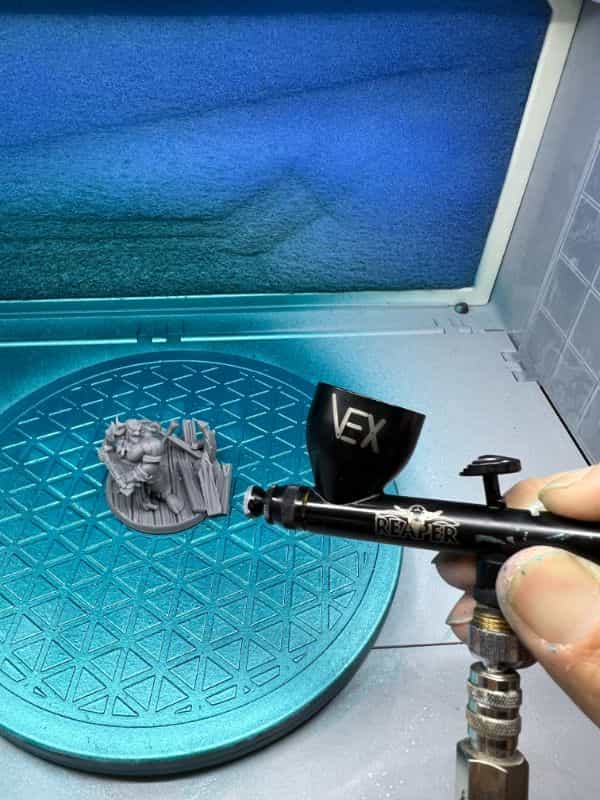
Filled with Vallejo Surface Primer (gray), I set the air pressure to around 30 PSI for a 0.3mm sized airbrush nozzle. This gives me a nice wide spray pattern with good atomization for a smooth (no splatter) paint application.
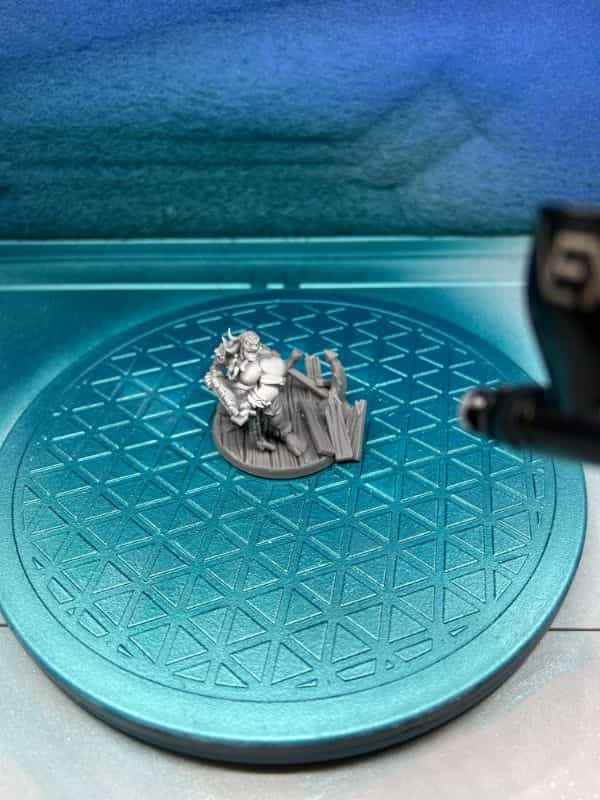
I slowly rotate the model until the entire surface is covered with the primer. I make sure to get underneath the model as well, so that every surface has a thin layer of primer coat.
3. Paint the base coat colors
I started with the skin colors I wanted for the models. Because I’m airbrushing, I applied the darker color tones first. The reason you want to start with darker colors when you’re airbrushing is that it is easier to control your lightening paints when they are sprayed. Also, I think it’s much harder to direct a spray nozzle into a recess (where shadows go), than it is to spray raised areas on a model.
To airbrush my base coat, I simply thin regular acrylic paints with water. There are many methods to thin acrylic paints, but I find water is the most versatile and causes the least problems.
After I get my first base coat layer down–in this case, it’s for the flesh/skin tone–I allow the layer to dry, completely, before adding more paint.
4. Layer up other colors to build “3D volume”
Miniature painters have all sorts of “philosophies” about how to approach their paintings. I like to think of painting miniatures as building up volumes. What I mean by this is using paint to make a 3D object look more three-dimensional.
To build-up the appearance of 3D volume with paint, you need to keep in mind that “contrast is key”. Contrast is the difference between your dark values (shadows) and bright values (highlights). A high contrast miniature will have dark shadows and bright highlights.
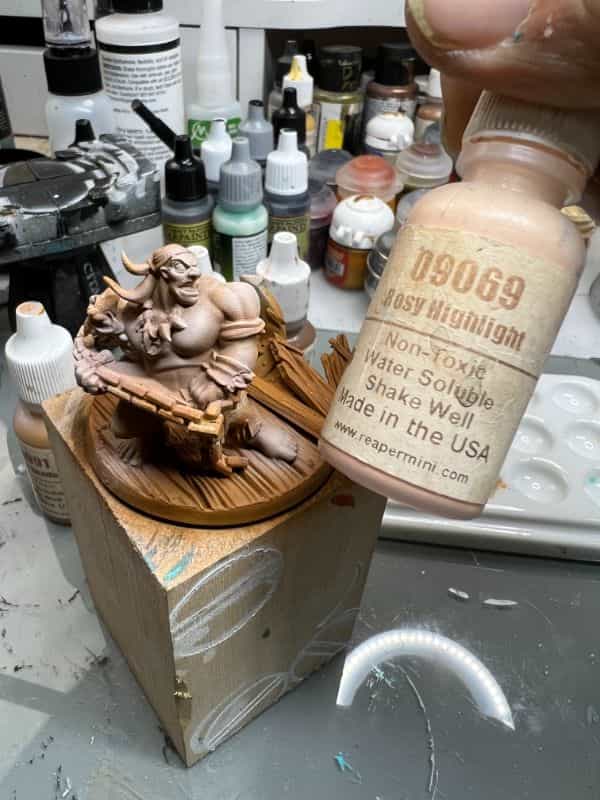
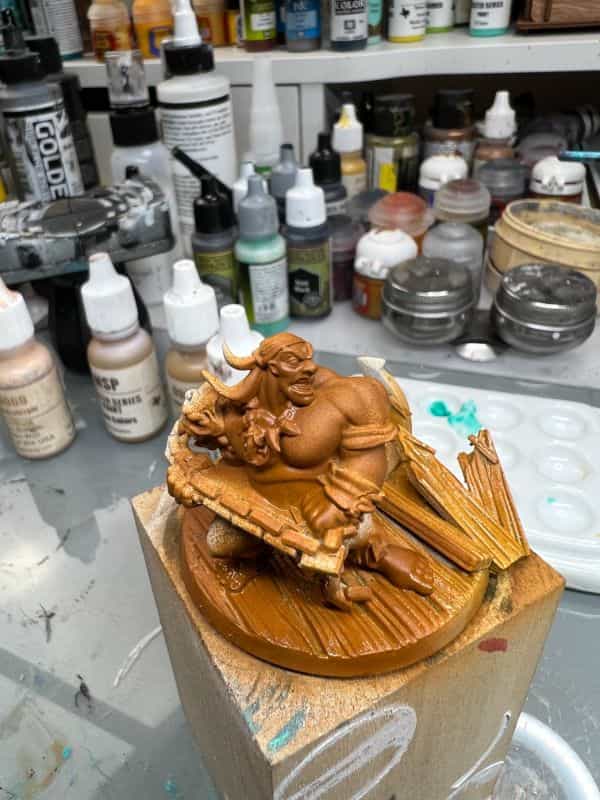
With the skin tone, I use a series of brighter and brighter flesh tones. In this case, I’m working with Reaper Master Series paints which produce a very nice matte texture when they dry. The matte texture helps blend different layers together.
I apply these colors broadly over the skin areas of the miniature using my airbrush. You can see how smooth the layer appears with a spray application. Certainly, you could use a regular brush which has its own advantages compared to airbrushing.
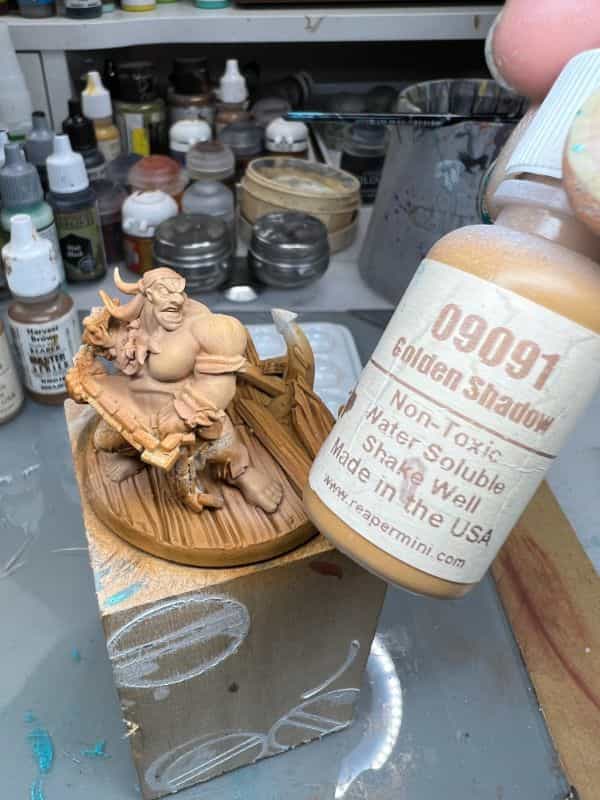
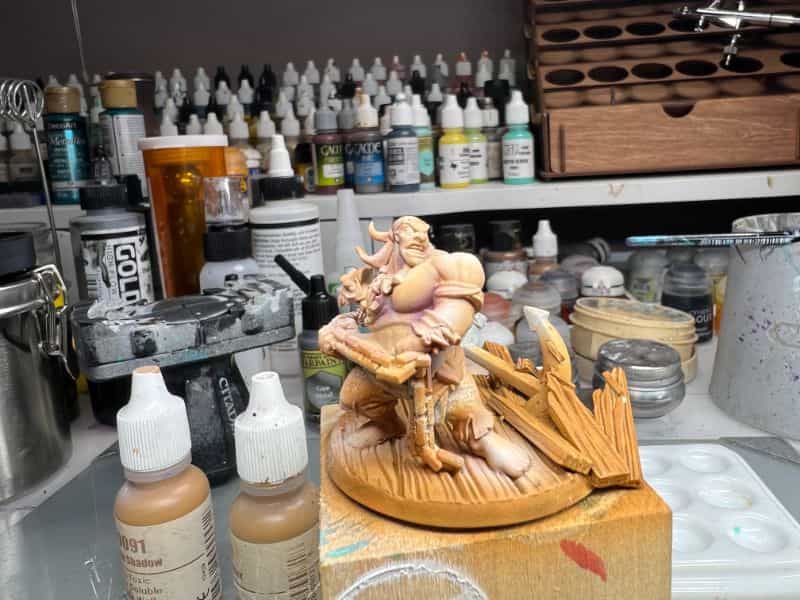
5. Add shadows (increase color and value contrast)
With most miniatures, I find that adding shadows after highlights helps tie things together. When choosing what colors to shade a model’s shadow areas, I recommend avoiding blacks or other neutral colors, e.g., gray or desaturated tones.
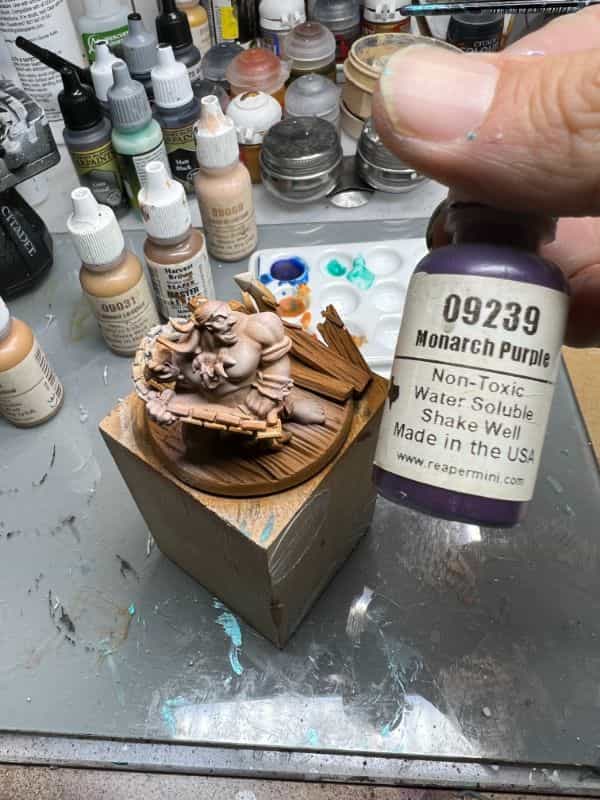
Remember, what I said about the importance of contrast to building volume on a miniature? You can add contrast through value (bright vs dark) and color (warm vs cool). For most of us, we know what we mean when we talk about shadows and highlights. When it comes to color contrast, its a bit different…
A quick word about “color contrast”:
In order to create color contrast in a miniature painting, you can use different color temperatures. Warmer colors tend to be more orange or yellow, while cooler colors are more blue or purple. You can use this knowledge to create different visual effects in your paint job.
Color contrast is important because it allows you to direct attention and focus in a painting or otherwise make certain parts of the model stand out, e.g., the 3D pop effect.
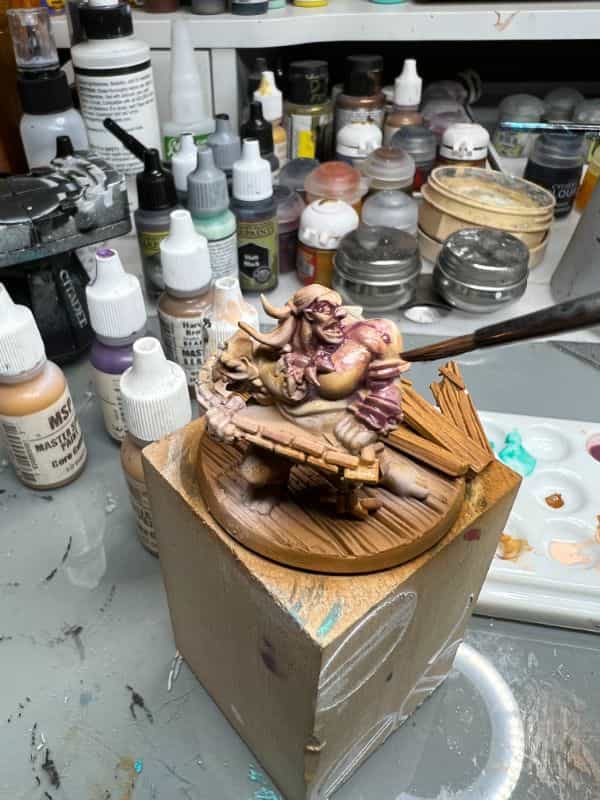
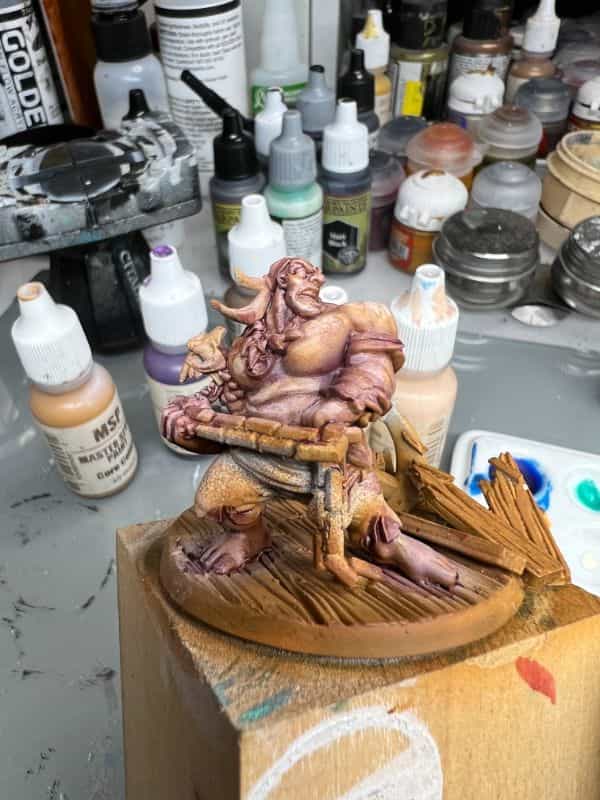
You can see in the photos above how I used the color purple to contrast with the warm, orange/beige tones of the mid-tone in the skin. It also pairs nicely with the yellowish hues of the highlight. Instead of using black, my application of purple helps bring interest to the volumes of the miniature’s musculature and form.
Remember, you don’t need an airbrush to apply color like this. A regular brush with other color blending techniques can do a great job, too.
6. Use a glaze to pull colors together
An acrylic glaze is a transparent or translucent paint that is usually used to blend colors on a miniature painting. It can also be used to add depth and richness to a miniature painting. You can buy a premixed glaze solutions, or make your own using a mixture of thinning medium and ink or regular paint.
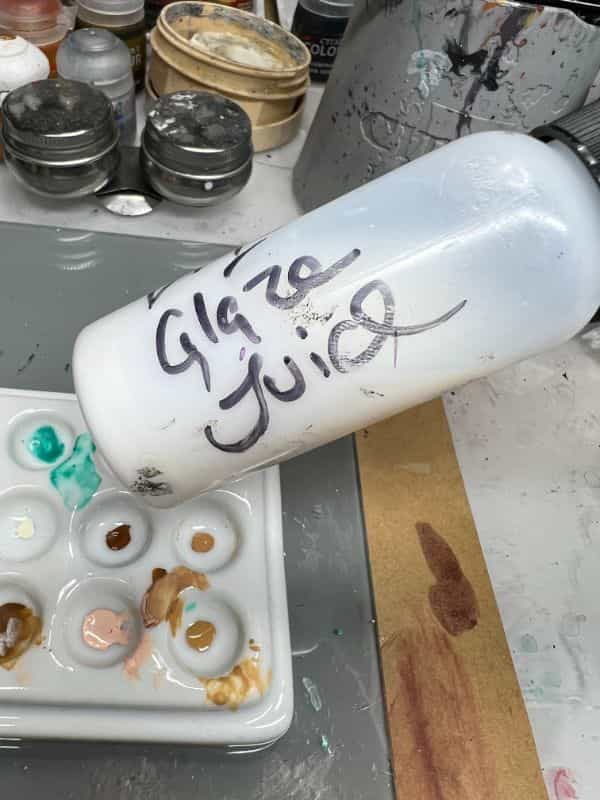
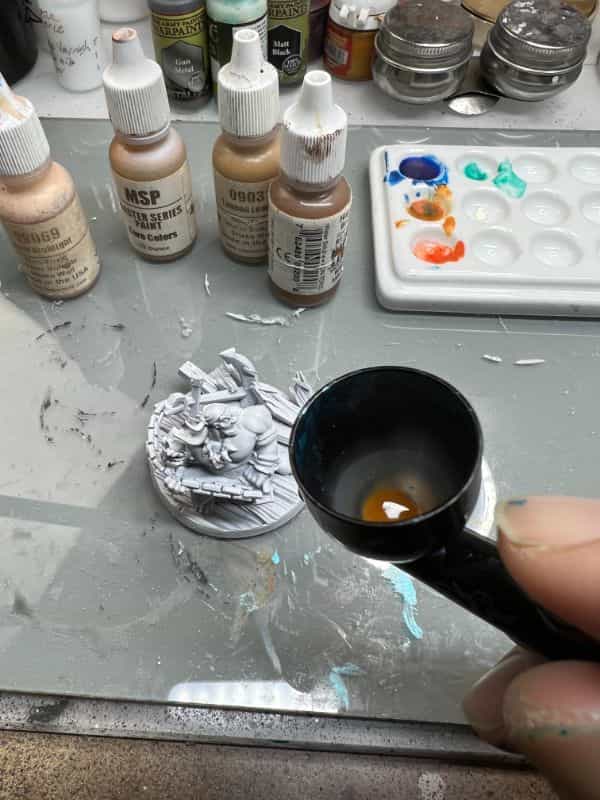
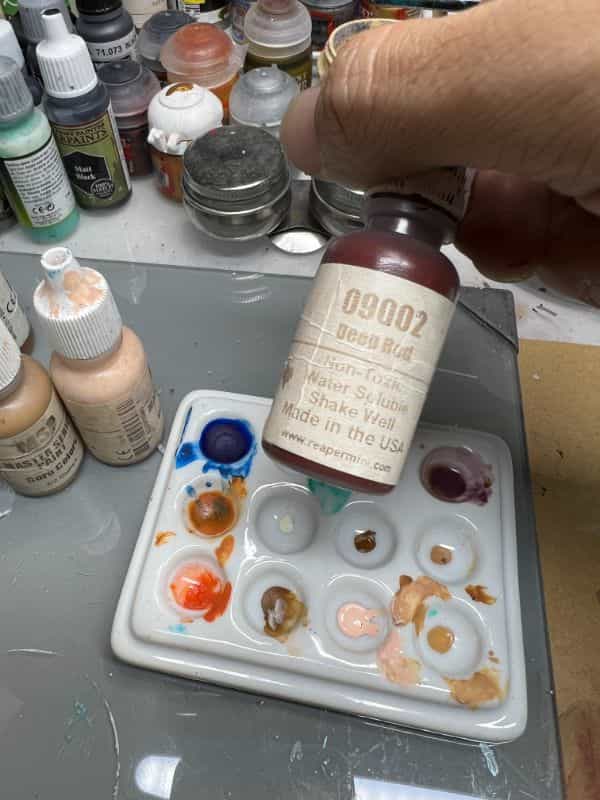
For almost all my miniature projects that involve a glaze, I like using a mixture of my preferred “glaze juice” and regular acrylic paint (e.g., Reaper Master Series Paints). My Glaze Juice is a cocktail of 2 drops matte varnish, 1 drop flow improver, and 10 parts water.

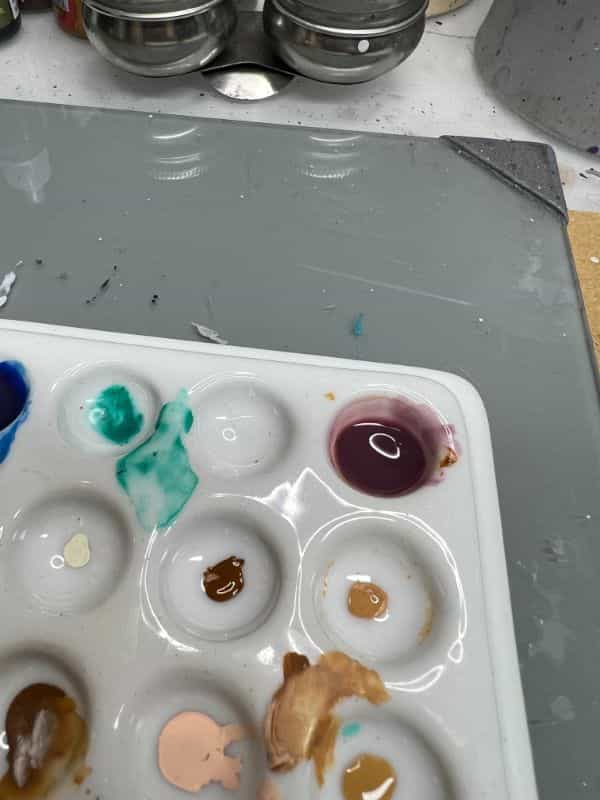
I add a drop of glaze juice to a drop of my favorite hobby acrylic paint to make a glaze. I’ll add a bit of water if I need to thin it down further to create the transparency I need. There isn’t a true formula for this; I tend to experiment as I go, testing the glaze mixture on the side of my palette before using it on the miniature.
By the way, I’m using Reaper Master Paints. The reason I like these paints for painting 3D prints, in particular, is because Reaper brand paints dry very matte. With a matte finish, they are non-reflective which helps with keeping overall contrast high when you are painting–It’s easier for you to see high and low values when your desk lamp isn’t reflecting off your model. But, more importantly, Reaper brand paints blend really well I think because of how the matte texture makes color seem to absorb one another.
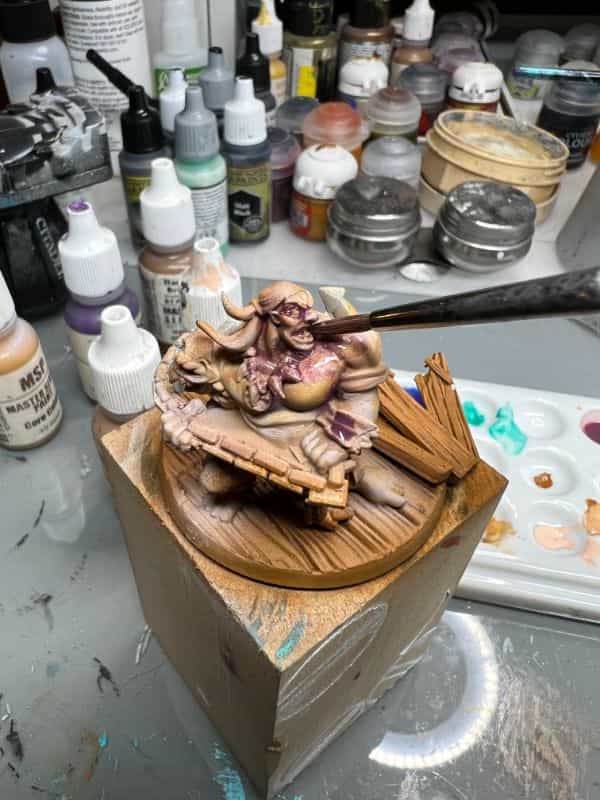
To apply the glaze, I just “slosh” it on with a big soft brush. Some may call this a “wash”, which is slightly different than how I’m using it. The key here is to make sure that you keep the layer of glaze thin on every surface you want to keep the underlying color “true”. That is, be sure you apply a heavy coat of glaze, but not so much that you change the color of the entire surface you’re painting. A glaze should “tint” the underlying color without overwhelming your model and making it too dark. See photos for what I mean.
Make sure you allow your glazing (tinting) color is completely dry before moving to further steps. If you’re trying to speed up the process, you can use a hair dryer to make color dry faster.
Remember, it’s okay if your first few layers are splotchy and uneven. You will be painting over these earlier layers to bring your highlights back in later steps.
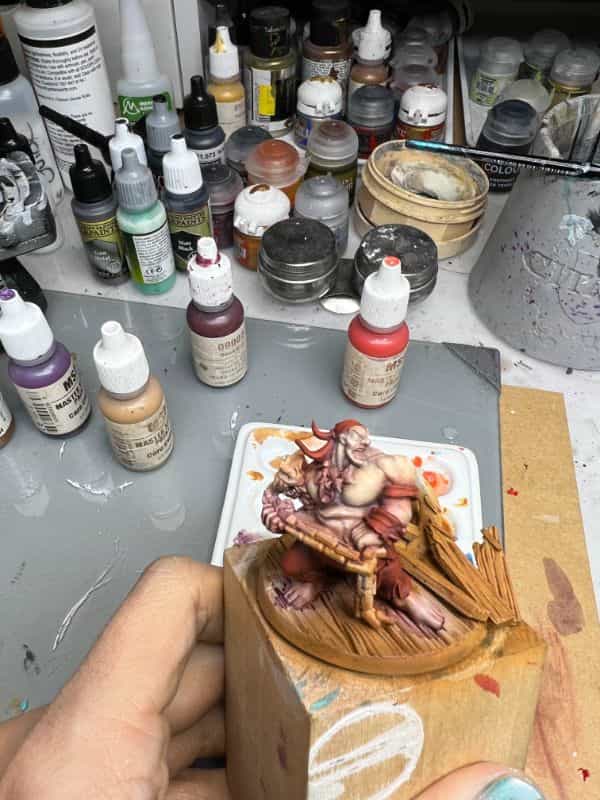
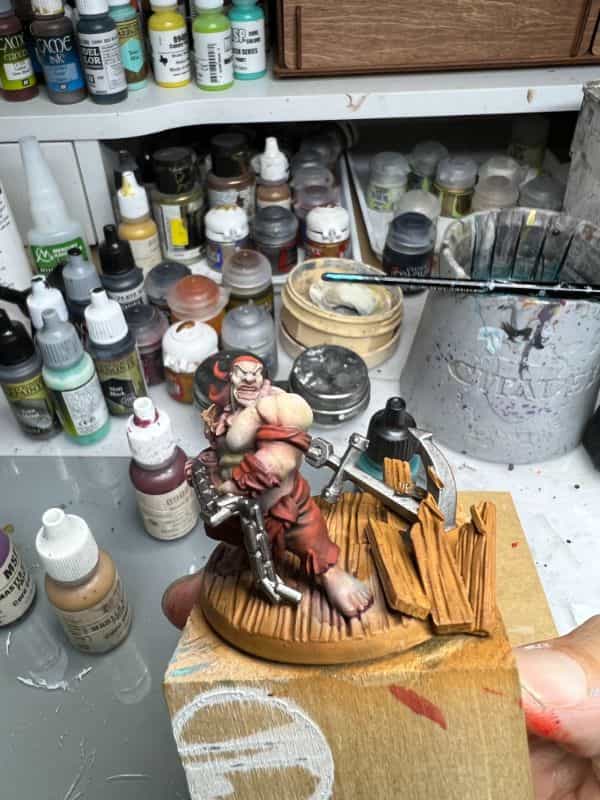
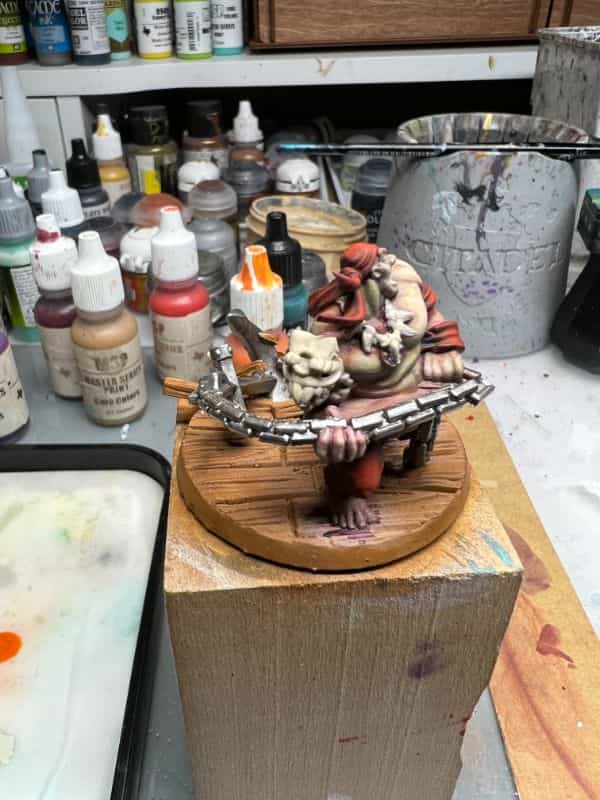
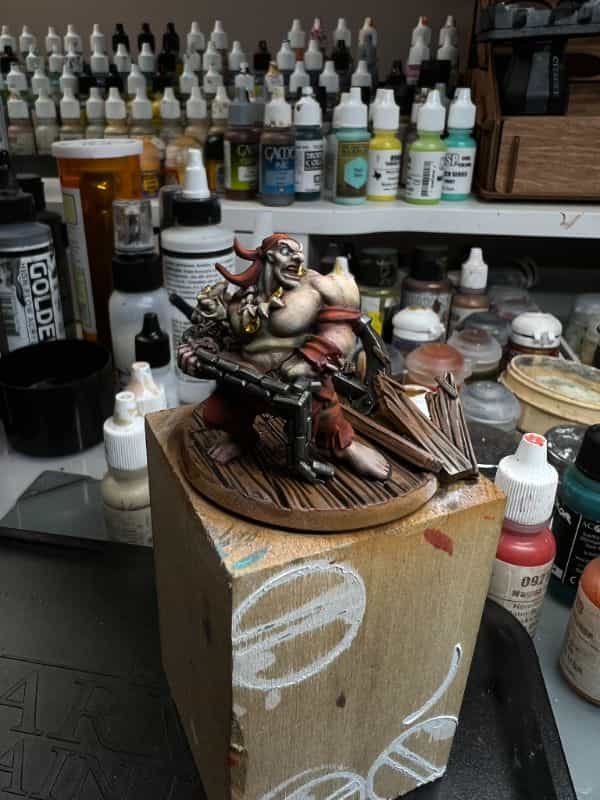
7. Paint the base colors of the other parts of the model
When you’re finished glazing the larger surfaces, I tend to paint in the all the other parts of the model. This includes clothing details, armor, and other smaller surfaces. This is a fun step, as it starts to “clean up” the edges of your previous work, which may have splashed over into other parts of the miniature.
Here I show you where I start applying paint on clothing pieces, e.g., the cap, the leggings, and other bits.
You don’t need to be precise with all of these steps. The whole philosophy I have with painting miniatures is to try and keep your process simple and consistent. For example, on every part of the model, I use the same technique and workflow approach (e.g., base colors, layer up, shade and glaze, highlight).
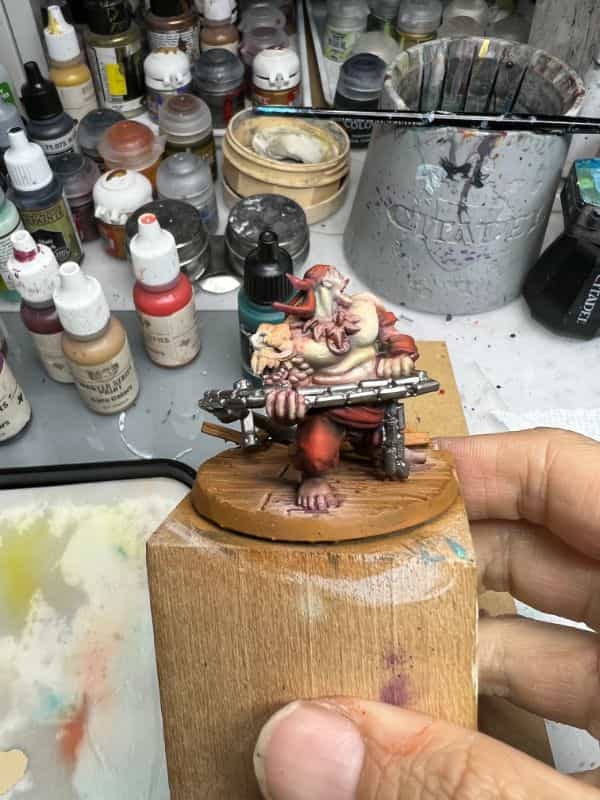
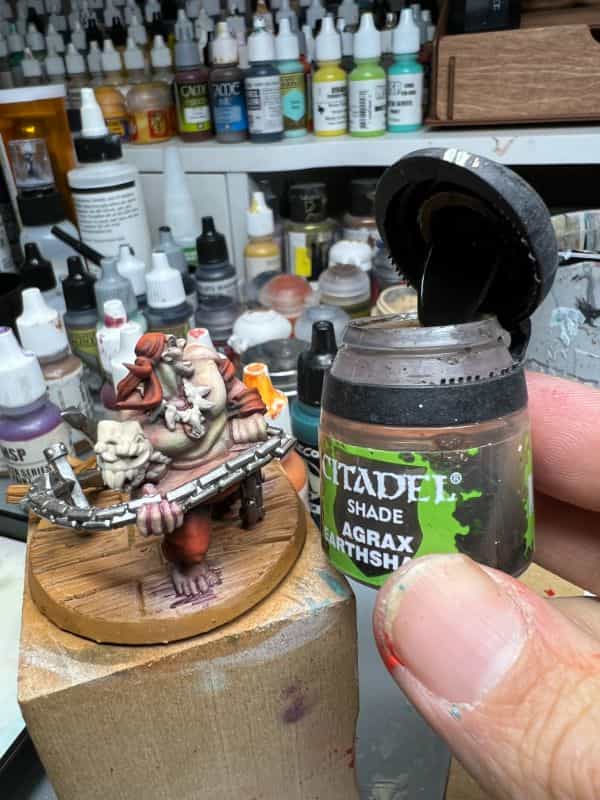
After basing the other parts of the model, I may wash the surface with a darkening shade. In some cases, I may use a DIY wash (using a similar formula as the glaze, seen above) or use a pre-made shade like those from Citadel, e.g., Agrax Earthshade.
After applying a shade, I’ll paint the mid-tone (the same base color) back on the model to bring the color back–A shade often will over-darken a model’s surface. Painting the same base color back on top the raised surfaces pull the color back to “normal”.
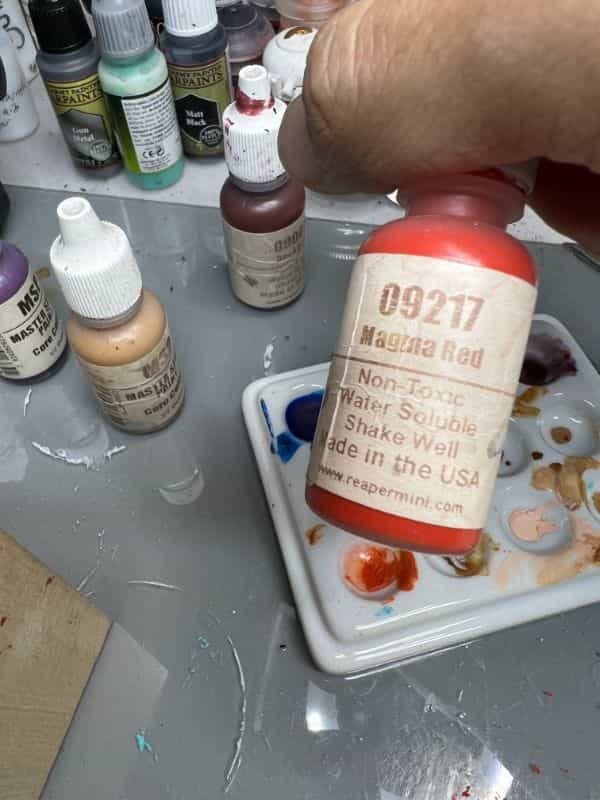
Use a highlight color to increase the contrast on these other parts of the model. Here, I use an orange color to highlight the burgundy, deep red color of the leggings, cap, and arm bands.

I only paint the highest, raised surfaces of these areas of the miniature. The idea is to find the areas where light hits first, and make these areas brighter.
When you think you’re got enough contrast on your model, I recommend increasing your contrast a few notches higher than you’re comfortable. This extra contrast on your model will help keep it’s volumetric appearance when you’re displaying your model under “normal lighting” conditions. Your desk hobby painting lamp may be diffuse and bright, which helps see details and shadows/light on a model. But, under normal ambient lighting, your model’s contrast decreases.
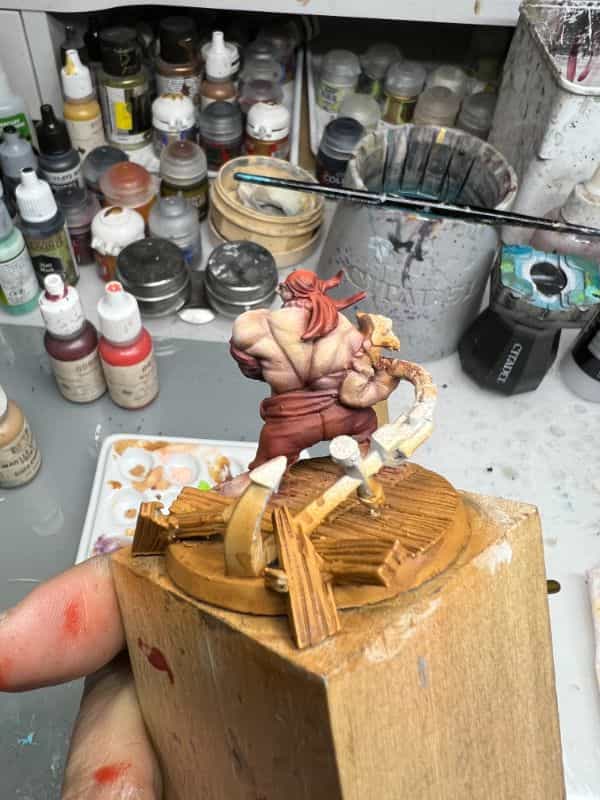
Pro Tip: Painting with higher-than-normal contrast as a principle will make your model’s “pop” no matter where you go with them.
8. Paint metallic surfaces
I recommend to most beginner painters to apply metallic paints last. There are three reasons for this:
- Metallics tend to require a few coats to create a smooth and even reflective surface.
- Metallic paints are harder to cover-up with other paints which makes clean up harder.
- Rinsing your brushes in your water cup contaminates the water with metallic flakes. These metal flake pigments would otherwise ruin your work of regular paint because they would get into your paintbrush bristles.
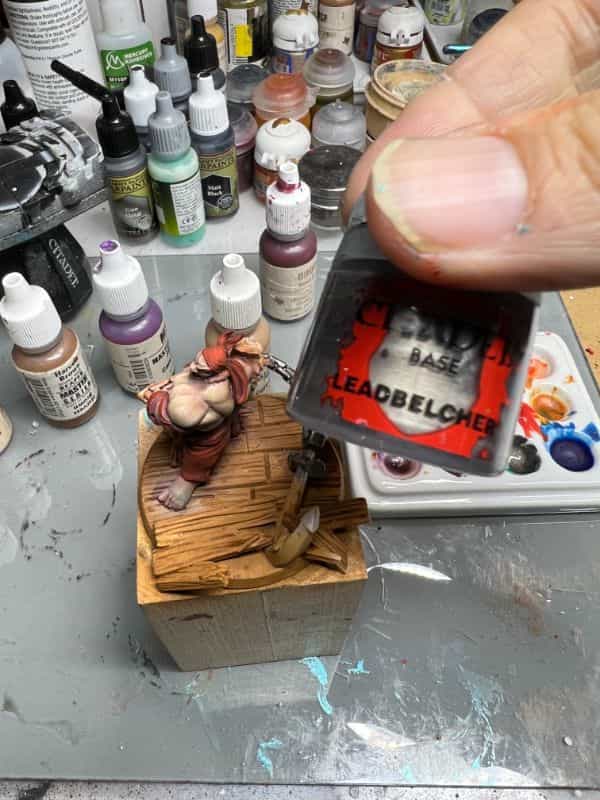
I wrote an article about my favorite metallic paints that every miniature painter should have in their collection. For most steel, neutral metal surfaces, I start with a base of Citadel Leadbelcher. It has amazing single coat coverage and looks really good when you add a few layers of shade over it.
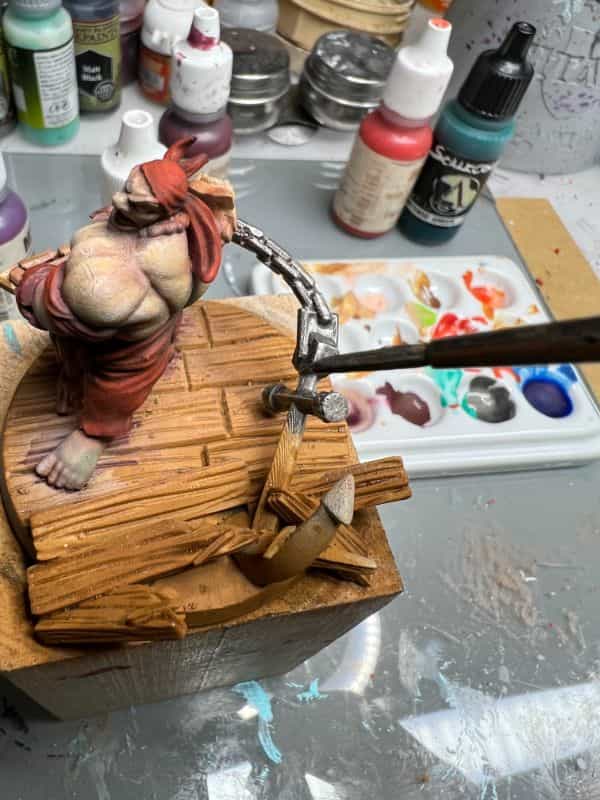
After applying a coat over the chain, the anchor, and a few other spots, I’m done with the steel metallic paint after about 5-10 minutes of work.
One tips that helps with metallic paints is to make sure you use a damp (not wet) brush so the paint flows easily off the bristles. The more consistent your paint thickness, the easier it is to keep the reflective effect of the paint even across the entire model.
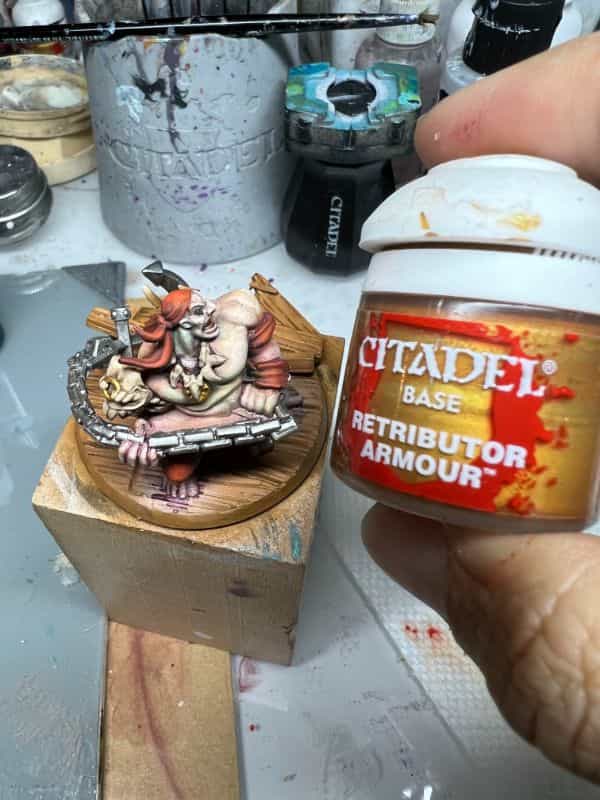
Paint other metallic areas the same way. Here, I also painted gold accents with my favorite gold metallic paint, Citadel Retributor Armour.
9. Paint bone and other details
This step is often interchangeable with the metallic painting step (shown in #8). For a full tutorial on how to easily paint bone, skull, or other organic bony materials, check out this bone painting article.
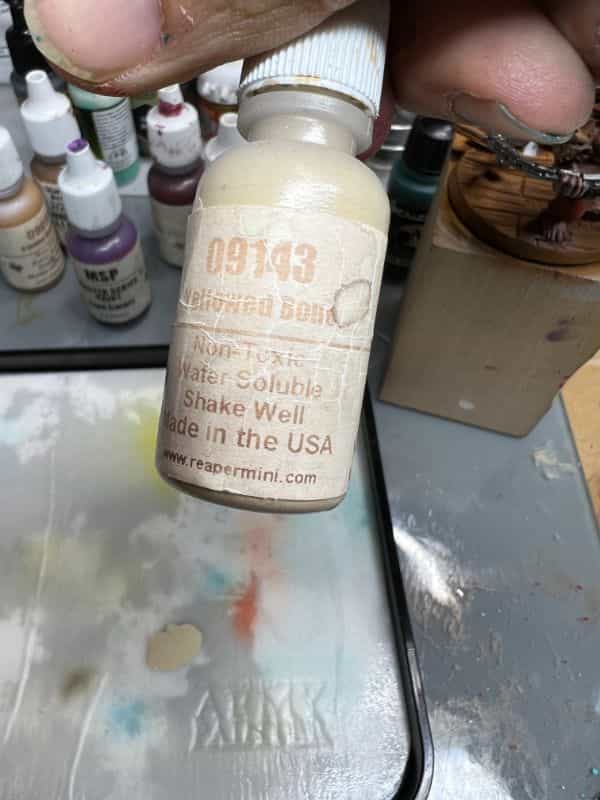
I apply 2-3 layers of a bone colored paint over these model areas. For best results, make sure the coating is even and smooth. This helps the overlying darkening shade (wash) settle properly.
Using a wet palette will let you thin your paints more consistently over the entire paint job. Though, there are different perspectives on what works best for palettes for miniature painting.
To finish the painted bone, use Agrax Earthshade or a similar brown wash to add shadow contrast to the surface. I don’t show in the photo above (see below), but the overall effect is most compelling when you’re almost done with the entire model. In other words, the smaller details on a painted miniature look better and better the closer you are to completing the entire project. Don’t get discouraged if things look messy. Keep going!
10. Shade the metallic surfaces
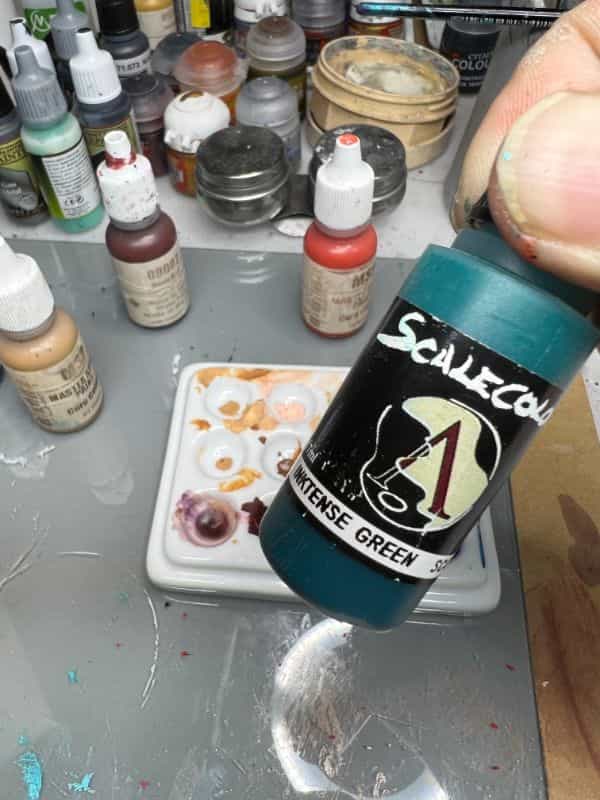
To finish the metallic painted surfaces, shade them with a suitable wash color. I tend to avoid using pure black or pure brown washes. I like mixing these together, in fact, to give metallics a more realistic appearance.
As a fancy alternative approach, I may also mix in a subtle hint of another color to add visual interest to the metallic painted areas. In this example, I add a dab of green ink to my darkening washes.
Apply the wash over the metallic surface and let it dry before deciding whether you should add more. For another article about how to paint metallics more realistically on 3D printed surfaces, you can see this metallic painting tutorial.
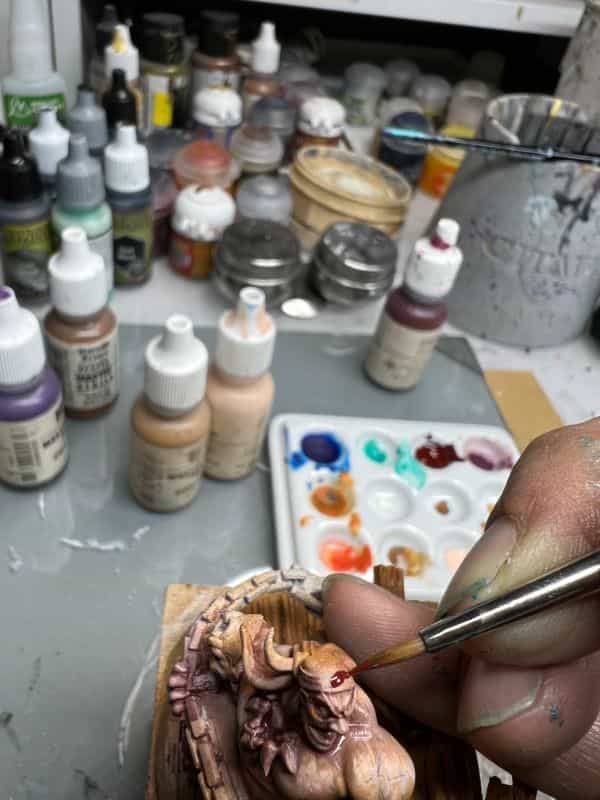
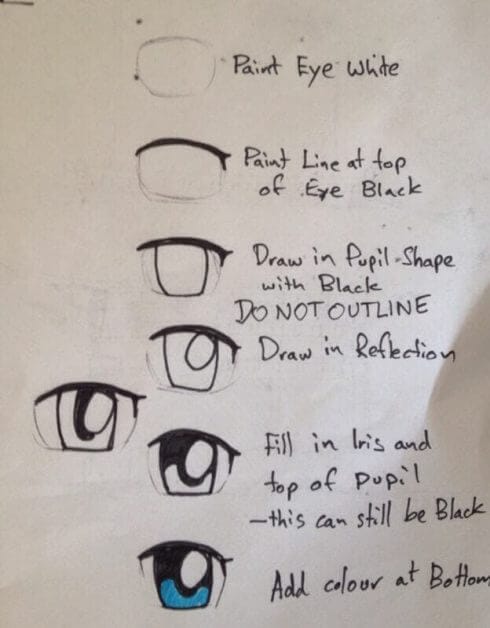
11. Paint the eyes
I always paint my miniature’s eyes last. The eyes are the windows to the soul and I don’t open the windows until I feel the model is ready to come alive 🧟♂️👀.

There are many ways to paint a model’s eyes. The way I paint a miniature’s eyes is to first paint the entire eye socket with a dark color (but not black). Then, I’ll paint the inner area a pale white color (not pure white). This forms the “canvas” I use to paint the pupil and iris, e.g., the circular dot in the middle of the eye.
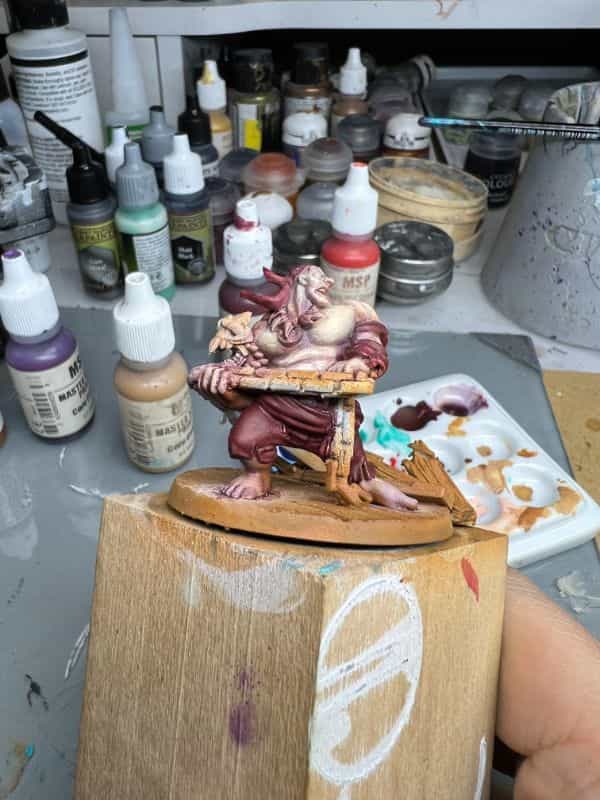
You can see in the photos how the eyes look after I’m done.
For a good step-by-step tutorial about how to paint a miniature’s eyes, follow this eye painting tutorial. I basically followed those steps with a few modifications to make it easier for the way I hold my paint brush–I’m not so steady with my hands.
If I had to sum up how I think of miniature eye painting, it’s more or less making a cartoon outline using a dark color. Then, I slowly fill in the details with an off-white color and other paints.
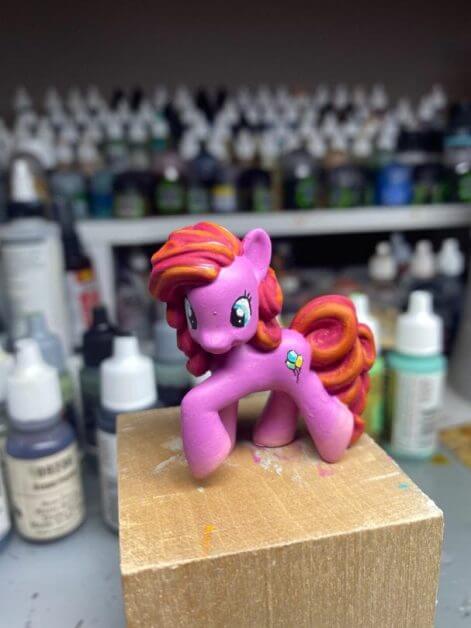
You can see another example of how I painted eyes using this method in another tutorial I wrote where I repainted a “My Little Pony” toy. Again, it takes a bit of practice, but these are the ways I paint eyes on my miniatures.
12. Finish the base of the model
For this model, I simply painted the base using brown and washed it with a Citadel shade (Agrax Earthshade). To complete the look, I paint the rim of the base a flat black using Army Painter black paint or an ink.
13. Varnish seal your model and take photographs!
I will always varnish my model using a matte sealer, like Testors Dullcote (see my full review and guide using Testors Dullcote). A good varnish protects a model from the environment and removes harsh ambient light reflections.
Photographing miniatures can be challenging, but I’ve written a few photography tutorials that will help you get better images of your hard work.
Conclusion
Everyone paints miniatures with a different method and workflow. For 3D printed miniatures, the steps are essentially the same as you would use for any other paint job. In this post, I showed you how I painted this 3D printed miniature from A-to-Z. The model is “Boatswain Bill” from Moonlight Minis (3D sculptor/artist: Christine Van Patten).
We began by priming the figure with an undercoat of pale primer to help us see the overall contrast and prepare the surface for paint. Once the primer was dry, we then painted the flesh tones using several layers of light and dark colors. A few glaze and wash techniques helped us achieve the color tinting and increased contrast we wanted for the model. After the flesh tones were complete, we moved on to painting the clothes, bone, and metal details. I also briefly showed you the basic way to paint eyes. Finally, we sealed everything in with a coat of matte varnish to protect our work.
What do you think? Was this walkthrough for painting a 3D printed miniature helpful? Let us know in the comments below!


Tangible Day on YouTube (Miniatures and More!)
