3D printing is now commonplace. If you do a search online, you’ll find a lot of painted 3D printed miniatures. As a miniature hobbyist, you probably already know about the endless possibilities of 3D printing. I’ve fully embraced 3D printing in the miniature and modeling hobby. But, there’s still a lot to learn! If you’re looking for miniatures for your Dungeons and Dragons (DnD) games and campaigns, then 3D printing may be a great way to expand your collection. D&D, Pathfinder and other roleplaying games are best played when everyone can immerse themselves in the story. 3D printing broadens the possibilities for showing what is happening in real time as a campaign progresses.
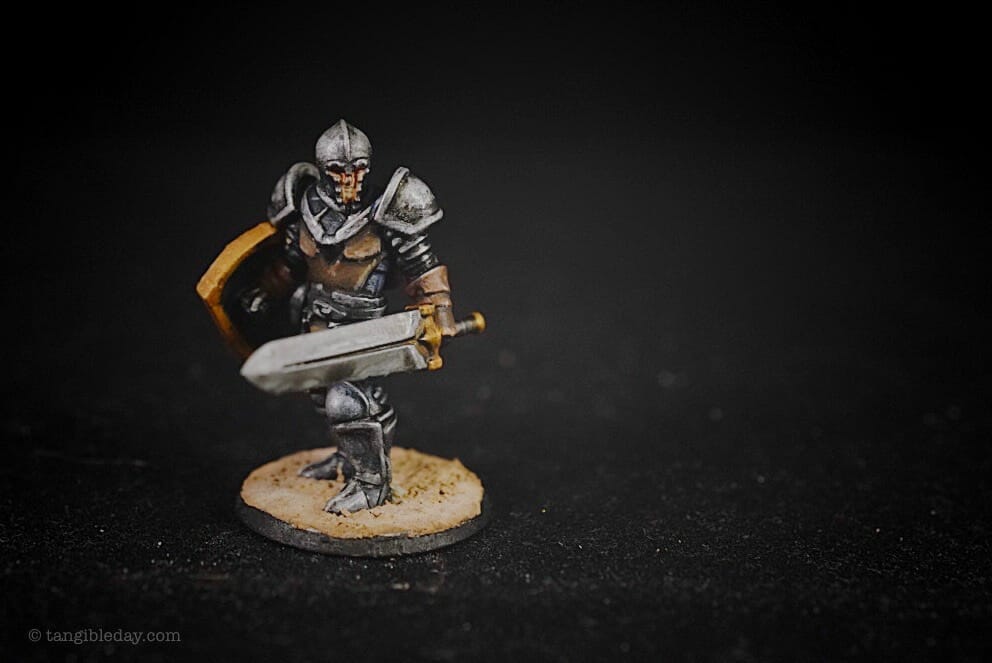
In this article, as an example of how far we’ve come, I show you how I painted this 3D printed Heroforge miniature.
There are unique challenges to painting 3D prints, but here I am able to paint this model to a satisfying tabletop quality standard fairly quickly. Suffice it to say, 3D printed Heroforge miniatures are some of the best Dungeon and Dragon miniatures you can find. Either you 3D print them yourselves, or you can buy them pre-printed. This 3D printed model was also shown in another article.


1. Prepare the Model
As with any miniature, the first and most important step is to prepare the model for paint.
For Heroforge 3D printed miniatures, most the of the model clean-up work is done. In this case, the miniature was printed with their black premium plastic.

This is the highest quality material that is offered. In close-up photos, which you can see here, there are very small build lines.
Obviously, painting miniatures with advanced techniques like wet blending requires a smooth, even surface. Even these tiny lines can disrupt those techniques.

It doesn’t matter if you have good tools. If the surface of the model is poor, the paint won’t behave the way you need it to.
The best thing you can do for enjoyable painting of 3D printed miniatures is to make the surface as smooth and even as possible.
To do this, I took fine grit sandpaper (600 grit or higher) and sanded as much of the surface as I could.
Then, I took my favorite primer and sprayed 2 even coats over the entire model using an airbrush. I talk more about primers here.
2. Base Coat with Main Color
To start painting any model, I like to base coat most of the surface with the main color. This means painting with the color that will lake up most of the surface area of the miniature.
As I’m aiming for a tabletop quality paint job, my goal here is to get this paint applied as quickly as possible.
For this model, the armor plates are the main element. And, I knew from the start of the project that the armor would be a metallic material.
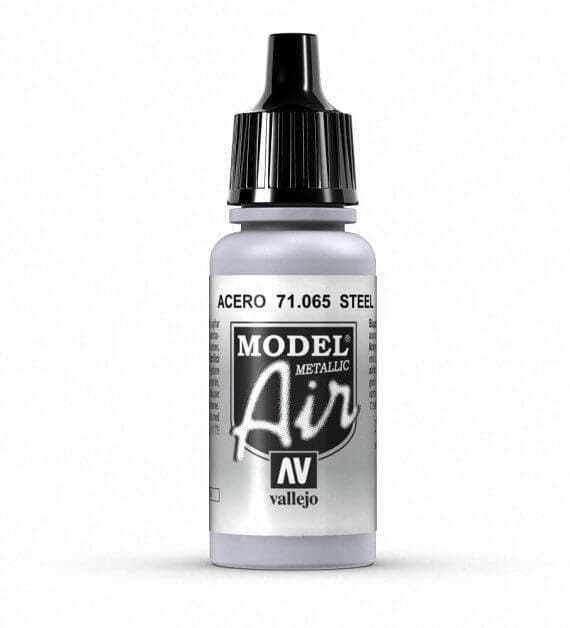
Because I wanted to paint this quick, I used the best metallic paint. In my opinion, this is the Vallejo Model Air metallic paint line.
Vallejo model air metallics are incredible. The paints have superior coverage when applied with either an airbrush or regular brush. This is probably due to the fact that their metal “pigments” are so fine and dense in the medium.
Vallejo model air metallic paints come in a variety of useful colors–from warm coppers to cool steels.

In this project, I airbrushed Vallejo metallic stainless steel. At first, it seems that this metal color was too bright.
But, in the next step, I will darken the main metallic color with layers of different washes to add contrast.
3. Make a Homemade Ink Wash
For many projects, this step is the most fun.
This is where I add contrast to the model. All the details that make a miniature unique start to really “pop”.
MORE: SPEED PAINTING ARTICLE: WHY CONTRAST IS IMPORTANT WHEN PAINTING MINIATURES
I know that Games Workshop makes washes for this kind of work. But, I wanted to go with a unique color tone so I made my own ink wash.

I wanted a dark, cool look for the main armor.
I would balance this color tone/temperature with a warmer color tone for the leather pieces and flesh of the face.

To start making the wash, I mixed equal parts flow-aid with acrylic glazing medium.
These two products make very dark, heavily pigmented inks flow across a model and increases the color’s transparency, respectively.
The glazing medium, in particular, is important because it:
- Slow down drying of the ink
- Creates a more transparent layer of color

A less necessary medium is a matte medium. The reason you might want to add a matte medium to a homemade wash is to reduce “shine” or gloss.
Most inks have a glossy finish that ruins contrast.
Importantly, a glossy finish reflects ambient light around a model that will ultimately reduce color saturation, distort shape and detail, and just look “cheap”.
Adding a matte medium to any homemade wash or paint will help keep those annoying reflections down.
The other way you can reduce glossy finish, of course, is to spray with a matte varnish sealant at the end of the project. I write a lot about that here.

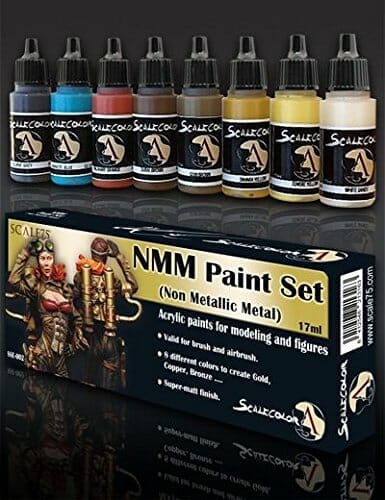
For inks, I went with a 1:1 mix of Inktense blue and black.
Inktense inks are part of the Scalecolor paint line.
These inks are incredible. They are super-duper pigment dense. As an example of what I mean, a single drop of this ink in maybe 10 parts water will still continue to provide nearly opaque coverage.

These inks make great washes and glazes, but require some know-how. Mixing them with other mediums like glaze medium or simply water changes how they behave, but they keep their color saturation (unlike regular paint)!
These attributes are counter-balanced by the resultant glossy finish.
That is why for this project, I add matte medium (mentioned above) when using these inks as a wash.
4. Apply Ink Wash
When I mix inks and other colors for glazing and washes, I use a ceramic water color palette.
These palettes are awesome.
And, in my opinion, these ceramic palettes are better than wet palettes for many miniature painting projects.

To apply washes, you don’t need expensive brushes. For most of my base coat and wash application, I love the Citadel Medium Base brush. It’s one of the most versatile brushes for miniature painters. I write about it here.

With the Citadel brush, I simply saturate the model with the homemade ink wash.
I tend to do this in 2-3 applications. I allow each wash application to dry before applying the next.
MORE: THREE BIG REASONS YOU NEED A HAIR DRYER FOR PAINTING MINIATURES
If you want to speed up this process, I highly recommend using a hairdryer. There a bunch of low-cost portable hairdryers that come in handy for painting miniatures.

As with any wash application, however, the resulting model does look a big messy.
But, that’s okay!
The wash application merely adding the dark tones into the recesses. What follows is both a clean-up and highlight process at the same time.
5. Paint Other Model Elements
This is the step where multiple things happen at the same time.
As you’ll see, it’s a simple approach of “seeing’ the parts of the model as different from each other.
Until now, everything is a single material, e.g., metal. Here, we start to pull out the shapes made of different things, e.g., leather, flesh.
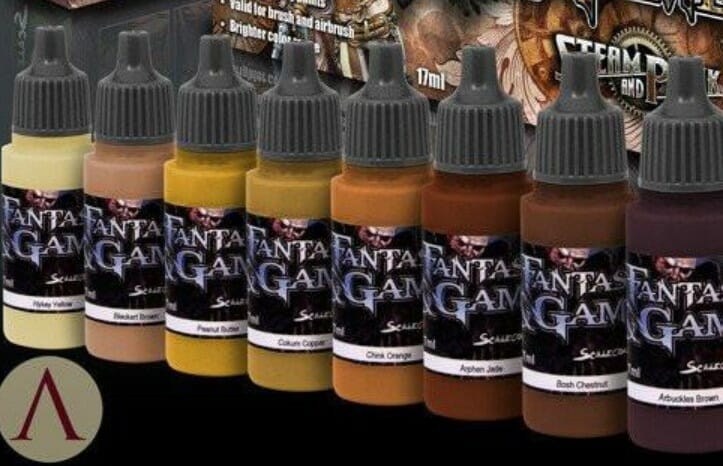
The colors I use are also from the Scale 75 color range. The high pigment density and easy-of-mixing with water to thin the paint is perfect for my style of painting.
I use these paints pretty much straight from the bottle for base coating. Then, for layering and highlights I thin the paint with a little water in my dry palette.
Because I’m aiming for a tabletop quality paint job, and getting the project done quickly, I rely on good, reliable paint.
For the leather/cloth bits on the front of the miniature, I simply use two browns: a dark and light brown. More specifically, I simply took brown colors from the Scale 75 Wood and Leather paint set.

This article doesn’t go into depth about how to base coat and layer. But, these two techniques are essentially what I do for the rest of the model. As you see in the pictures, I simply apply dark brown, then layer up to the lighter toned brown.
I’m not worried about smoothing out the transitions. I already assume that the model will be viewed at some normal distance.
Your brain will automatically blend areas of low contrast (dark brown to light brown) into a smoother surface than it actually is.
The high contrast areas–the metal armor–will remain distinctly different because of the difference in dark and light values.

I use the same idea for the shield, which is a dark red to a slightly brighter orange. The blending isn’t smooth. It’s merely layering the lighter color (orange) over the darker one (red).
I do my layering using a thinned paint (about 1:2 paint to water). For Scale 75 paints, this also lets me work a little longer.
Thinning your paints with water actually speeds up the drying process!
This is because water is more volatile than the acrylic binder in the paint. Volatility in this case is the propensity of a substance to change from one state to another, e.g., liquid to gas.
6. Finishing Touches

At the end of the project, I add a few touches to add further interest.
For this part, I felt a little gold metallic paint would help push the warm tones a bit further. Most of the model is cool-toned from the metallic armor and blue-black wash.
Here, I used used my favorite gold paint, followed by a simple Citadel Sepia wash. In my opinion, Retributor Armour gold metallic paint and Sepia Wash are an incredible combination. Together, they produce a gold-toned metallic that can match almost any other color scheme.
If you’re looking for a general gold color, Citadel Retributor Armour and Sepia wash are my go-to standard gold metallic.
For the flesh tones of the face on the model, I simply used a Scale 75 flesh tone (any brand paint line would do), followed by Citadel Riekland Fleshshade wash. I highlight back up using the same base flesh tone.
Then, it is finished.
7. Base and Varnish Sealant
My favorite basing material nowadays is sanded tile grout. It has fully replaced my use of Citadel Technical paints. Sanded tile grout has an adhesive built in that makes added a dirt-earth texture to any base super easy!
It also has some grit that makes it great for pulling up details using a dry brush technique.

For this model, I simply took some tile grout on an old brush and spread it across the bottom of the model.
You can see in these images here that it looks like beach sand. That is the natural color of the sanded tile grout (which comes in many, many different colors by the way!).
If I wanted to darken it, I would simply make a homemade brown-earthy colored ink wash like I described above and applied it to the dried grout.
For this piece, I liked how the natural tile grout looked, so I didn’t paint it.
For a tabletop quality miniature paint job, I was satisfied.
To protect the model, I sprayed 2-3 coats of an enamel-based matte varnish. The one I recommend it Testors Dullcote. I review this varnish and the best ways to use it in another article.
The best varnishes are matte spray varnishes. They evenly coat the model in a thin layer of sealant, and removes unwanted light reflections that can distort the way the model looks.
8. Photographing the Model (Optional)
Of course, photographing a miniature is optional!
Here’s the quick overview of how I photographed this model. As you saw above, the black background of the photographed 3D printed and painted model was produced in a light box.
The lightbox I use is super affordable. Under $40 USD, it not only includes the light box frame, but 4 different colored backdrops, and two fairly powerful halogen lamps.

It’s also portable!
I don’t really travel with mine, but the side-benefit of a portable sized light box, is that it doesn’t take up much space. And, if you need to, you can pack it up for storage.

When you setup a model in a light box, the ultimate thing you need to concern yourself with is how the subject is lit. How does the light fall on the model?
I’ve learned with experience that you generally want the light to be diffuse. That is, you want the light entering through the light box to come in broadly, from many different angles at the same time.
The purpose here is to reduce the “hard” presence of light to remove hot spots and harsh shadows (e.g., shadows with hard edges).
Varnishing your model properly with a matte finish helps with this immensely!
Once you’ve setup your model, you will need to be familiar with how your camera (or smart phone) works when it takes a photo.
Adjust your shutter speed, aperture, and ISO settings such that you maximize even light exposure over areas of your model without compromising image quality.
I won’t get into the granular aspects of photography as that could fill entire textbooks. Some websites are built around instructional photography!
Here’s one awesome resource that I have found helpful in the past when I was starting out in digital photography. It’s a book, but comprehensive and I continue to use it as a reference. Tony Northrup also has a YouTube channel.
You can also get the book at a huge discount with a Kindle Unlimited free 30-day trial (here).
If you’re looking for a crash course (TL:DR), here are three photographic tips to keep in-mind when photographing miniatures:
- Low ISO settings – Keep your ISO setting as low as possible. The closer your ISO to “100”, the less noise and grain you’ll have in your final image.
- Higher aperture settings – Try and keep your aperture (i.e., f-stop value) greater than “4”. This setting controls the depth-of-field of the image. In other words, more of the miniature will be in-focus with a greater f-stop number. The drawback, is less light will pass to through your lens to the camera’s sensor. To compensate, you’ll need to slow your shutter speed.
- Use a tripod – As mentioned in #2, you’ll need to slow your shutter speed to allow sufficient light through your lens. But, slowing your shutter speed will also introduce the risk of camera-shake. This will obviously blur your image. To control for this, try and use a tripod when taking photos of your miniatures. Low-cost tripods for smart phones and dedicated cameras are everywhere. Here’s what I use for everything nowadays.

Of course, you don’t need fancy equipment to take great photos of your miniatures. But, it does help just like using good tools for painting miniatures.
Final Word
3D printed miniatures are here to stay. As modelers and miniature hobbyists embrace the technology, the obvious next step is getting the models painted. For me, it is when color is added to a miniature that the piece comes alive.
Of course, not all of us have the time or motivation to paint meticulously to a very high standard. It takes skill and practice to paint miniatures well. Hopefully, this article has shown you how I paint a 3D printed model with very simple techniques.
The most important final professional tip I have is to keep the pressure off yourself. Paint for fun! Play with color and the tools you already have. Only time and pressure will make you a better painter — add both and see yourself fly.
Tangible Day on YouTube (Miniatures and More!)


Tangible Day on YouTube (Miniatures and More!)