
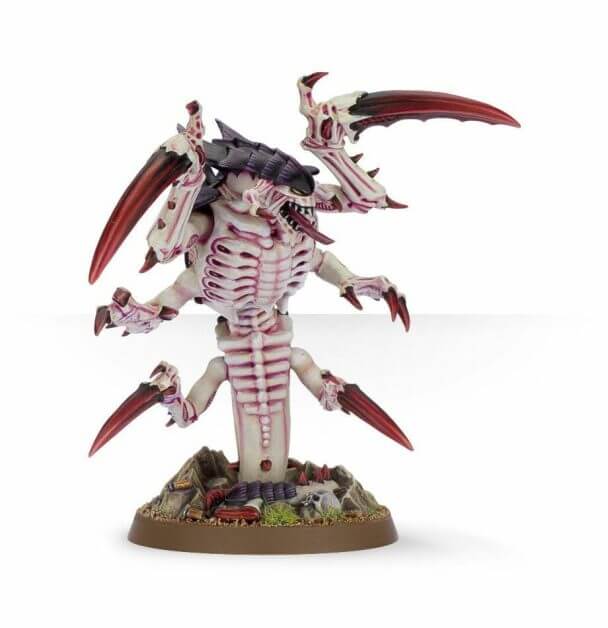
The goal of the 3D printing project was to make a proxy model for one of the 40k Tyranid models (e.g., the Ravener). In my opinion, the Games Workshop model is neat looking, but it doesn’t carry the respect of the more iconic Starcraft Hydralisk.
In this article, I review the 3D printing process of the Starcraft Hydralisk.
Check out how I painted this model here.
The Hydralisk 3D file is located on Gambody.com. For those that don’t know, the Hydralisk is an iconic unit from the Starcraft real-time strategy (RTS) video game (circa 1998).
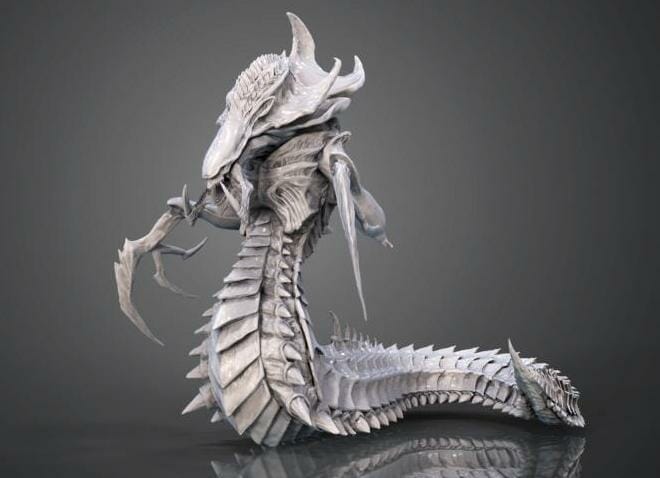
More specifically, the Hydralisk originates from the playable Zerg faction. According to the fluff, the Zerg are a swarm race of alien xenomorphs (with very close similarities in character and aesthetic to the xenomorphs in the movie Aliens directed by James Cameron). The Zerg are hyper-evolutionary organisms that overwhelm their prey/foes through sheer number and their organic ability to adapt to the changing battlefield.
RELATED: IS 3D PRINTING GAME MODELS PIRACY?
Some factions conquer by great technologies, and others by swarm tactics. Hence, the similarity with the game mechanics of the Tyranid faction of the Warhammer 40k Universe (Games Workshop).

The 3D printing process
3D printing is not as easy as printing with a regular printer for paper. The technology for 3D printing requires a bit of engineering to produce the iterative process of building up layers upon layers. 3D printing is essentially 2D printing done over the same areas again and again.
There are many factors that go into this process, likened to the building up of bricks for the wall of a house.
It is critical that bricks are laid out properly and neatly because small errors in alignment amplify themselves as the height of the structure increases.
A small change in angle or shift in spacing will destroy the aesthetic or integrity of the whole.
If you’ve ever tried to tile a floor in a room, you’ll know that even small changes in how a tile lines up with its neighbors matters when you want to get the entire room laid out with an even pattern.
The same goes for 3D printing.
The 3D printed object is only as good as the machine’s ability to generate perfect layers upon themselves. The bigger and more detailed the object, the more demands are placed on the 3D printer itself to not screw up.
The 3D file (e.g., STL or OBJ)
The 3D file is the blueprint the 3D printer uses to make the object. The format of 3D files are usually in STL or OBJ formats.
These files are usually created by a digital artist using programs, such as Z-brush (expensive), Autodesk Fusion 360 (free for non-profit use), or Blender (total open-source, free). There are many 3D modeling programs that can be used to create STL or OBJ files for 3D printing.
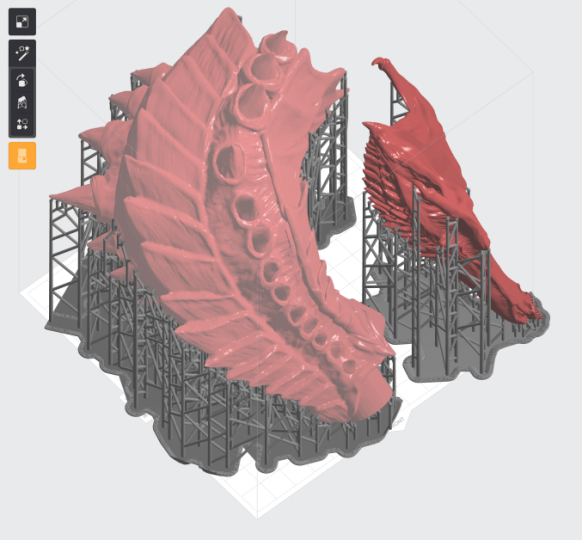
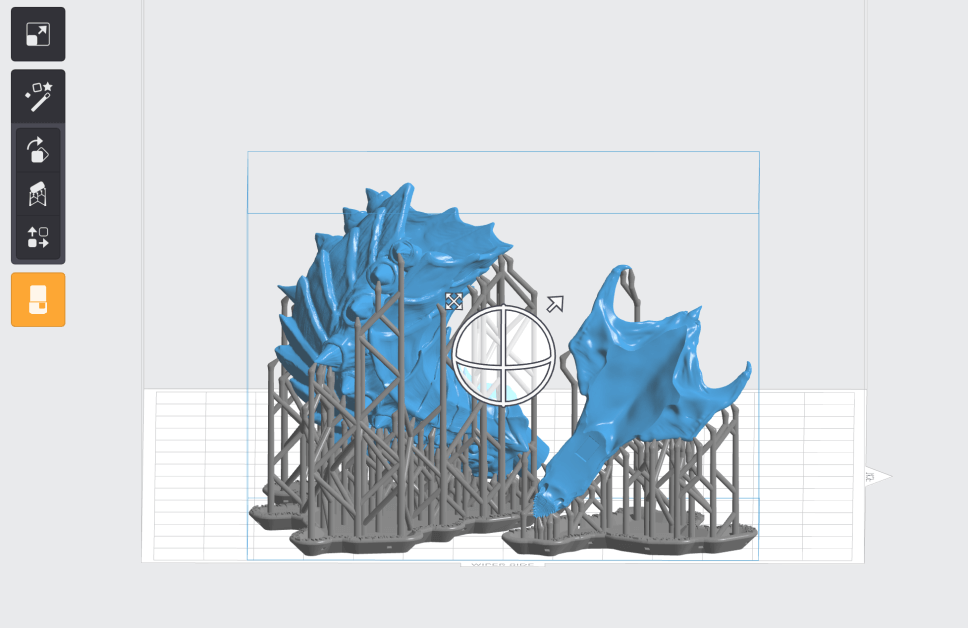
Once created, the 3D file needs to be “sliced” by another piece of software. This slicing takes the 3D object and breaks it down into smaller pieces/layers.
Also known as deconstruction, programs like Cura (open source, created by the makers of the Ultimaker printer) or Simplify3D (paid software with much higher functionality), take these 3D files and make them ready for the 3D printer to make.
Need help using Simplify3D? Check out this great guide book for using this power 3D slicing software for working with 3D models and printers.
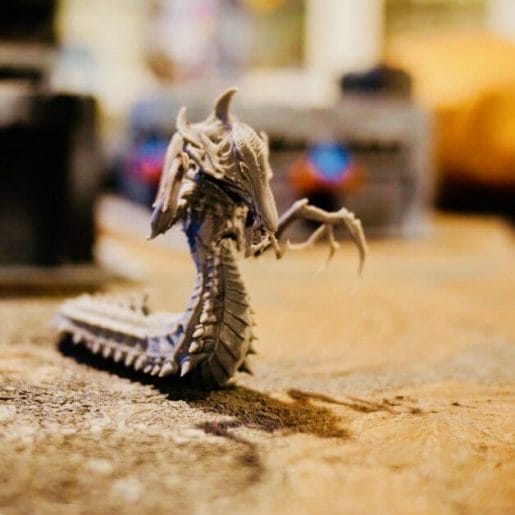
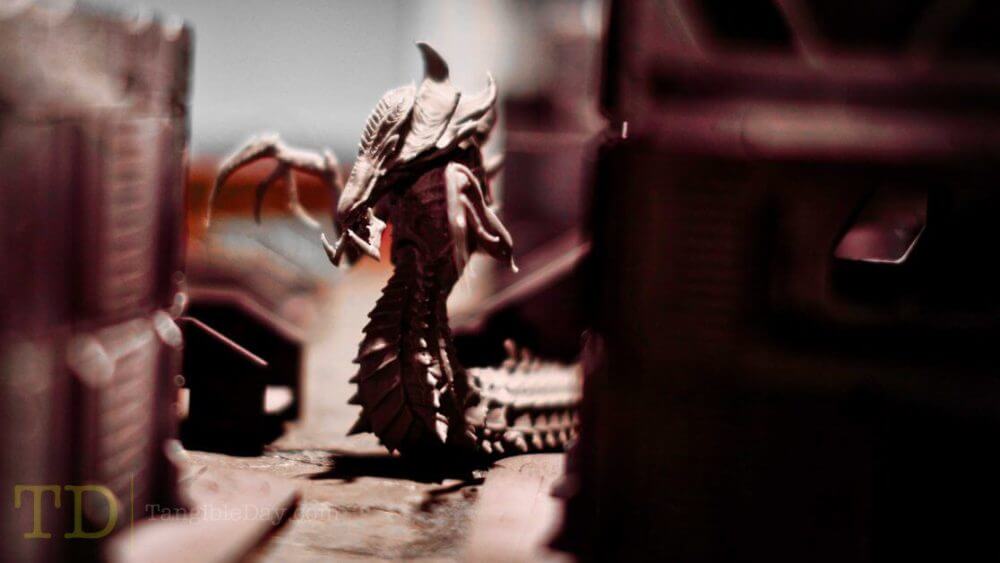
The Hydralisk Print
The goal of the 3D printing project was to make a proxy model for one of the 40k Tryanid pieces (in particular, for the Ravener miniature).
In my opinion, it’s a neat looking model, but it doesn’t carry the respect of the much more iconic Starcraft Hydralisk. So, searching the internet, the Hydralisk 3D file was available for purchase (among other 3D files for video game models).
The concern whenever you find things off the internet to make with a 3D printer is how good the quality of the file is.
You’re especially wary when you have to drop cold cash on a digital product that may or may not yield what was promised.
But, given the good reviews on Facebook and other social media sites, I decided it was worth a shot. This, and the fact that this was a part of a commissioned project for a friend made it all the more important that I give this print a shot.
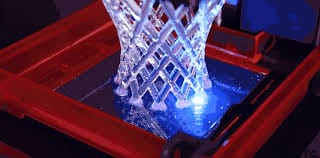
The 3D printer I experimented with is an SLA type printer made by FormLabs that uses liquid resin cured in very thin layers with a UV-emitting laser.
RELATED: ANYCUBIC PHOTON RESIN 3D PRINTER REVIEW FOR PRINTING MINIATURES
The laser travels over the surface of the build platform and gradually builds up the object like an igloo upside down.
In my case, the hydralisk would be built upside down as the build plate is pulled out of the resin “pool”.
I won’t go into the chemistry of photo-polymerization, but it’s fairly old technology (more than a few decades old).
The technology that has emerged in recent years has made it more reliable (see these recent low-cost high-res printers), and the reduction cost per computing power (as it takes quite a lot of processor turnover to churn out and deconstruct/reconstruct those thousands of digital layers) has made the entire field more accessible to professionals and hobbyist.
My use of this machine has been mostly for learning and training purposes, so anything I’ve made has been essentially an experiment, including this Hydralisk model.
Software works with hardware.
The computer I used was an iMac. Not powerful, but not too shabby either. The PreForm software which is compatible with the Form2 printer drives the entire operation.
Using PreForm I performed a scaling operation using some measurements from Tyranid models as a reference (which I actually screwed up and used the wrong model initially).
But, you’ll see this worked out because the scale I used was the perfect balance between material usage and detail retention (e.g., scale vs detail, we can’t escape the everlasting dilemma of scale modelers).
My first print worked out and held onto all the details perfectly. I kind of expected a disaster, but given the reliability of the Form2 (which, apparently has a very low failure rate that I’m now convinced of, and is a testament to the engineering minds that went into machine) the torso print was a success.
I quickly re-sized the other parts and printed them all simultaneously.
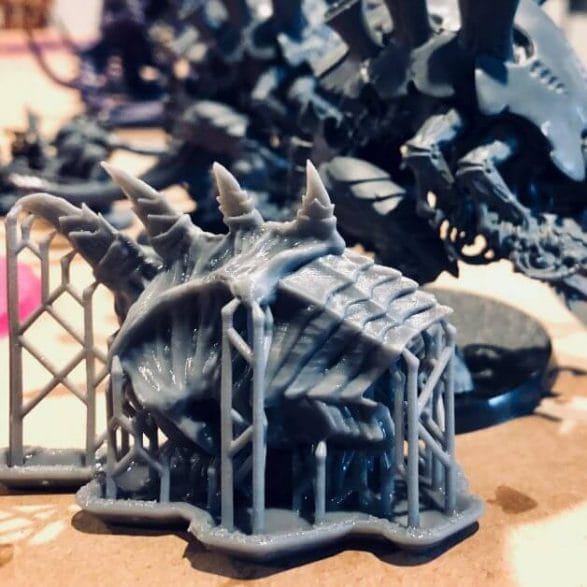
I pulled them out of the printer, scraping them off the build plate, washed the parts in 90% isopropyl alcohol (5 minute washes, twice at room temperature), and set them all outside in the bright sunlight to perform the final curing step.
The parts come out of the printer dripping in excess uncured liquid resin. The alcohol step washes that off, but an additional UV curing step is required to ensure the solidified resin retains its structure and detail.
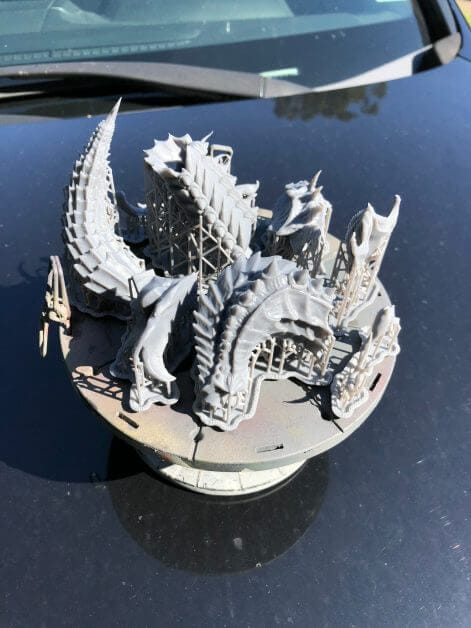
There are additional kits that can help with this final UV exposure step, but I just left the part outside on top of my car’s hood. I rotated the bits a few times every few minutes for about 30 minutes.
Did some chores around the house, what not, and returned to clip off the sprues/scaffolding material.

The assembly went well, and all the parts had nice fitting slots. Gambody.com sold me a great 3D file with an excellent design for 3D printing and assembly (I personally don’t enjoy assembly).
And, of course, I messed up the scaling and the Hydralisk was much larger than I expected. But, happy accidents indeed, the model is perfectly scaled with the Trygon Tyranid model.
Gratefully, this is okay as I’ve learned a lot and I’m now planning to work on scaling this down to the smaller size so it can be used as a proxy for The Red Terror.
There may be some trouble as some of the details in the face and mouth parts might be lost or become fragile, but I think it can be done even if I have to re-sculpt those bits myself with a bit of epoxy putty (this is the best stuff on Earth at $22 that lasts forever. Best price for sculpting putty is on Amazon) the analog way.
Painting it up
Painting this model will require some clean-up and sanding to remove some of the “flash”, but a bit of automotive primer and elbow grease (the gentle kind) will make this thing an awesome unique piece in a 40k game.
Check out how I painted this model here.
Are you interested in 3D printing minis? Did you find this article helpful? Leave me a comment below!

Tangible Day on YouTube (Miniatures and More!)
