Do you enjoy assembling miniatures? Many scale models arrive in boxed kits that require assembly. Miniatures are often plastic, resin, or metal. Each kind of material and model kit requires a different assembly approach to achieve the best results. Tabletop games such Warhammer 40k, Age of Sigmar, Infinity the Game, Guild Ball, and many others miniature games require some assembly. It’s part of the hobby, and part of the challenge.
In this article, I share 30 tips I picked up over the years from assembling tabletop models and miniatures. I hope you find these quick miniature assembly tips helpful as you start in the hobby, or face other daunting challenges like painting.
I’ve played many types of miniature games. Although Games Workshop models are the most popular kits in the tabletop gaming world, as a commissioned miniature painter, I’ve had my fair share of assembling miniatures from different companies.
RELATED: COMPLETE GLUE GUIDE FOR MINIATURES AND SCALE MODELS
Games Workshop produces the highest quality plastic miniatures in my opinion. They are right up there with some of the other established manufacturer’s of scale models, such as Revell or Tamiya.

30 Tips for Assembling Miniatures and Models
1. Clean your models
Before you assemble a model kit, you should first consider cleaning the parts. Many companies use cast-molding techniques where molten hot material is poured into mold. When the material cools, it hardens into the final piece. Of course, to more easily remove the cast part, molds are often coated with a lubricant. This non-stick material helps the manufacturer remove the part from the mold, but that lubricant also hinders you from properly gluing or painting a model.

To clean a model, I often wash the pre-assembled pieces from a model kit using warm water and soap. I air-dry the part before I assemble the final project. To speed up the process of cleaning or to wash many parts at the same time, I’ll put the sub-assemblies in an ultrasonic bath filled with water and a tiny bit of soap to break down any oily coatings on the pieces.

2. Sharp blades are safer
Any experienced model maker will tell you that a sharp blade will be safer to use. If you’re using a hobby knife, you’ll want to make sure you’re working with a very sharp edge. A sharper knife requires less force to do its job. When you use a blunt edged knife, you’ll naturally want to apply more pressure to make a cut.
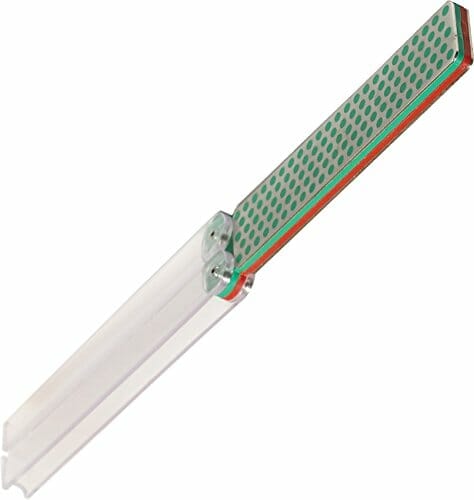
This is dangerous, because you’re increasing the risk of the blade slipping across the surface. It could slip into your exposed hand (ouch), or into another part of your model and damage it. Keep your blades sharp. You can either do this by replacing an old blade (in most hobby knives), or using a diamond sharpener.

3. Hold tools closer to the tip for more control
This is a principle that I share for painting miniatures as well as for fine-motor control of other tools. The closer your hand’s grip is to the working tip of your tool, the more fine control you’ll have. Of course, the disadvantage of doing this is that you do lose some leveraging power (e.g., your movement “stroke” will be shorter and will naturally have less pressure).
For applying small dollops of glue on a small surface, for example, if you grip closer to the nozzle you’ll gain better control of your application. When you are scrapping a small mold-line or removing flash over a delicate surface, a forward grip will be advantageous.
4. Move your grip up the tool handle for more power
Gain leverage on your work. Hold your knife or other tool with a grip higher up on the handle. This is useful for removing large chunks of resin from big sub-assemblies. For example, Forgeworld models sometimes have large pieces of flash (e.g., centimeters thick) that need removal; in which case, I start with larger cutting strokes away from myself.
Sure, you can use power tools for jobs like these, but they have their drawbacks, too. Another example is in wood carving or whittling. In carving down pieces of wood for model basing material (which I’ve done here), I will also use a leveraged grip to remove large pieces of material.
5. Small is fast
You can often get more done by taking a lot of tiny steps quickly; rather than fewer big steps slowly. In the cycling world, this might be called “cadence“. Finding the right cadence for your work is the key in improving efficiency. For assembling models, this could mean starting with the easy small sub-assemblies first, before going to the larger more challenging parts.
When you’re shaping resin or removing flash from poorly molded plastic or metal parts, you can go a lot faster using small “bites” with your cutting/sculpting tool. Additionally, by going in small steps, you reduce the risk of making large mistakes. Moving systematically in short, small bursts, is my standard-operating-procedure when working on complicated miniature or model assemblies.

6. Try to avoid power tools
Power tools are awesome. I have a Dremel that I use frequently for larger projects and household repair. But, when it comes to smaller projects, e.g., miniatures that aren’t vehicles or terrain pieces, a power tool can become counter-productive.
This is especially true for sanders, drills, and other routine activities required for assembling models, e.g., cleaning up surfaces, removing flash or mold-lines. Power tools are brute force machines (e.g., not all of them; check out this ultrasonic cutter or micro-sander).
Unless you’re using specialized power tools designed particularly for miniature and model work, conventional power tools can actually work against you by making a mess, damaging parts beyond repair (e.g., just a small slip is all it takes), and require quite a bit of post-assembly cleanup and maintenance to operate with best results.

7. Consider wearing a respirator
I’m a bit skeptical when it comes to how dangerous dust from sanded plastic, resin, and metal parts is. Then, again I don’t do a lot of sanding with power tools. But, I do agree it is “better to be safe than sorry”. In this case, you should wear a filtered respirator to protect your lungs and airways from foreign contaminants. For those spraying aerosols or airbrushing, you could also consider a hobby spray booth.
Even if the lethality and toxicity of sanded resin or plastic is minimal or non-existent, the dust can exacerbate pre-existing problems such as asthma or allergies. In other words, wear a respirator for a more comfortable and pleasant hobby experience when you’re assembling models and sanding them (either with manual sand paper or power tools).

8. Reshape warped resin and plastic parts with proper heat
The glass transition temperature of resin and plastic is about 70-90C and 120-200C, respectively. For reference, in the Northeast United States, the interior of a car parked outside on a warm Sunny day can easily reach 100-150C. Don’t leave your models in your car if you want them to stay in-shape. Of course, if you’re trying to re-shape bent or warped pieces of resin or plastic, you can use heat to your advantage.
For resin, you can simply use a bowl of hot water (>70C or close to boiling if you want to work quickly). Dip the resin part into the hot water, and keep it there for about 30-60 seconds. You’ll have to play around with the proper temperature and time to get this work well for your application. But, if all goes well, you should have enough pliability to reshape the resin part. Dip the resin part into cold water to re-solidify the part again.

For plastic, you’ll need a lot more heat. For thin parts that I want to reshape or bend, I often get away with using a hairdryer applied on the highest setting. For more seriously plastic reshaping, you’ll have to find a heat source that is hot and diffuse. That means using a low, open flame (e.g., a stovetop). Boiling water won’t work because it’ll only reach 100C (depending on your elevation from sea level…but this is another scientific matter).
I know some people who use a heat-gun. Just be careful because plastic material holds onto heat. In other words, heat accumulates and there is a small window of opportunity where if you miss and go too far, the entire part irreparably melts.
9. Use sculpting epoxy to fix miscast metal parts
I love working with sculpting material. I’m not a sculptor, but I enjoy the “possibilities”. Unlike resin or plastic material, which you can bend/flex/cut, metal is often much harder to shape. When you receive a pewter metal parts, like those from Privateer Press (Warmachine-Hordes) or Corvus Belli (Infinity the Game), and they have “issues”, you’re kind of stuck. You can’t bend them, e.g., they’ll crack if you apply too much force, and you can’t safely apply enough heat to specific parts to flex them. In this case, I either contact the modeling company and ask for a replacement, or I re-sculpt the part using epoxy putty.
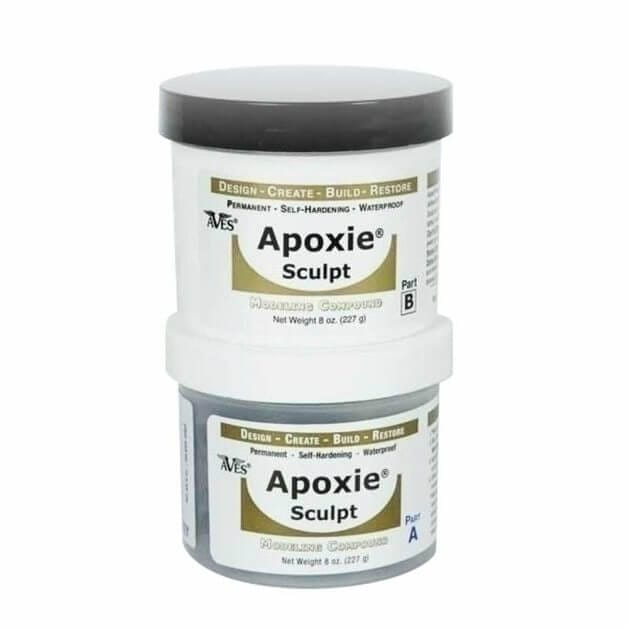
I love Apoxie Sculpt. You mix the two parts together in a 1:1 ratio and work it like play-dough. Because it is water-based/soluble, you can use a dampened sculpting tool or your finger to shape and smooth it. You have a 1-hour working time and fully cured, hardened part surface in 24 hours.
The putty holds detail well, and maintains its shape even as it dries, e.g., it won’t shrink or crack. The other great thing about Apoxie Sculpt is that you can sand and paint it as easily as any other material. There are other putties you can use, such as Milliput, or here for other gap filling options.
10. Clean metal parts with a high carbon blade
The pewter or white metal material in many miniature and model kits is often a softer material. This means that any hobby knife will have a fairly easy time working with it. However, if you want to maintain the lifespan of your essential miniature hobby tools, consider using high carbon blades or working edges on your sprue cutters/clippers.
Carbon steel blades and tools keep their sharpness longer and will maintain their utility over time without sharpening, e.g., they don’t blunt as easily as cheaper tools. Sure, you can use disposable blades in hobby knives, but if you’re working with metal miniatures, you’ll want to trash them more than once with every involved project.
Here’s a scraping and shaping tool that I use for working with white metal and resin miniature parts that has lasted me a very long time with minimal upkeep. The disadvantage of carbon blades and tools is that they are prone to rusting. Keep your high carbon steel tools dry!

11. “Mise en place”
“Mise en place” is a French culinary term for “everything in its place”. It is a philosophy for proper food preparation. However, in assembling kits, this approach is very useful for keeping organized. For example, when a cook is making a dish, it is proper for him/her to place all his ingredient in separate bowls, organized in such a way that they are added to the cooking pan in sequence. All the different parts have their place in the process of the final making of a dish. In the same way, consider clumping all the sub-assemblies of your model kit together in an organized fashion, “mise en place”.

For example, for a 40k Landraider assembly, after you’ve cleaned and prepped the parts; separate the pieces into their respective components: Put all chassis material that goes on the left side of the model in a different area on your hobby desk than the right side. Place all the lights in a small pile that is different from the pile with the tread parts.
When you do this before you start gluing things together, you’ll find your brain having an easier time keeping track of all the steps. You’ll know immediately where to find that subassembly you were looking for and the pieces you need to add to it. Applying “mise en place” in your assembly process will essentially create an assembly line, similar to what you see at the Subway sandwich shop. Fast, simple, and adaptable. Here are a few storage rack ideas to keep your paints and supplies organized.

12. Work on a cloth or other covered surface for easier clean up
The most disruptive element to efficient and pleasant assembly is keeping your surface clear of distraction. More than this, losing parts because they’ve disappeared off your working surface is a huge time-suck. My suggestion here is to work on a tablecloth or other surface that keeps you from losing parts. If a part skitters off into the distant part of your covered desk, at least you can reel it back in. This is a simple tip, but I’ve found it incredibly helpful for those frustrating situations when something slips from your hand.
13. Consider a work bench color that contrasts with your model kits
This is related to the other tip above. Work on a table or desk top surface that adds contrast to the parts you’re working on. If your kit has a dark colored material for parts, then you should work on a bright colored surface. Not only does it make it easier for you to see what you’re doing, but if something goes missing, it’ll be a lot easier for you to visually track it down.
14. Don’t work over a carpet
Boo! You’ve dropped a small part on the floor…and you say your floor is covered with a carpet. Yuck. My ideal hobby room is one that is has either a hardwood flooring (so you can hear something drop), or a concrete surface that is brightly colored.
A thick carpet will literally “eat up” dropped parts. I don’t know how many times this has happened to me when I worked at a desk in my old apartment. I probably spent a full week’s cumulative time over an entire year of modeling just looking for missing parts that I dropped on the carpeted floor.

15. For serious assembly, use a workshop apron
This is more of a hobby wishlist item for me. In fact, it’s #1 on my unique hobby gift list. A work shop apron is like the apron you wear when you’re cooking. It covers your normal everyday cloths, protecting you from spilled glue, paint, and other bad things for clothing.
And, the apron can hold your tools and other doodads as you move about your hobby space. If you drop a part, a workshop apron will likely catch it before it hits the floor and scatters off into the abyss. Absolutely consider using a workshop apron for more involved model making and assembly. It also looks geeky cool, imho.

16. Always wet sand for best results
When you sand anything, those tiny particles that come off parts clog the sand paper (or metal file). To prevent that from happening, keep your sand paper or file wet. I use a water spray bottle, or simply dip my working surface into a pot of clean water. This keeps your tools from clogging up, which increases working efficiency and overall pleasantness, and also produces a better sanding result, e.g., parts come out cleaner and more evenly smooth.
17. Consider an assortment of jeweler’s hand files
This tip hits on the idea that some tools are better for specific jobs. If you’re working with small miniature parts, then you’ll want tools that reflect that challenge. Don’t use huge files that are designed to shape and clean large parts or for big projects. Instead, for miniature or model assembly use finer tools for that task. I have a low-cost set of jeweler’s hand files that I often use for those hard-to-reach places I need to clean or smooth.
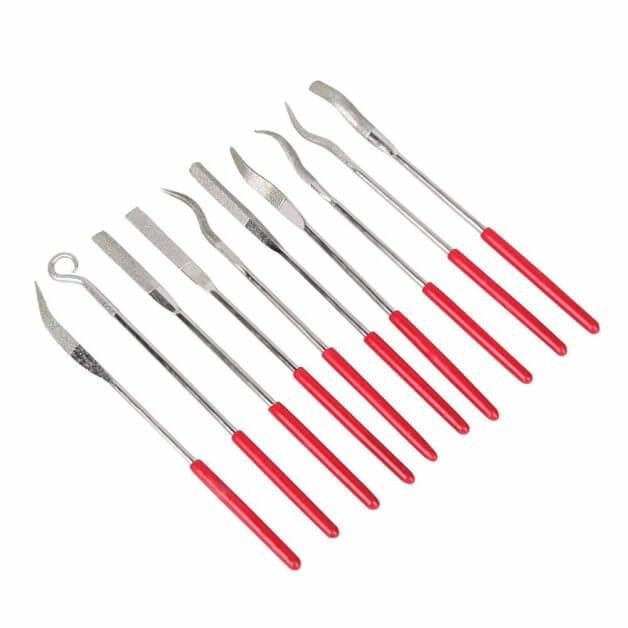
I have these small files close-by for when I need to scrape out the inside of a glue-joint. They are particularly useful for reshaping areas of metal miniature parts and sub-assemblies that doesn’t fit exactly right. Taking off a bit of material with a file like those above can make all the difference in making two parts come together, nicely.
18. A scratch brush is great for clean up
For 3D printed parts, especially those made with PLA, you often get these stringy-bits that hang off the sides of a model. The best way to remove these is either with heat (e.g., melt them off), or using a scratch brush (less than $8).
A scratch brush is kind of like a mini-Brillo pad that you might use to wash dishes. Or, maybe that wire brush you use to clean the outdoor BBQ or kitchen oven. I have a scratch brush kit that comes with different bristle materials (i.e., nylon, metal, etc.) with different abrasive properties. They are easy-to-use and, if correctly applied, will not damage your model.

19. Dry fit pieces before applying glue
Everyone should know this assembly tip. Before applying glue, make sure your two parts fit together properly. If they don’t, you can try and re-shape them before applying glue. If you want to dry fit multiple pieces together, you can use an assembly handle like the Citadel tool I review here, or this soldering/magnifier thing.
20. Super glue is the best universal glue
Super glue, or cyanoacrylate, is the best universal glue for assembling miniatures and models of any material (see why super glue is awesome). Super glue has a fit tricks up its sleeves that make it really, really useful. For one thing, it works really fast and you don’t need much for a strong bond.
On a clean, prepared surface, it’ll bond parts that aren’t even the same material. Mix super glue with a binding agent, like baby powder, and you have a super glue-paste that can fill gaps. Very useful. Quick pro tip: To remove super glue, use acetone (e.g., found in most nail polish removers), which will dissolve the glue bonds.
21. Two-part epoxy is the strongest adhesive for joining larger parts
For assembling larger parts, or those that you want to maintain in harsher environments, a two-part epoxy might be a better choice than super glue. See my favorite glues for particular jobs in my other article on glues. Glues are such a fascinating topic! My favorite epoxy adhesive is z-poxy, which comes in either a 5-, 15-, or 30-minute cure time version. Your call. How much time do you need to work with your adhesive? Either way, the final product is super strong.

22. Increase the strength of any adhesive by scoring the joining surfaces
The more surface area that is in contact with your glue and assembled parts, the stronger the bond will be. To increase the surface area of your bonded parts, score the joining surfaces. You can either use a knife, sandpaper, or a file. Just scratch deep enough that glue will adhere within the scratched up surfaces.
23. Plastic cement works only on styrene-based plastics
Plastic cement (also commonly referred to as “plastic glue”) is a substance that first dissolves the two plastic parts, that subsequently cures or solidifies into a single fused part. However, plastic cement is special in that it only works on plastics that it can dissolve.
This means the model or miniature kit you’re assembling must be made from a styrene-based plastic material. Be aware, however, that because plastic cement melts and dissolves most styrene based plastics, it’ll scar and abrade any plastic surface, instantly.If you wanted a smooth armor plate, for example, you better be sure not to have any plastic cement get on it.
24. For a stronger bond, pin model parts
For many model assemblies, you may want to reinforce the joint with a “pin”. Using a small drill or pin vise (I have this one, affordable), make a hole in each part. The hole should be aligned properly in the two parts. After applying glue on the two surface, insert a pin or wire (I often use an appropriately snipped off part of an office paperclip) into one of the holes. Then, carefully join the parts together with the pin inserting into the opposing part. Done!
Pinning parts is best done on weight-bearing sub-assemblies like legs and hip joints. Additionally, if two parts have small joining surface areas, glue won’t do a great job holding them together. In this case, a pin joint will be helpful.
25. Saliva is a super glue accelerant
There are so many uses for saliva. For super glue (e.g., cyanoacrylate), you can use spit to accelerate the curing bond. This is because super glue works best in the presence of moisture. When there isn’t enough ambient moisture in the air, super glue may be slow to cure. This can be frustrating.
You can buy accelerants like this, or simply use a bit of saliva straight from your mouth. Simply get some of that spit (not too much) on one half of a model part, glue on the other, and place them together. You’ll be surprised how quickly and effectively this works. Of course, you may make a mess. For this process, “less is more”.

26. Super glue has thick and thin versions
Depending on your application, a thin super glue may work better than a gel-thick version. I find super glue for most jobs works best when it is a tad-thin, but not so runny that it doesn’t “stay-put” on the surface when I move the part around. The glue needs to remain in place when I turn the part sideways when I’m putting parts together. A gel version of super glue is great for small parts with a smaller surface area to join the two parts.
27. Fill gaps
I wrote an entire article about gap fillers. A gap filler substance is any material that can securely bridge two separate parts. It does not need to be an adhesive, although a gap-filler with bonding properties is very useful in most applications.
For assembling models and miniatures, a gap filler is used to smooth out two surfaces that are joined, but not completely flush. For best results, you’ll want to fill in those “gaps” so your final model looks complete and professional.
Another reason to fill gaps is practical. A gap is an opening in your miniature or model joint that will allow the environment to enter. It is a vulnerable spot in your assembly that could be prone to containment and breakage.

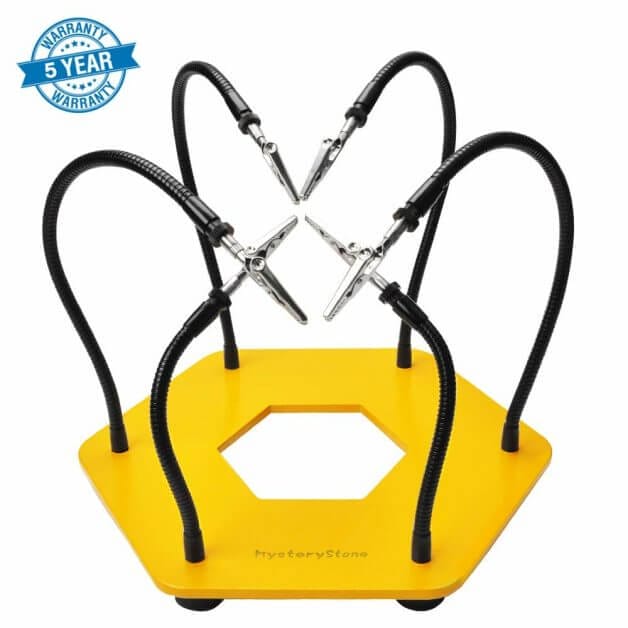
28. Use helping hands
Assembling models can often become challenging due to the sheer number of parts that need to come together. Some kits aren’t well-designed, and the entire process requires more than a single part to bond together at the same time, e.g., multi-keyed parts come to mind.
RELATED: 10 GREAT HELPING HAND TOOLS FOR ASSEMBLING AND PAINTING MINIATURES
You can either ask a friend, loved-one, a child, or your teeth (yes, I’ve done this) to help you. Or, you can get “helping hand tools” like the one below or the Citadel Assembly Handle, which I often use, too. For painting miniatures, you can use a painting handle to keep your fingers from touching a model with wet paint.
29. Follow written instruction
I hate assembling home furniture, because the instructions are usually horrendous. But, for the most part, model kits come with great instruction. And, if you’re lucky, the company you purchased the kit from has made a video posted on YouTube. Follow those instructions and every tip I’ve listed here will fall into place. Trust me. In the past, I’ve skipped ahead and glued everything together only to find a part left over. Uh, oh.
30. Be patient, have fun!
I love painting miniatures (see some my tips from years of running a painting service). For me, painting is more fun than assembling models. But, at the end of the day, I know that assembling miniatures well is necessary for achieving great results. It’s part of the hobby and seeing the results of a job well-done is rewarding. So, despite all the challenges in this hobby, my final piece of advice is to have fun.

Final Thoughts
I’m still learning the best practices for model assembly. I hope my tips give you some insight into how I approach assembly. From my perspective, the greatest part about the tabletop miniature hobby is experimentation and discovery. I don’t fall into routine easily.
Whether you’re a professional modeler, a casual hobbyist, or simply someone wondering about starting in the miniature and modeling hobby, you know that life offers many choices to doing the same thing. This list merely highlights principles that I think are useful for a broad range of assembling applications.
Maybe, you have better ways of doing things. Let me know with a comment below!
Happy modeling!

Tangible Day on YouTube (Miniatures and More!)
