Night time photography is a great way to create art when most photographers call it quits. Finding picturesque beauty by shooting photos at night time is a huge personal reward. You discover things that only your camera can “see”, as the limited light hinders your natural vision. The great part about nighttime photography is that the more your practice it, the more. your creative mind adjusts to seeing beauty in the dark. Night photography isn’t for the faint of heart, however, as you’ll encounter several challenges taking pictures at nighttime.
In this article, I share my experience and tips for amazing nighttime photography.
Here’s you’ll learn:
- Proper night photography settings on your camera
- How to take photos at night that aren’t “too dark”
- What subjects you should consider photographing when detailed pictures during the day may be impossible to capture in low light
- New night photography ideas
Keep reading to learn more about how to take photos at night, and my 11 tips for better night photography.
READ MORE: TOO DARK FOR ART? A GUIDE TO UNDERSTANDING CRI IN ARTIFICIAL LIGHTING
Why you should practice night photography
Shooting photos at night is discovery. Nighttime photography takes what is mundane and everyday, and evokes a magical aura, as low ambient light takes center stage.
Learning how your camera works and operating those buttons is like a dance.
Ever see a photographer in the evening standing by a tripod, staring intently out into blackness? If you have, then notice how their fingers play across their camera like a piano.
Indeed, you as a nighttime photographer are a magician, evoking something from nothing. Your wand is your camera, and your familiar is the knowledge you gained from years of experience that whispers to you.
Alright, let’s get this straight. If you’re looking to shoot photos at night, you’re trying to do something very modern. Night photography is an artform that is fairly new in the context of history.
Your camera is a modern marvel and you’re only able to create this nighttime art because of it. Indeed, night photography is any photography you do at night. Take pictures at night and you’re a night photographer.
Amazingly, simple.
How night photography helps you become a better artist
The techniques involved in night photography are incredibly useful for all types of photography. If you can photograph images at night, then you will have a solid set of skills that can be applied to any genre of photography.
The challenges of low light photography include the requirement of stabilizing your camera (and/or your subject). If you’re doing a night time photoshoot with a human subject, you’ll grasp this immediately. You either add more external light, e.g., a flash or constant light, or you have to stop motion so you can keep your camera’s shutter open longer.
Shooting at night is often the most difficult of the photographic pursuits because it requires mastery over your camera.
You’ll need a solid understanding of how shutter speed, aperture, and ISO interact.
There are a lot of ways to figure out how to take night pictures without understanding all your camera settings, of course. Smart phones come with automatic night photography settings that do a fairly decent job in “dim light”. But, to really push yourself you’ll want to be able to control what your camera does.
Night photography involves control over your environment.
In general, if you learn how to take pictures at night, you’ll become a much better photographer overall.
GAS: A temptation of night photography
There’s the figurative sense of danger in that you’ll become addicted to night photography (myself included). The buzz you get from photographing that amazing night time shot that took hours to setup is indescribably awesome. And, for many, the danger also lies in the temptation to get better and better equipment in a phenomenon known as “G.A.S.” (or gear acquisition syndrome).
The danger of night photography is the potency of GAS. The pleasurable thrill is much stronger, and thus, the withdrawal and fear of continued high expectations drives you to spend down your limited household budget.

Fear is GEAR?
Well, if you missed it, GAS stands for gear acquisition syndrome.
G.A.S. starts with a single photo. In night photography, it is the first photo you take that you fell in love with. This special photo made you feel special, too. And, so in your self-satisfied and smug self, you walked on a pleasure cloud.
You skipped home and shared your wonderful art with everyone.
Then, after an hour or two (or longer for the genetically resilient), you experienced the symptoms of withdrawal. Yes, there is a post-photographic downer all avid photographers experience. It is the feeling that they missed something.
This is the fear.
That the special photo could have been better.
But, it could have only been a better photo if you had the “right” equipment. Hence, you whip out the credit card (because what photographer buys equipment with cash, anyway?). Online shopping you go; so easy, too easy.
And, the cycle shifts into higher gear, pun intended. Game over.
Well, the solution to avoiding G.A.S. is to stop reading about photography, thinking about getting better photos, and instead going out there at nighttime and making pictures (even if they suck).
Avoid G.A.S. by staying in the “take photos” phase as long as possible! Go make great photos by doing it!
Location: A safety warning about night photography
In all seriousness, learning how to take photos at night requires a good head on your shoulders.
Safety first.
You should know where you setup your camera. For example, don’t set yourself up to a cliff’s edge in the dark, or near a pitch-black roadway where a single step back puts you into incoming traffic.
Where you setup your camera is a key part of learning how to do night photography.
Again, ask yourself: Are you in a safe place to setup your camera equipment?
In some urban night photographic spots, it is possible to become isolated, standing in a single place for a long time alone. This raises all kinds of safety issues.
If possible, I like to travel to new places that may be off the beaten path. This also means I’m likely putting myself in a vulnerable position.
With my face in the camera eyepiece, back to my environment, who knows what’s coming up behind me.
As such, I would recommend, if possible, that if you’re not comfortable with your location for shooting nighttime photography, you go with a friend. Partner up.
In fact, night photography is best done with a friend or small group. You’re often waiting for your camera to do its work (slow shutter, etc), and the social company is welcome.
What camera do I need for night photography?
The statement holds true for any photography.
Whatever camera system you have with is going to be the best because you’re going to use it!
But, if you’re looking for the absolute best camera for night photography that would likely be a full-frame sensor camera.
In general, for camera gear, you do generally get what you pay for. So, I leave it to you to decide how much money you’re willing to spend.
As for myself, I stayed within a reasonable budget and started with a sub-one thousand dollar full-frame camera body.
(Yes, expect to pay around 1000 for a semi-professional full-frame camera)
MORE: BEST LIGHT BOXES FOR PHOTOGRAPHING MINIATURES
Top 11 tips and tricks for better nighttime photography
1. Use a Tripod (or Other Stable Platform)
For any night photography, you enemy is the lack of light. All cameras need light.
Every image your eyes see requires light.
The tripod I used for almost every photo on this page is an affordable aluminum tripod that folds up nicely for travel.
Light is right.

A tripod allows you to slow the shutter on a camera.
The slower your shutter speed, the more light enters your camera. At night, more light is better!

Of course, when you slow down your shutter, your camera is likely to also capture any shaking or vibration.
Placing your camera on a tripod or other stable surface, allows you do keep the shutter slow and prevents motion blur.

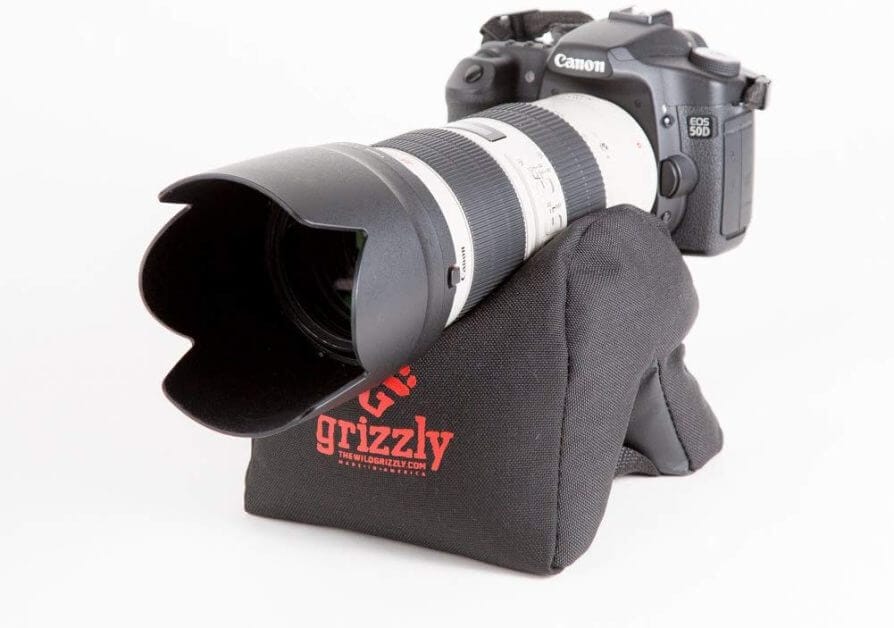
In some cases, I’ll often find a flat surface and just put my camera down with a hand over it to prevent it from tipping over.
I know some photographers who use a small bean bag or pillow.
Stabilizing your camera is the most important tip and trick for taking photos at night or in dark places.
Light needs to enter your camera in sufficient quantity for the sensor to capture good information.
Get a good tripod or other device to stabilize your camera. You won’t regret it.
2. Open Your Aperture
I don’t go into great detail about how to operate a camera manually here. There are TONS of websites, including YouTube that do a great job for this.
Here’s my favorite video about using manual mode on cameras (about 7 minutes).
When it comes to night photography, it is often useful to open the aperture to let in more light.
On a camera, this involves lowering your f-stop value.
A smaller f-stop means a larger aperture (yes, it’s opposite).
Most budget lenses have f-stops between f4-f22. More expensive lenses may allow you to go to a smaller f-stop, such as f2.8 or f1.8.
Some of the most expensive lenses, such as the Leica Noctilux-M 50mm, have an f-stop of 0.95!
Of course, that lens is really, really expensive!
All this means is that the more money you spend on lenses, the more light that lens will allow you to capture.
Money is light.
Maybe.

What aperture should I use at night?
If you’re shooting at a slower shutter speed, you can keep your aperture closed-down (larger f-stop like f4 to f11). At faster shutter speeds, you’ll need to open your aperture up (smaller f-stop numbers, like f2.8 or smaller). Night photography is often difficult if you have equipment that prevents you from opening up your lens aperture.
Open your aperture as far as it will go (smallest f-stop on your setup) to allow more light into your camera.
This also has the side-effect of creating some interesting artistic effects, too. A larger aperture will give you a more shallow depth-of-field (DOF). In other words, you’ll blur a lot more of your background with a larger aperture.
In night photography, you can use this to your advantage. You can make some really creative looking images with shallow DOF.
3. Take A Lot of Test Shots: Experiment!
The beauty of photography is discovering new ways to create images.
Experimenting with how you take a photograph is not only fun, but a key part of learning how to make unique images.

When I first began my photography journey, I’d take photos of everything. Silly things, like a napkin at dinner, or a flower under a bridge (the stone kind that let’s you cross streams of water).
In night photography, to learn how to make compelling images in the dark, you have to figure out what works.
There is no secret formula!
If I had a secret formula for great photos, even at a night or when the light sucks (usually indoors), I’d be… well, who knows?!
It’s all fun.

For example, for a while, I wanted to learn how to “see” better composition. I wanted to learn how to compose better photographs.
For a while, I thought taking more black and white photographs would help me.
RELATED: STRUCTURE IN PHOTOGRAPHY
Objects exist in 3D space, but in a photograph, they need work together in a 2D frame.
The art is in “seeing” how different elements in an image work together.
For night photography, experimenting by taking a lot of photos is a great way to discover the best settings on your camera. In manual mode, the best settings will depend on what you want to do.
Do you want to have streaks of light of objects moving, e.g., cars, people? Or do you want to have that shallow artistic depth-of-field, where you background is blurred out?
Those a some pretty bokeh balls.
Ultimately, you’ll never run out of film.
Best tip for learning night photography: Keeping taking shots until you’re happy with what you are capturing.
In fact, take those images home and inspect them more closely, you might find with a few tweaks, that photo you took is a true gem.
4. Check Your Composition
Composition in photography is probably the most important aspect of the art.
Composition governs how your subject of interest is placed within the frame and how it “interacts” with other elements in the image.
For a viewer, good composition draws the attention through the image space, into the frame, and around it.
In night photography, composition is just as important as any other kind of photography.
Darkness shrouds everything, so the challenge for you is to “see” where things are in that space in front of you with less light.
In learning photography, it took me a long time to figure how what I was really capturing. For example, leaf on the ground is not simply a leaf laying on the sidewalk.
A dead leaf casts a shadow, and the shadow touches a crack in the concrete, which draws the viewer’s attention to the side of the frame.

By shifting your lens to the side and angling the view, you can make subtle changes to how the subject fits within the frame and with other elements.
As I mentioned above, challenge yourself and experiment.

How do you see composition in night photography?
- Define your subject – Look for big shapes, then small shapes. These could be shadows or bits of light. Where does one shape end, and another start?
- Identify structure – See how the parts within the visual space of your image come together. Even if it is dark, there’s a reason you’re taking this photo. What does this bit of structure do in the context of the other parts? Look for leading lines that tell the viewer to “look along here” or “go there”.
- Shadow play – Keep an eye on where light and shadows fall. Even if they may not be your main subject, they play a huge part in how the overall image comes together. Importantly, in night photography, light tends to do things in unpredictable ways, especially with long exposures.

“Practice, practice, practice.” This is the best tip for learning how to shoot better night photography. Repetition. Get out there in the dark with your tripod and camera and find interesting scenes lit by the night sky or ambient lights of buildings.
5. Look for Reflections in Water
My favorite images at night include some body of water.
Water during the day is kind of neat. Under certain bright conditions, water reflects its surroundings with a characterful style.
But, at night, water is magic.
Water is never still. Always moving, the waves and ripples in water often distort reflections. Unless you’re using a neutral density filter, those glaring reflections aren’t pretty unless you’re careful.
At night, with your camera on a stable tripod or surface, you can extend the shutter opening allowing light to leak onto your camera sensor.
Amazing things happen with water and long exposures.

The surrounding light and colors mix and blend in unexpected and surprising ways.
Beautiful! Color blending into the reflective surface of water, smooths out with time.
This mixing of the ambient light on the surface of reflective water, smoothed out by a long-exposure is sublime.
You’ve taken a photograph of your first “water color painting”.

This is a beauty of night photography: being able to see and share what isn’t really there without adding a bit of time (i.e., the long exposure).
6. Look for Bright Movement
In night photography, a trick I learned from a professional photographer is to find “movement”.
Look for movement of objects that emit light.
It took a while for me to understand this. But, after a while I think I get the meaning.
The long exposure required for night photography creates an opportunity for adding “dynamism” to an image.

Dynamism is an aspect of photography that many people ignore. The sense that things are happening. There is a progression of events through the image frame.
Adding dynamism is a night photography trick that you achieve by searching for ways to capture movement.


As mentioned in the tips and tricks above, you’ll want to stabilize your camera and learn to find the best composition. The best night photograph images combine movement with good composition.
I would also go so far as to say that color is not at crucial in such images.

The pro tip here is to maintain contrast in your night photography.
Is the moving object bright against a dark background? Can you tell where your subject edges or line of movement begins and ends? You should.

Photo taken at the “Cloud Gate” sculpture in Millenium Park in Chicago.
The exciting thing with night photography is that you never truly know what you’ll capture until you’ve done it. Night photography is always a hidden surprise.
The tips I provide here are merely a way for you to get started for yourself to find what works and what doesn’t.
Finding how moving subjects work with long exposure in a bright setting is challenging enough. You get motion blur. We’ve seen that; and often humorous enough, we see it when we shake our cameras or don’t hold things steady.

Keep your eyes peeled for bright moving subjects.
Anticipate what light might look like if drew a path through your frame. Compose for time travel.
7. Don’t Use a Tripod
Wait, what?
Yes, I know I contradicted tip #1.
But, sometimes the best trick to employ in night photography is to “just go for it!”
Use your instincts.
Don’t get stuck to a single spot. A tripod is a cumbersome apparatus compared to your hands and body moving about a space.

Unhook your camera and move about the darkened night scene. Look for lighting that may add some drama to your images.
Sure, some objects like people may be darkened shapes without detail. But, that’s okay. Let things go into shadow.
Play with shadow and light.
Embrace the dark.
What is the best ISO setting for night photography?
Without a tripod, you’ll probably want to increase your ISO (or sensitivity of the camera’s sensor). The best iso for night photography is any iso that gives you a “clean” image without too much noise or grain.
The best iso for night photos is therefore the lowest iso setting you feel comfortable using without getting the “too many pixels” effect.
For a typical setup, you should try and keep your ISO under 1600 (crop sensor) or 3200 (full frame camera).

In some cases, you may be able to use some of that grain or noise to your advantage. In my example above, the snowfall is part of my photo.
Although I used a high ISO setting, which added a lot of grainy noise, it is hidden inside the the snow.
When you photograph at night or in dim light without a tripod, increasing your ISO is a must. Without stabilization, you need to speed up your shutter to prevent camera shake.
The higher ISO adds versatility for night photography. If you compose your subjects within the frame, play with contrast (light and shadow), you can still get stunning images despite the added grain noise.
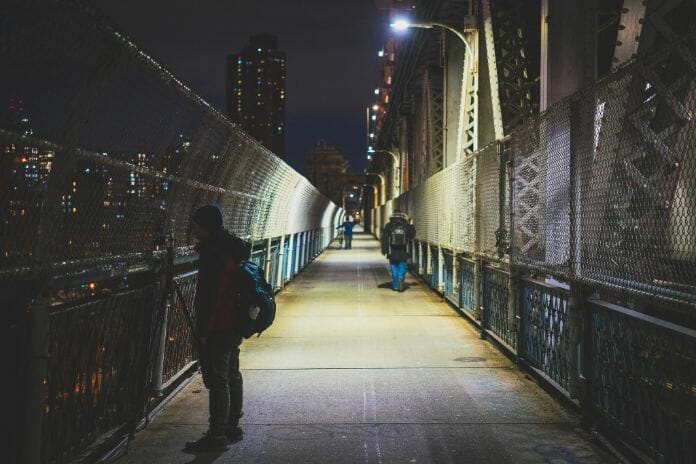
8. Remove People from Your Night Scene
This is a HUGE advantage of capturing images at night.
When the light goes down, you can stabilize your tripod and slow your shutter speed.
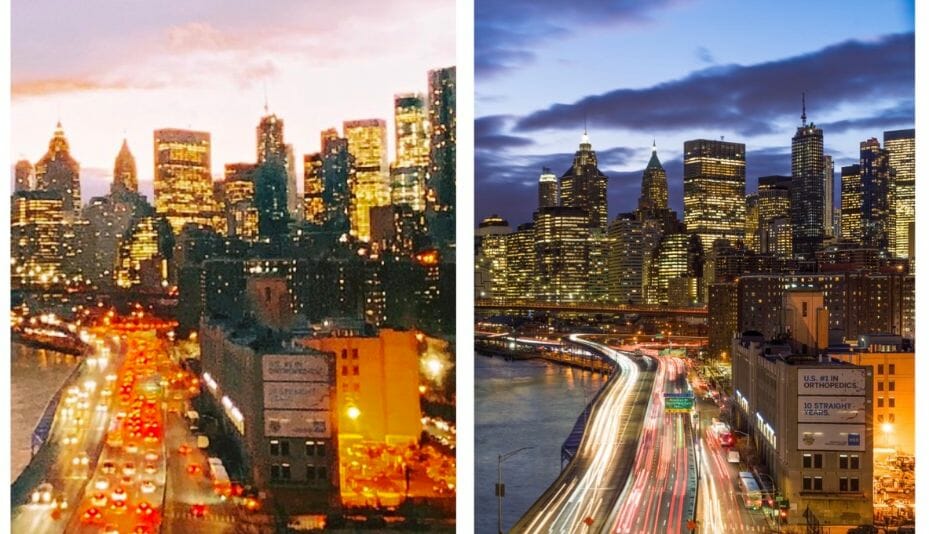
In fact, if you slow your shutter speed enough, you can often blur out completely anything that is moving.

This includes people walking around a busy street. People mingling about a location will completely vanish from your image if you slow your shutter down enough.
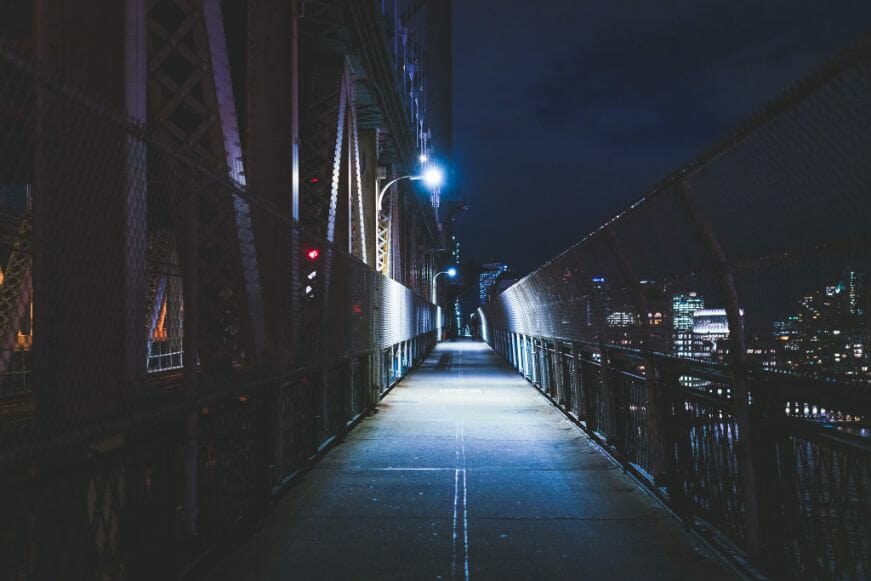
It does take some patience to perform this night photography trick. Slowing your shutter requires waiting around. Sometimes, I’ve let my shutter stay open for almost a full minute or two!

The results, however, if you work at it are awesome.
Taking photos of landmarks at night, even at busy tourist spots becomes more interesting. You have a new tool in your toolbox that happens to work best a night!
If you want to perform the same effect during the day, you’ll need to use a neutral density filter. A neutral density filter (or ND filter) are like sunglasses for your camera lens.
An ND filter reduces the light entering your lens enough to let you slow your shutter down sufficiently to add things like motion blur.
For removing people from day light scenes, I highly recommend an 11-13 stop ND filters. Make sure to get the right size for your camera lens (they are usually threaded onto the front of the lens).
The great thing about night photography is that you can get away without neutral density filters.
Stabilize your camera and open that shutter for a long time. The longer the better!
Often, you get some ghosting of people who aren’t moving much, but with some patience you can essentially keep your scene clear of distracting tourists or other passerby.
9. Capture with RAW files
Most dedicated camera systems allow you to capture RAW image files.
RAW files are different from the common JPEG files that any computer can display.
These files are essentially the film negatives from the analog era and require some work to convert to commonly viewed image formats.
RAW image files contain all the image information that your sensor captured. Whereas JPEG files are processed using onboard computing inside your camera (or smartphone), RAW files are simply “image data” in its purest form.

The reason I suggest you shoot in RAW image format is because RAW files give you room to adjust your photos later.
Sure, you can make edits to JPEG images. In fact, most casual photo editing software can only make edits on JPEGs.
But, if you’re serious about getting the most out of the light you captured, you should know that RAW image files provide you with so much more…power.
Of course, shooting in RAW image format requires more post-processing work. But, there are huge number of ways to edit your RAW files and convert them into JPEGs (which you can then share).
I use Adobe Lightroom to edit my RAW files. There are alternative photo editing packages, but Lightroom has been around a long time and there are a ton of tutorials online.
In either case, if you do a simple online search for “why you should shoot RAW instead of JPEG”, you’ll get great information.
In night photography, RAW image files allow me to push color and contrast beyond what a JPEG would allow me to do.
10. Use High-Dynamic Range (HDR) Photo Capture Technique
In some cameras, you can automatically capture a set of images with different brightness values. These separate images are then combined into a single image with a greater range of color and brightness value.
This combined image is a high-dynamic range (HDR) photo.

You can use this process night photography to produce unique images that appear surreal, almost fantastical in look.
You can, of course, over-do HDR to the point of the images looking “fake”.

And, it doesn’t bother me. I enjoy a pretty image, even if it doesn’t represent reality.
HDR is fun, especially with night time photos.

You can either perform the process in your camera (most smartphone cameras use HDR automatically in low light situations), or take your series of images into a digital darkroom (e.g., Lightroom software) to create the final HDR image.
11. Have Fun in the Dark
Photography is fun, because you are discovering new ways to see your world.
Night photography is even more exciting, because you are seeing your world that you couldn’t otherwise without technological help.
Have fun.
Making images without good natural ambient light is pretty hard. It takes work and trial and error.
I remember the first photo I took using night photography skills I learned. The image was horrible! But, I was smitten.
The process of figuring out what I needed to fix; the camera, the tripod, the scene’s composition, became an enjoyable and addictive experience.
I know I could spend HOURS outside taking photos of a night time scene.
I’ve done it many times.
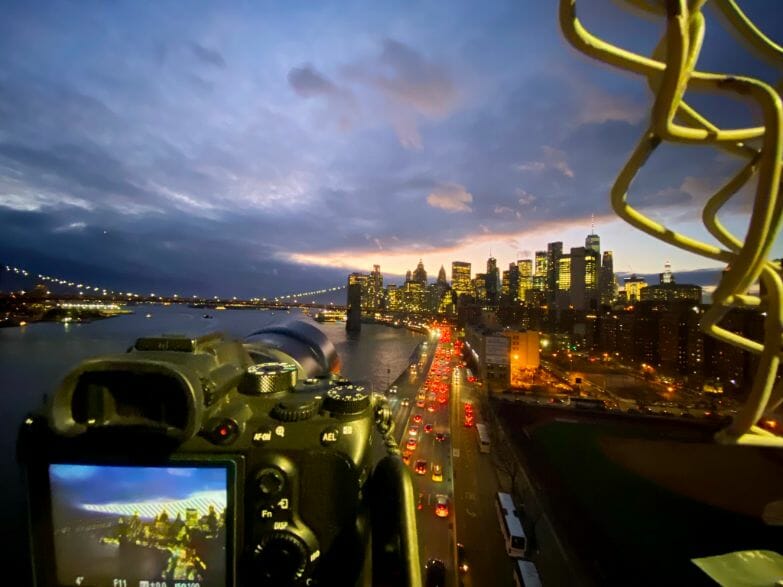
I’ve watched a sunset gleefully knowing that the world around me would soon come alive in the darkness.
Practice, practice, and practice.
Ultimately, the best tip and trick for night photography is to enjoy the process.

Final Thoughts
Photography is a hobby for everyone. It takes time and practice. The great thing about photography is its easy access. Nearly everyone carries a camera now.
For photography, the best camera is the one you have with you.
I’m still learning a lot about how to make better images. For me, photography gives me an excuse to get outside, literally. It also compels me to explore new places even within my local home town.
There’s always a new way of looking at the same old things.
And, when the lights go out, you have to use your imagination a tad bit more…
Tangible Day on YouTube (Miniatures and More!)


Tangible Day on YouTube (Miniatures and More!)
Wow! As usual, you have worked hard on a post that is full of great info. I tried night photography once and it was a complete bust. Your article has spurred me on to give it another try. Thanks!
Forgot to add that your images are awesome. Making the people disappear is a nifty trick too. Thanks.
Awesome 🙂 thank you for reading. I’m glad you found this helpful! It was fun to write as well as collect those photos.
Pingback: Black and White Photography: 40 Images with my 40mm Lens - Tangible Day
Much obliged for the tips and answers for night photography. It is one of my preferred subjects. I as of late bought my first DSLR: Nikon D3. I am a self-thought picture taker, starting with dark and white, and have consistently taken appropriately uncovered photographs. Being new to computerized photography, I didn’t have any issues catching night photographs. You are right about utilizing the recipe. That is the means by which I start with all my night shots. What’s more, more critically, similar to you stated, set the camera in manual mode.
Excellent. You’re welcome. I’m glad this article on night photography was helpful for you. It’s a lot fun! Thank you!
Pingback: How to take Milky Way Photos and other Events in the Sky | Veronicajune Photography